


How to Install a DIY Paver Patio With Stone or Brick
A patio can be a relaxing oasis in your front or back yard. Adding attractive patio furniture and plants adds curb appeal while making it a comfortable place to unwind with friends and family. One of the most popular and elegant patio designs is a paver patio -- a pattern of squares (made from concrete, stone, brick, or other materials) that form an eye-catching design.
What to Consider Before Building a Paver Patio
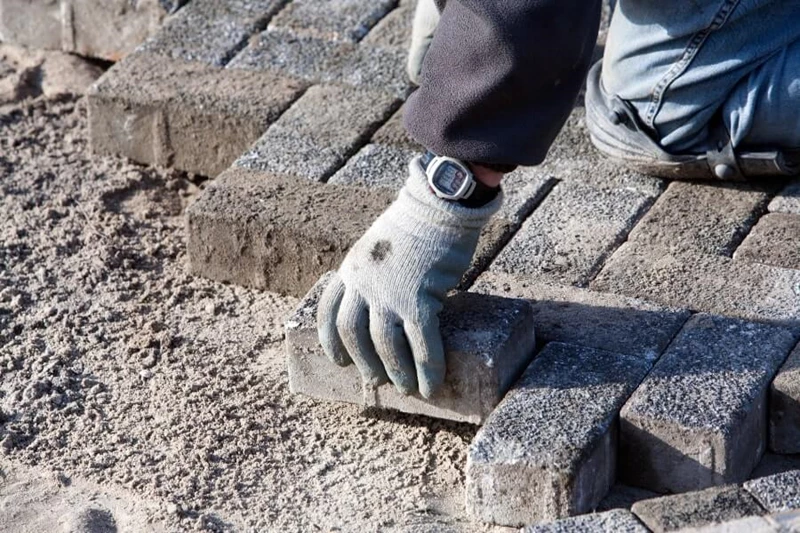
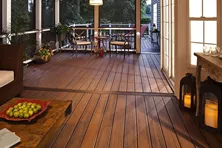
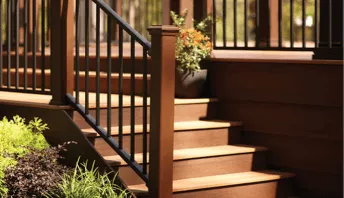
![]() Save
Save
Photo Credit: @nfdecorhome
If you’re planning on installing a paver patio of your own, you must consider how complicated it is to build the patio, how long your project may take, and the cost.
The average cost of building a paver patio ranges between $2,400 and $7,000, with a national average of $3,400. The cost of your patio may depend on the type of pavers you choose, so be mindful of the material cost when budgeting for your project. Typically, pavers cost between $8 and $25 per square foot to install, but high-end varieties of stone can cost up to $50.
Building a paver patio may take 2-3 weeks if you’re an experienced DIYer and have capable help. If you’re inexperienced, the project could take up to a month. Building a patio with pavers isn’t difficult, but it does require a lot of time and patience to do correctly.
If you plan to install a concrete patio below your stair landing, you need to adjust your stair design to ensure it lands properly on your new patio once it has been completed.
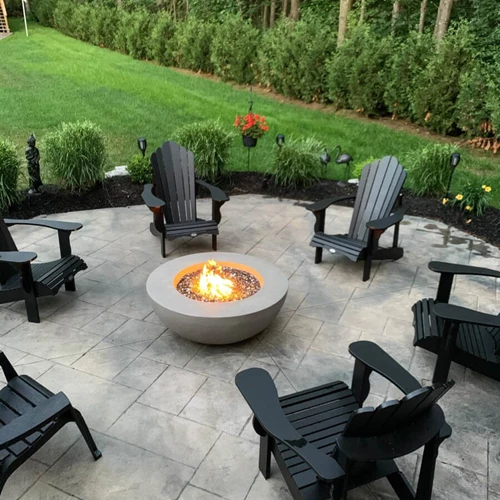
Pros & Cons of a Brick or Stone Paver Patio
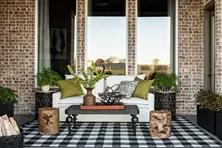
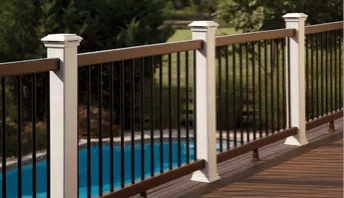
![]() Save
Save
Photo Credit: @nfdecorhome
There are many paver patio benefits, but there are potential drawbacks too. Though durable, they are not always the cheapest option and installation can be challenging. Before you get started on your new patio, consider these paver patio pros and cons to help you decide whether it is the right choice.
Pros:
- Weather Resistant - Pavers are made with concrete, brick, or stone. Compared with other materials like wood, they are incredibly durable and weather-resistant.
- Less Prone to Cracking - Pavers are also less prone to cracking than large areas of poured concrete or bigger patio slabs. These surfaces can crack due to temperature fluctuations, which cause them to expand and contract with temperature fluctuations. Small pavers with lots of interlocking joints create a more forgiving surface that doesn’t have this problem.
- Low Maintenance - There is no need to treat the surface of pavers to prevent weathering or damage. Dedicated cleaning products make it quick and easy to remove stains too. When repairs do need to be made, single pavers can be taken out and replaced without the need to re-do the entire surface.
Cons:
- Installation Time - Patio slabs or poured concrete patios are much quicker to install. It takes an average of 2-3 weeks to install pavers, while a concrete patio can be poured in one day. That said, concrete takes 1-3 days to cure before you can walk on it.
- Upfront Costs - In most cases, the initial cost of a paver patio is more than a concrete patio, especially if you are using high-end stone. There are also additional installation materials like gravel, landscape fabric, bedding sand, edging, and spikes to factor in. You should also consider the long-term maintenance costs. Concrete is relatively low maintenance until it needs to be replaced. Pavers, on the other hand, need to have the sand between them replaced on a regular basis. This incurs an additional cost.
- Weeds - The sand in the joints between the pavers washes out over time. This leaves space for weeds to grow through, and if not managed properly, they can quickly take over. You can prevent this by using specially formulated polymer sand, which blocks most of the weeds, but this comes at an additional cost.
You can find more details about the pros and cons of paver patios in this article.
Paver Patio Alternatives
There are several paver patio alternatives to consider, each with pros and cons. Poured concrete is a more affordable option that is still very weather-resistant. It’s also relatively easy to install as the concrete can be poured in a few hours. However, it is not the best choice if you live in a changeable climate. The freeze-thaw cycles during the winter can cause the concrete to crack.
Patio slabs offer similar benefits to pavers, but they are larger. They are more prone to cracking than small pavers but still easier to maintain and repair than poured concrete. However, patio slabs are not very DIY friendly because the concrete hauling, set up, and drying time are difficult if you don’t have prior experience pouring concrete.
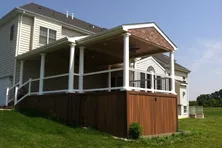
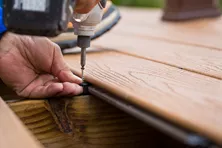
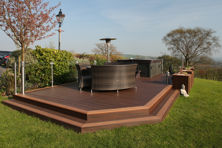
Alternatively, you could install wooden decking. Although natural wood decking requires more maintenance to prevent it from rotting, many people prefer the aesthetic, and it’s cheaper and easier to install. Using composite decking, made from a combination of wood fibers and recycled plastics, can increase the durability of the decking and reduce maintenance. Read our guide to the best deck materials for more information.
Tools Needed to Install A DIY Paver Patio
The tools you’ll need to lay a paver patio include:
- Rubber mallet
- Gloves
- Level
- Mason’s string
- Hammer
- Broom
- Rake
- Tape measure
- Spade
- Wheelbarrow
- Sledgehammer
- Shovel
- Chalk line
- Tamper
- Masonry saw or electric tile cutting saw
- Eye protection and ear protection
Materials Needed to Build a Paver Patio
Materials you’ll need to build a patio include:
- Wooden Stakes
- Gravel
- Landscape fabric
- Sand
- Stone
- Bricks
- Edging Material
Steps for Building a Patio & Installing Pavers
Before you build your patio, it’s important to measure your space and find out if you need a permit to build a brick or stone paver patio. While there are some differences between laying brick or stone, the overall steps are the same, and it starts with creating a design and a good foundation.
You may also want to consider options such as deck stairs that land on a concrete patio or composite decking for a patio.
Step 1: Design Your Patio Layout
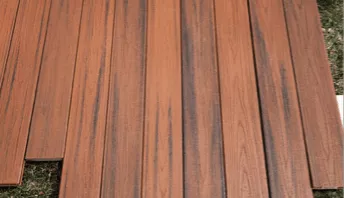
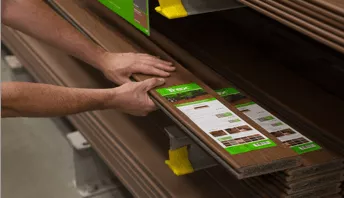
What type of patio do you want to build? Do you want to build it with brick or stone pavers? Stone pavers come in a variety of materials, ranging from limestone to cobblestone to flagstone to concrete.
The term “paver” refers to the way the material is cut -- which is flat and thin. These stones are designed for patios and walkways. There are dozens of options that vary in cost and size, so it makes sense to visit a stone supplier to get an idea of the type of paver you want.
Once you have an idea of the aesthetic, it’s time to formally design your new patio’s layout. You can sketch out your DIY patio design or look online to see if there is a design you’d like to copy for your own patio.
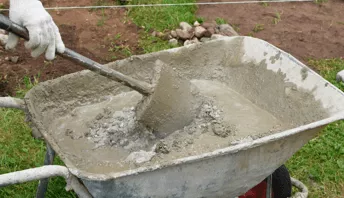
Step 2: Gathering Materials
In addition to pavers, you’ll also need sand, gravel, and landscape fabric to go underneath the pavers and establish the foundation for your patio.
Proper preparation of the ground with landscape fabric keeps out weeds. Layers of sand and gravel create a foundation for drainage. Together, these materials create a stable and long-lasting base for your patio.
The staff at your local home supply store can help you decide on the right amount of materials for the size of your patio and arrange for delivery to your home. Be sure to take accurate measurements of the space and photos of the type of design you’re planning.
For the purpose of this article, we’ll discuss concrete pavers because they’re easier to work with especially if it’s your first time building a DIY patio with pavers.
Step 3: Define The Space
Beyond putting thought into an attractive design for your patio and observing how the light will hit it at several times throughout the day, you will want to confirm that the area where you plan to build your patio is actually viable to build on.
Choose an area with good drainage and contact your local utility company to make sure there are no pipes, cables, or wires underground that could be damaged when you start digging. Once you’re certain it’s safe to proceed, outline the area where you want your patio with a measuring tape, wooden stakes, and mason’s string. You can use your trowel to dig the space by hand and place the stakes.
Step 4: Map Out Your Materials
Now that you have an idea of the size of your planned patio, you can better determine the amount of building materials you’ll need. You’ll be dealing with heavy materials, so enlist some help building your paver patio if you can.
Step 5: Establish the Slope
Proper drainage will help your new patio last a long time. Assess the terrain where you want to build your patio and establish the drainage path for rainwater runoff. Place stakes in the ground to show the direction and tie strings to them. Check that they’re level.
Continue marking 10 feet along the planned slope and pull the string taut. This will be your guide to dig an inch lower after every 10 ft. interval for water runoff.
Step 6: Establish Your Patio Depth and Foundation
Measure your paving stones for your patio height. Then, add another 6 inches for your foundation, depending on your soil. Wet and low-lying areas require a thicker sand and gravel base than well-drained soil. However, it’s common to dig 6 - 10 inches to lay your foundation. If you’re not sure about the soil in your yard, check with a soil engineer.
Step 7: Excavation
To build your brick or stone paver patio, you’ll need to move a lot of dirt. The minimum depth is 6 inches. You can do this by hand or hire an excavator.
Step 8: Compact the Soil
Check with your local home supply store for a “tamper,” a tool with a flat bottom that packs or “tamps” down soil or dirt. A tamper will help you establish a smooth foundation by compacting the ground after you’ve removed dirt and soil. Once your ground is level, you’re ready for the next step.
Step 9: Lay the Gravel and Landscape Fabric
Landscape fabric keeps your patio weed-free and prevents weeds from springing up between any spaces in your brick or stone pavers design. It also keeps the pavers in place as part of your sand and gravel foundation. Unroll a generous amount of fabric, extending 6 inches or more beyond your patio and use wooden stakes to hold it in place. Later, you’ll trim the excess.
Next, fill the area with 2 inches of gravel to hold down your landscaping fabric.
Step 10: Smooth the Gravel
Use a plate compactor to tamp down the first layer of gravel. Then, spread the second layer and tamp it down, too. Wet the gravel, starting in the center, then work your way out and cover the entire area. Next, you’ll add the sand.
Step 11: Lay the Edging and Screed
Frame the patio with lightweight, durable aluminum edging. Use a tape measure and level to coordinate the edging so it’s even before nailing it into place.
Lay ¾ in. iron pipes under the string. You want them to protrude above the gravel ⅜ in. Then, pour your screed onto the area in between the pipes. Next, you’ll drag a 2 x4 across the pipes to level the sand. Then, remove the pipes and fill the trenches with sand. This helps the pavers stay flush.
Step 12: Lay the Border
Measure a few of your stones or bricks to determine their average thickness. That way, you’ll know how tall your patio will be. Then, stretch strings across the patio to indicate the height. You can tie them to the wooden stakes. Remember to allow for the brick thickness plus an additional inch for the sand foundation. Shimmy a paver into the sand around the perimeter. Then, add another paver and another. If needed, add more sand as you work. You want your border stones to be held in place by the sand.
Step 13: Level the Stones
Once you’ve installed pavers around the edge of your patio, measure them with a level to see if they’re even. If they’re uneven, gently tamp them into place.
Step 14: Snap the Baseline
Draw chalk lines in the sand to indicate the design of your pavers. This will give you an outline to follow as you install your brick or stone pavers.
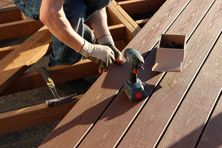
Step 15: How to Install Concrete Pavers
Start at the baseline and lay a row of pavers. Align the first paver with the next and continue making sure you lay them tightly together. Keep going until your patio is complete.
Step 16: Cut the Pavers
Your pavers may not fit at the edges and that’s ok. Use a marker to draw a line where they’ll need cutting. Then, use a masonry saw to cut the bricks where you marked them. You can rent a masonry saw or electric tile cutting saw. Use protective eyewear, gloves, and ear protection. Once your pavers are cut, you can chip the edges with a hammer to keep with the natural feel.
Step 17: Make it Sturdy
Fold the excess landscape fabric inwards to create a perimeter around the edge of the patio. Then, pack dirt around the edges to hold everything in place.
Step 18: Tamp it Down
Use the compactor again to even the bricks and embed them firmly in the sand. If you have thin pavers, skip this step as it may break them. Otherwise, keep the compactor moving evenly over the top of your patio.
Step 19: Pour (More) Sand
Add sand between the bricks. Dump more sand on top of your new DIY patio and sweep the sand into the areas between the pavers. Keep tamping, leveling, and adding sand until the areas between the pavers are full. This is an important step and the sand will essentially serve as a “glue” that holds your pavers in place.
Step 20: Seal Your Patio
A water-based sealer will help protect your patio. It hardens the sand so it stays in place and doesn’t wash away when it rains.
Step 21: Choose Patio Furnishings
Couches, chairs, coffee tables, and more -- there are almost endless types of patio furniture made with outdoor use in mind. Think about what would create the most relaxing and enjoyable outdoor environment for your patio. The right furniture sets the tone for your patio: Do you want a casual wicker look or do you want a hardwood like teak? Consider what works with your home and budget, as well as your tastes.
Ready to take your new patio to the next level? Check out Trex Furniture for unique pieces to make your backyard an oasis.
Step 22: Landscaping
Like patio furniture, your landscaping and decorating ideas will affect its appearance. Depending on your needs and budget, you may opt for potted plants or add walkways and shrubbery.
Learn More about Paver Patios vs. Decks
- Decks vs Patios: Cost, Pros, Cons, & Comparisons
- How to Cut Concrete & Pavers
- Best Pool Decking Options and Materials
Discover the Pros & Cons
Find out more details about the pros and cons of paver patios.
What is the Average Cost to Build a Front Porch?
The average cost to build a front porch depends on the type of porch and materials you use. Discover the costs of building a front porch at Decks.com.
7 Tips to Keep Bugs Away From Your Patio
Don’t let mosquitoes, flies or ants stop you from enjoying your patio. Learn the best way to keep bugs away so you can get back to relaxing at Decks.com.
How To Build A Roof Cricket or Saddle
Building and framing a shed roof is not as challenging as you might think. Discover the step-by-step process for how to build a shed roof at Decks.com.
How to Install Decking Over Existing Concrete Slab, Patio, or Porch
Discover the best techniques to build a deck over concrete, ensuring proper drainage and stability, while creating a beautiful outdoor space.

What to Consider When Building A Wrap-Around Deck
Looking to add a wrap-around deck to your home but unsure of what the process involves? Check out this guide to learn more about top considerations when building a wrap-around deck.

How to Build a Floating Deck
A deck does not need to be attached to a house. Building a floating deck allows you the opportunity to create that perfect outdoor space anywhere on your property. Find out if a floating deck is the best option for your new outdoor oasis.
More Helpful Resources


Explore Articles by Topic
Footings
Information related to installing frost footings for decks
Framing
Learn structural framing methods
Decking
Learn about wood and composite decking materials
Stairs
An in-depth look at the complex issue of how to build stairs
Railings
How to install guardrails and handrails to meet IRC code
Features
An overview on water drainage, benches, planters and lights
Design
The basics of deck design
Planning
Learn about permits and working with contractors
Porches & Patios
Build a covered deck to enjoy all seasons
Ledger
Proper attachment techniques
Care
Maintain your deck to maintain your investment
Materials
An overview on water drainage, benches, planters and lights

9 Conservatory Design Ideas for Indoor/Outdoor Living
Conservatories are a great way to ensure that you (and your plants) can soak up the sun all year round. Get inspired with conservatory design ideas.

Backyard Patio Ideas and Inspiration for 2025
Transform your outdoor living space with our 2024 backyard patio ideas. Discover an array of materials such as concrete, brick, flagstone, tiles, cut stone, and gravel, each offering unique benefits. Whether you prefer modern, rustic, or traditional styles, find the perfect patio solution to enhance your home's charm and functionality.
What to Consider When Building A Wrap-Around Deck
Looking to add a wrap-around deck to your home but unsure of what the process involves? Check out this guide to learn more about top considerations when building a wrap-around deck.
10 Common Deck Building Mistakes & How to Avoid Them
Building a deck can be a complicated process. Learn how to avoid falling into common deck building pitfalls with tips and advice from the experts at Decks.com.
Picture Frame Decking
Install a picture frame or perimeter board to finish the edge of your deck with style.
Explore Articles by Topic
Footings
Information related to installing frost footings for decks
Framing
Learn structural framing methods
Decking
Learn about wood and composite decking materials
Stairs
An in-depth look at the complex issue of how to build stairs
Railings
How to install guardrails and handrails to meet IRC code
Features
An overview on water drainage, benches, planters and lights
Design
The basics of deck design
Planning
Learn about permits and working with contractors
Porches & Patios
Build a covered deck to enjoy all seasons
Ledger
Proper attachment techniques
Care
Maintain your deck to maintain your investment
Materials
An overview on water drainage, benches, planters and lights