The exposed end grains of wood deck boards can begin to look pretty rough over time. Many will crack and split, and some will cup.
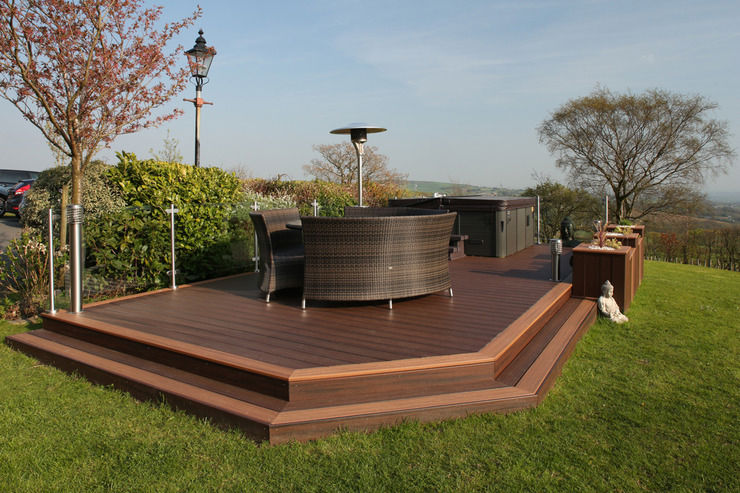
An effective method of finishing a deck surface is to install a trim board around the perimeter of the deck. This technique is also called deck picture framing or racetrack decking.
Blocking must be installed between joists where the picture frame boards will be parallel to the joists. Depending on the design of the deck picture framing short deck boards may be required. When installing these, there are a few common installation practices to keep in mind.
How to Build a Picture Frame Deck
Step 1: Install Support for the Decking Border
Install blocking 1-1/2" below the top of the frame along the sides of the deck at least 16" on center. You may be able to use scrap material for blocking.
Step 2: Prepare the Picture Frame for the Border
Install 2x4 material on top of the blocking around the perimeter of the deck for a fastening surface for the picture frame decking and to end fasten the field decking boards.
Step 3: Run the Border Around an Angled Corner
Install the picture frame border with the desired overhang. In this case, it is 2-1/4" because of the skirting and fascia boards that will be installed outside the frame below.
Step 4: Leave Room to Install Rail Posts
Notch the picture frame border around rail posts. Leave a 1/8" - 1/4" gap for a picture frame with composite decking to allow for thermal expansion. Wood picture frame decking can be notched flush with the post.
Step 5: Continue the Frame Along the House Wall
You may choose to continue the picture frame decking along the house wall. Notice the 45 degree miter cut in the corner. In this case, we needed to cut down the last 2 deck boards in the field to prevent the last board being only 3/4" wide.
How Do You Secure a Picture Frame Edge?
Generally, no composite board should be supported on less than three joists below. Where short pieces are needed to complete the deck picture frame, an additional support should be installed between the standard spacing. Minimizing the contact area between the decking and the support is also important.
Picture framing a deck requires a good amount of attention to detail so the picture frame boards are in the exact same plane as the main decking boards. The deck picture frame boards can’t be tilted one way or the other because the outer rim joists are not flush with the joists or the blocking in parallel joists is not flush with the top of the other joists. This is an often-overlooked issue when you start to ponder how to picture frame a deck.
Securing the picture frame boards is simple. The outer board usually has to be face fastened. Refer to the installation instructions for the screws to use, spacing, and the plugs to use to hide these screws.
Face-fastened decking requires screws that penetrate the face of the board. High-quality composite decking often has special screws with plugs made from the actual decking. When you countersink the screws using a special driver, the head of the screw is down about ¼ inch below the surface allowing the plug to be tapped into place so the screw is hidden.
How Much Overhang Should a Picture Frame Deck Have?
Some deck builders install the trim board over the edge of the rim joist by about an inch in order to tuck the fascia board underneath. This allows water to drain off the board’s edge. This subtle detail can do a lot to improve the overall appearance of your deck.
Additional Considerations When Installing Picture Frame Decking
Be sure to consider how your rail system will be attached and how your rail posts will intersect with surrounding decking.
In reality, the picture-frame border is not much harder to install than the regular decking boards. It’s imperative you take the time to ensure the picture frame boards that are running parallel with the main decking boards are straight. The main decking boards build off the picture frame and people will notice if the spacing of the decking is not consistent.
The tools needed to install a picture frame are no different than what you’d use to secure all the other decking boards. A precision miter-box saw will help you cut crisp miter joists for the picture frame corners. You’ll need a drill, a drill/driver, a jigsaw, a tape measure, and some string. Be sure you take the time to watch any installation videos provided by the decking manufacturer. These aids will help you avoid making costly mistakes.
Get Started Planning Your Deck Today
You should absolutely give a picture frame deck pattern serious consideration when you build your deck. The picture-frame look adds interest, especially if you use a different colored decking material for the frame. While it takes a bit more work to install the blocking for the picture frame, the attention you’ll get from your friends and neighbors will be worth it.
Ready to start building your picture frame deck? Find a nearby retailer or contractor to help build your deck.