Loading

Composite Deck Repair: How to Remove Scuffs and Scratches from Composite Decking

Close up of scuffed and scratched surface of a patio
PinterestSave

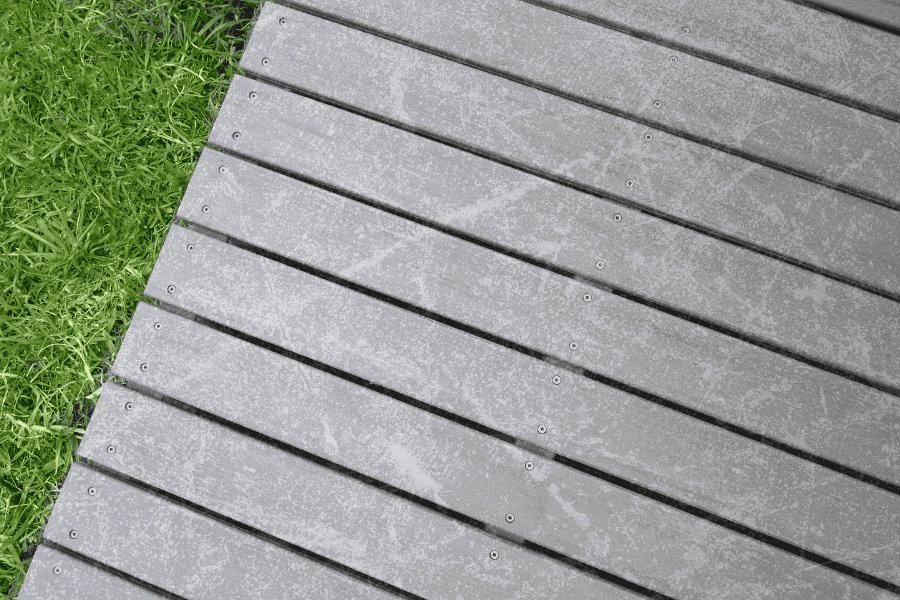
If you have a composite deck, you know how durable and beautiful it can be. However, even composite decking can become scuffed or scratched over time. These blemishes can alter the appearance of your deck and make it less enjoyable to use. The question is, how can you repair composite decking? This article will show you how to remove scuffs and scratches on composite decking quickly and easily.

Why Does Composite Decking Get Scuffs and Scratches?

Composite decking is an attractive and durable option for outdoor living spaces. However, with time, you may notice some scuffs and scratches in particular areas. This can happen for several reasons, including:

  • Foot traffic: Composite decks are designed to be durable, but they can still be susceptible to scuffs and scratches from foot traffic. These composite deck scratches are found on walkways and are caused by shoes like heels and boots.
  • Weather: Extreme weather conditions can also cause composite decks to get scuffed and scratched. High winds can blow debris onto your deck, while hail can damage the surface.
  • Furniture: When heavy furniture in the outdoor area is dragged or moved, it can leave unpleasant marks on your deck.
  • Tools: Composite decks can also be damaged by tools like lawn mowers and power tools.
  • Kids & Pets: Composite decks are a great option for families with kids and pets. However, children can also be responsible for composite deck scratches. They may accidentally drop toys on the surface. While scratch-resistant, a dog’s nails can also scuff or scratch composite decking.

Steps to Removing Scuff Marks and Scratches from Composite Decking

Composite decking is easy to maintain. However, it can develop scuff marks and scratches from everyday use. Here are some easy steps on how to get scuff marks off composite decking and keep your deck looking like new.

Cleaning the Deck

Snowman melting on a composite deck melting in the sun
PinterestSave

As with any stain, it is important to clean the deck before attempting to remove the scuff or scratch marks. This will help ensure that you don't just move the dirt around and make the problem worse. Use a mild soap and water solution, and scrub the area with a soft bristle brush. Avoid strong chemicals. Rinse thoroughly afterward.

Try Heat Method Using a Heat Gun

Heat gun
PinterestSave

If the composite material is tolerant to high temperatures, you can try using a heat gun to remove the scuffs and scratches. Hold the heat gun about six inches away from the affected area, and move it back and forth until the marks start to disappear. Be careful not to hold the heat gun in one spot for too long, as this could damage the composite material. Good practice is to test it out on a sample board first and start at a lower heat then switch to higher setting.

Contact Your Manufacturer

You can contact the manufacturer to fix scratches on composite decking, as different materials may require different repair methods. In some cases, they may have a touch-up kit available for purchase.

Replace the Scuffed and Scratched Boards

2 people removing a deck board
PinterestSave

If the scuff mark is stubborn, you might need to replace your boards. This is a more extreme measure, but it will ensure that your deck looks its best. You can purchase replacement boards from the manufacturer or your local home improvement store. However, it is recommended to buy extra decking materials during the initial purchase for future replacements to ensure that you have the best color and material match possible.

Check out the full guide to resurface your deck on Trex Academy

[Music]

Hi, and welcome to Trey academy where you can learn everything you need to know about building a deck. In this particular video we're going to be covering a few basic questions to determine if you have the time, tools, and skill required to build your own deck.

So, my name is Devin and I've got Brittany with me here today and so we're going to be showing you how to remove and replace existing deck boards.

Let's start by removing this picture frame border that we've got going all the way around the front of the deck. We've actually made a small cut here so the only thing holding this in place are stainless steel screws. So, Brittany if you want to start removing from there, I'll start here we can race to the middle. But, before we do, remember stainless steels are actually kind of prone to stripping out. So, you want to give a lot of downward force and kind of match the angle that they went in.

Okay, sounds great.

All right, let's go.

[Music]
[Music]

[00:01:05]
I think we about tied, 1 to 1.

That was pretty easy.

Yeah, nice job.

Looks good.

Thank you.

All right Brittany, with the fasteners out won't you help me put this board down? Okay, and then you can actually move to that next picture frame board right next to you, and I'll start taking out some of the boards behind you.

Okay, sounds good.

Okay Brittany, now that we've got all those stainless-steel screws out, we can go ahead and start pulling these boards [out]. Pull this one first. Go ahead and grab that one for me.

Awesome.

Now I see why we wore gloves today.
Yeah, exactly. You do not want to mess around with treated lumber, splinters... promise you.

All right. If you get that in, we'll go ahead and pull these off to the dumpster.

Okay.

[Music]
[Music]

[00:02:05]
Okay Brittany, I think our deck frame is pretty clean. So now we're going to take a chance to inspect it.

Okay.

So, there are five things you're going to want to look out for whenever you're inspecting a deck.

Okay.

So, rot cracking is going to be one of the first things (1).
Then we're going to check out the hardware (2). All the hardware needs to be checked for condition.
Then we're going to look at our beam span (3), our joist span (4), and then we're going to check center to center spans (5).

Okay?

Okay.

So, obviously I put you here for a reason. I wanted you to see this rotten board here. Oddly enough, this was the only one around here that had any kind of rot.

Yeah, it's pretty bad.

Yeah.

So, we're gonna have to replace this one but all the other ones are gonna stay. So next let's check out the condition of our hardware.

And what am I looking for in the condition of the hardware?

Okay. So generally, if something needs to be replaced, you're gonna see some kind of corrosion on the surface that could be orange, brown, maybe some red rust on the top.

It looks pretty good.

Yeah. I didn't see anything either. So, we're going to keep all that hardware. [It'll] save us a lot of time. Next let's move to our beam span. So, if you can get your tape measure out. Measure right at that splice, and I'm going to pull it down here. Right at the center of that bracket.

Okay.

All right.

Where are we at?

We're at 60 inches.

Okay, that's perfect. That's well below the local code for a four by six.

So next let's go ahead and check our joist span.

Well, hold up a minute.

Okay.

So there's a hole... looks like somebody dug out a hole here and there's a bracket on the ground? What is that about?

Yeah okay, no, good catch. Okay, so this is a concrete patio. Right? So, you're not supposed to just drop deck frame right on top of that. You actually need to lift it up a bit and what they did (which is the right thing to do by the way) is you cut away some concrete, and then you dig it to whatever the local regulations might be to get to that frost line. You're going to pour new concrete, embed a new bracket, and drop your beam on top of that. So, this is actually lifted up above that concrete patio.

That makes sense.

Yeah.

Okay so let's go ahead and check that joist span.

Okay.

Again we're always checking to see if we're under the maximum span. Okay? Yeah, we are. So that follows code. Next thing we need, I'm going to go from our joist to joist right on center.

We are at 16 inches.
Okay, again maximum allowable span for Trex decking is going to be 16 inches. If we're going to be running it this way which we are. So, we're perfect. So next thing we need to do, replace a couple of these boards and then we'll put down some Trex protect beam and joist tape.

Okay, let's do it.

[00:04:23]
So before we put in that Trex protect tape that we were talking about before. We actually need to determine if we need any more blocking. So, a quick and easy way to do that is to cut up some small pieces like this so we can create a mock-up. So, if you can put that fascia right up against here? And then go ahead and grab that square edge board. Put that here. Now give me about a half inch overhang. So that's the final look that we're gonna go for. Tell me when you got that.

That's good there.

Okay.

So now since we're using a square edge board. That means we're not using hidden fasteners, right?

Mm-hmm.

So since we're going through the top, we need to stay at least an inch away from the sides of the board. So how do you think that would go right now?

If I put a screw an inch from the end of the board right, I'm going to completely miss that joist underneath.

Exactly. So, we have support here. We have nothing to go into here, but it gets even more complicated because now we've got a deck board running perpendicular. With an eighth of an inch gap. Right? Same rules apply. We need to be an inch away from the edge [and] an inch away from the edge here.

So how would that go?

[The] same thing's going to happen, I'm going to miss the joists.

Right.

So, the easy fix is to add some more blocking.

We've got a couple of two by sixes that we're going to be placing for blocking. That's going to run all the way from the beam to the beam and attach it to the back of this joist and then we'll add one more for the ends of our board and attach that to the joist like that. Okay. So go ahead and put that back on there. Let's check our support now.

That looks much better.

Yeah, exactly.

So now we've got support on all sides. We've got the support for the ends of our boards with that eighth inch gap. I think that'll be good.

All this blocking seems like a lot of extra work.

Yeah, okay. You're not wrong. It is a lot of extra work but the alternative if we don't add blocking for that support would be to run these all the way to the end because you don't need any more blocking but it's not exactly a great look, is it?

I see that now.

Yeah. So, what do you prefer?

Square edge board.

I agree.

Okay. So, let's get some blocking in and then we'll get our Trex tape down.

Okay.

So let's go ahead and install our joist tape. I've actually stuck a little bit down here and we've got this release film that we're going to peel and apply pressure as we work our way down the joist.

Okay.

So, I'd like you to grab it right here if you don't mind? Kind of help me work it down.

And what's the purpose of this tape?

So this is just going to extend the life of your deck frame.

How's that?

Yeah, perfect.

All right. We've got a few more to do and then we'll work on our ledger boards and our beams.

[Music]

[00:06:48]
We are completely done installing the joist tape.

Finally.

Naturally that means the next step is going to be laying down some deck boards.

That's the best part.

I know we've been waiting for this moment. We're finally, going to see it come to life. okay?

Yes.

So before we can do that though we have to trim these factory cut ends because they're not square and they're not really too smooth you feel that?

Yeah, it's rough.

Yeah. So, there's a quick and easy way to do that.

Okay.

You're gonna take this square [I'm going to] kind of set this up for you. Go ahead and put that against the left edge. With your left hand you're gonna hold that in place.

Okay.

Then take the circular saw and you're gonna run that shoe, that bottom metal part, right against it.

Okay. You're looking to take about 3 16ths of an inch off the edge.

All right. How does this look?

Looks great.

Okay.

Go ahead.

All right. That's perfect. What do you think of that?

Oh, it's so smooth.

Right. A lot better and we know it's square.

Okay.

Go ahead and put the square up against there and you'll see the difference.

Perfect!

Okay.

I look like I've done this before.

[Laughs]

I know. Exactly. You're gonna be a pro by the end of this.

All right.

Okay so this is only one of two ways to do it. The other way is to use a miter saw. So, I really want you to try that out too and kind of see which one you prefer.

Yeah. I would love that.

All right. Let's do it.

All right.

[Music]

Before we start laying down these deck boards, we've got to get kind of a plan. We need to know how many deck boards we're going to do. If we need to cut one side bigger than the other.

Okay.

So, I want you to go ahead and take this tape

*All right. *

*to* the other side there. I'll measure over here

And I'm taking this to the edge of the frame or the house?

Just all the way to the wall.

All right.

Yeah, that's perfect. Okay. So, I'm at 237 inches I've already actually calculated how many boards we're going to need because we're going to take into consideration our boards are five and a half inches wide, and we know that we're going to have quarter inch gap in between each one. Right?

Mm-hmm.

So, it's going to put us at 41 boards. Now the other thing is, not only do we have to think about how many, but we need to think about even rips on both sides. Right? [It's] just going to look a little bit better. So, if we start with the full board here, that 41st board or our last board is going to be a tiny rip. Okay?

Okay. So what's wrong with doing a tiny rip over here though?

Okay. So, a couple things. First of all, I personally don't think it looks as good but the other one, you're not going to be able to install it properly. Remember how we were talking about earlier you have to have at least one inch from the side?

Yes, that makes sense.

So, if we're less than two inches, there's no way to do that properly.

Okay. Got it.

So, the way that we're going to do it. We're actually going to cut this board down. Move it over to the left and that's going to give us the exact same side or we're going to be splitting the difference essentially. So that we're even on both ends.

Got it.

All right.

All right. Okay so let's go ahead and cut that out. We'll start here and we're going to work our way across.

Okay.

Okay... just watch your step when we're bringing this in.

Mm-hmm.

Okay. I'm getting ahead of myself. Sorry.

[Laughs]

There we go get that right in there. Push that up against there.

Okay.

So a couple things I want you to look at while we're down here. We just cut out that notch. Right?

Right.

So we kind of talked about keeping the equal ripped board on this side and that side over there.
So that's one purpose of it but another one if you look down this line. You're going to see that that board is going to line up perfectly with our picture frame border later on. Okay? So that's one thing. Two more things I want you to pay attention to when we're here. Our gapping. You see how we have that gapping against the house? We're gonna leave at least a quarter inch here and a quarter inch on the back end.

And what do we need that for?

[00:10:07]
Okay. That's just for expansion contraction as things kind of move around when it gets hotter or colder. Right.

Okay.

So, we're going to keep that in mind. The other big one, we want this board to be as straight as possible. Perfectly straight even.

Perfectly straight.

Right. If possible, perfectly straight.

All right. And what happens if it's not?

Okay. So, let's think. Right here, let's say that we're a quarter inch off. I'm out like this. That's going to show throughout the entire deck because every time we're going to be using those hidden fasteners. Right?

*OH. *

*So...* Yeah, exactly. So, you're going to see that throughout the whole thing.

So, it's like a guideline?

Yep. Yep. It's a guideline. So, everything that we don't do right here, you're gonna see through the rest. So, let's really take our time and get this as straight as possible.

Okay.

So why don't you go get the string line. We'll make sure that this is straight. Then we can start putting some fasteners in.

All right. I'm ready.

[Music]

[00:11:06]
Okay. That looks great.

Yeah.

So there's one other fastener option that I wanted to show you. We've got our color match screws. [They] look nice and flush but I think this even looks a little more clean. Okay? We're going to be using a screw and plug system. So, what we're going to do is just drive this in with a special tool. This is going to disengage when we get down to the proper depth. So, it makes it really user-friendly.

Okay.

Did you hear that click?

Yeah, I did.

Okay so that's when it disengaged. We've got our plug. Get a hammer. Just tap that right in there.

Wow!

Look how clean that is!

You can’t even see it.

I know. So, which would you prefer out of those two?

I like this one.

Yeah. I think it's pretty obvious. So, the reason that you said you can't even see it, it almost disappears. It's made of the exact same material as our composite deck boards.

That's so cool.

Yeah. Super cool. So why don't you try the next one?

All right.

Show me how it's done.

[Music]
[Music]

[00:12:10]
Look at that! That is perfect! Nicely done. Good job.

[High five]

So we've got our first deck board in place using surface attached fasteners. I want to show you one more fastener though.

Okay.

That's the Trex Hideaway Hidden Fasteners. These things are super cool for a couple different reasons. So, I'm going to put that in place, and I've got a little piece of blocking I'm going to use as a jig just to hold it over there.

Okay so one of the cool things is it has that quarter inch gap we were talking about already built into the device.

I see that.

Yeah. How cool is that? So, the other thing that's really cool, is that whenever this entire deck is done, it's gonna virtually look like there are no fasteners whatsoever.

Nice!

[It will] give it a nice clean look.

Okay. So, I'm gonna go ahead and drive this one in.

And you're using this block just to hold it in place?

Yeah, yeah. It's just to hold it in place. Just to make sure that it doesn't put too much pressure on the side. Kind of hold it there. So, I'm not going all the way down yet. I'm just below the surface of that board.

Okay.

But I want to show you one other way. Okay? And that's using the Trex Handheld Tool. [I'm] just going to put it in like that. Shove it all the way back and I'm ready to drive it all the way down.

So, you're going to put the screw all the way in this time with that tool? Is what you're saying? Oh nice, and then you don't have to come back to it.

Exactly. So how much easier was that than *using that jig there*.

*It seems a lot easier*

Yeah.

Okay Brittany let's stop right there for a second we got about half of our deck board I think we put down 19. This is a good point to kind of step back and take a look at the color and see if anything jumps out at you.

Okay. So, immediately I noticed that there are some boards that have some darker streaking and some that have lighter.

Exactly what I wanted you to pick up on.

Exactly what I wanted you to pick up on. Okay. So, Trex boards kind of have a natural variation between board to board. Right? No two boards are going to be alike and what that results in, is a beautiful deck, but we have to make sure that we kind of shuffle some around. So just like you were saying. We don't have some dark blocking over here, [it's] really light over here and your eye just going to catch it.

It's kind of like laying a hardwood floor.

Exactly.

Okay. You want to switch it up a little bit. So, to avoid that, we're just going to do what we call "shuffle the deck around". Just move some boards. Put some lighter by some darker. Darker

by some lighter.

All right.

[Music]

[00:14:15]

Oh, that looks better.

I think it looks great. Okay. So now you see how it's more random all the way throughout. Your eyes not catching one particular area. It's gonna be a beautiful deck.

Yeah, it's got a nice variation.

Exactly. Okay. So, help me slide this last board *over*

Okay.

And I have a little kneeling pad here. Then we're going to get our drills, hidden fasteners, and we're going install this board.


[Music]

[00:14:51]

Just found that was a little easier for me to line them up rather than having to reach in my pouch.

For sure. Whatever works for you.

Yeah.

Okay so let's go ahead and we're going to tilt this sideways and push this in. We've got this notch that we cut in this board.

Okay.


That looks good. That's perfect.

How's that?

Yeah.

Okay.

So I wanted to stop real quick to show you we have a slight bow in the end of our board see what I’m talking about?

I see that. Yep.

Okay. It's really no problem. Grab these mallets here so we can make sure that we're getting snug and if we start here in the middle and kind of work our way down. We'll work that out no

problem.

Okay?

Okay.

I'm gonna start here and I want you to do that one for me next, and we'll just kind of work to the ends.

Okay.

I'm doing this one?

Right here.

Okay that looks good.

I'm getting so much better with that tool.

I know you're getting pretty smooth.

Smooth enough that you want to race?

[Laughs]

All right. I guess if you're up for it.

If you're up for it?

I really don't know. I see you getting pretty smooth. I'm a little nervous.

All right. Let's try it.

I think I’m going to even out the uh the odds a little bit here.

Ah!


So, I'm going to actually take this bow out for you.

Okay.

So that I don't beat you too bad.

I like how you steadied it with your leg that seems like a good...

Yeah. Exactly. Yeah. It's a nice little tip.

Ready? Go.

[Music]

Know that I'm not going to go easy on you right?

[Laughs]

I'm keeping up with you. Oh, I had a little snag though.

You sure about that?

Yeah.

Oh. You're lucky mine just messed up too.

[Music]

How are you doing down there?

I got the chimney in my way, so I guess I win.

Oh! You have one less to do?

Yeah that's right. I think I had two less to do so... I set myself up for success.

Yeah, I didn't think about that when I made the bet but I’m pretty close here. How's that?

All right. Looks great now.

Let's take another look at that bow.

Can't even see it.

What bow? Right? Exactly. So, this is good. We're just going to keep laying more.

All right.

Thanks for grabbing those.

Yeah, no problem.

Only got a couple fasteners left. I think our gap is looking pretty good.

Looks good.

Yeah?

Getting excited now.

I know. We're almost done. So, we've just got a couple more fasteners so why don't you go ahead and put in the next one.

Okay. So, I feel pretty confident about doing that but because we're so close to the house here is it cool if I pre-drill it before I put the fastener?

Oh absolutely. I've already told you. I want you to do whatever's gonna make you most comfortable.

Okay. Okay.

All right.

Right there?

Yep.

Good.

Okay. I'll get the fastener in. If you would grab a plug for me.

Okay. I guess I should do something while I’m sitting here.

Well, the leader becomes the apprentice now.

[Laughs]

Looks good there.

Looks great. Perfect.

And I'll hammer that in?

You got it?

Yeah.

Okay.

I wanted to finish it out at least.

That's great.

That looks good.

Okay. So, I’ll take care of this last one.

Oh, look at you. Showing off with no pre-drill.

Oh boy. Hey, it comes with time. You'll be here one day too.

[Music]

[A] Plug for you.

Thank you.

Yes!

Nice and clean.

Looks good.

All right.

All the fasteners are done. So now we're going to get to our picture frame border. Before we do that, we're going to cut off all the ends of our boards. Using a circular saw and a rip fence. You grab the saw and I'll get the fence.

All right.

Thanks.

All right. Thanks for grabbing the saw. What do you think about our fence?
I think our fence looks an awful lot like that last deck board we ripped off.

Yeah. That's because it is. We're not gonna waste anything around here. Okay? Now, that was really just to show you that you can use whatever you've got around.

*I like it. *

You *still did* a really great job. Okay. So, I wanted to show you a couple of things. We're going to put this in place but before we do, we're going to get a chalk line down to make sure it's going to be perfectly straight all the way down.

Okay.

You know I like to say perfectly straight. Right?

Yes. "Per-fectly straight".

So I've already done that one down there and I’m going to show you how I did that. So, I’m going to get that blade right up against that board that we cut earlier, and I've got my shoe I know that's where it's going to run. Right? Against the fence the whole way down. So, to make sure that's square. Set that up right there. That looks great.


Looks like you've done this before.

A couple times.

All right. So now we know we've got a matching line here all the way down there. Let's go ahead and snap a chalk line. Let's not do this right over top of the deck because that blue dust will go everywhere.

Oh. Let's not ruin our nice deck.

No. Not right before we've got it so close to being done.

Okay. So, I'm coming up here?

Yep. So, you should see that line down there.

Yep. And this just hooks over the deck board?

Exactly.

Okay.

So we're gonna keep it pretty tight. Okay?

All right. I got it.

Let me know when you're good.

And is my chalk line on the...

Should be right on the line.

Perfect got it.

All right. I’m gonna snap it. Okay. So, walk off with me again. Reel this back up and that looks great. Good job.

Very blue. Okay.

[00:20:23]
Okay. Let's come back over here [and] kind of reset. And now we're going to be putting this

board right up to this chalk line. Okay? I think a really good way to do that, bring your square in get it right up to that line so there's no question of "if I'm on the line", "am I over the line"? So, what I’m going to have you do, we'll get this first one set and then after that I’d like you, if you don't mind, just go behind me kind of make sure we're set. So, let's go ahead and wiggle this back line in first.

So, since you already snapped a line, I mean, what do you need the fence for? You're a professional. Right?

[Laughs] Okay. that's a good point. Yeah, I could just snap a line right here and just cut it freehand. A lot of people do actually do that, but I wanted to show a way that actually requires a little less skill it's still going to get that nice result that perfectly straight line all the way down.

Got it.

Right? So, this might be a little more friendly to the diy-er.

Me.

[Laughs] Exactly.

Okay.

And so, you need me to just keep this nice and straight?

Yep. So, just pull that in. Right on the line.

Okay.

Now we know we're straight.

Woo hoo.

[Music]

[00:21:33]

Um. You just put a screw right into our deck boards.

Oh my gosh... Yeah. I know. Okay? I'm just messing with you.

Oh...

Now, this is really easy to fix. Okay? All we're gonna do, whenever we pull this back off, take a quarter inch drill bit, drill down to at least the depth of one of those plugs we were *using*...

*Okay*...

You won't even notice it was there.

Nice trick. I like that.

[Music]

Okay. Ready to cut. So, our fence is set. Times through cutting (??) [00:22:21] right?

Yes.

One more thing we need to consider before we actually make the cut. So, I went ahead and set the blade depth at the same depth as one of our Trex boards.

Okay.

So that whenever I cut through, I'm not catching anything, not getting the tape. Right?

Makes sense.

Yeah. It's gonna be a nice smooth cut. So, I'm gonna give a test cut real quick just to make sure that it went all the way through. Okay. [You] got your ears on?

Ears. Eyes.

All right. Looking good.

[00:22:49]

Okay. Got one board.

Ah that looks nice!

That's perfect.

Yeah.

That's exactly what we want. You see, we didn't get our tape our board is nice and loose. Now we're going to cut all the way through.

[Music]

[00:23:09]
Okay. How's that look?

I'm impressed.

Hey, thanks for cutting that.

Yeah. No problem.

All right. Let's get this picture frame border in.

Okay. Go ahead and put a square in here. Make sure I don't go too far.

Just put it right down?

Yep.

Okay.

That's good.

Okay.

I'm gonna make sure that I’ve got an eighth of an inch gap. Using a little tool, you can really use anything that you've got around [it] could be even a scrap piece of a board here. I've got this. Which just so happens to be an eighth of an inch.

And that's lined up.

Looks good.

Okay.

So, I really like to pre-drill the ends of my boards just to make sure that it's not going to split over time because you got to think about it, these boards are going to be here for a really long time.

Yeah. I feel better pre-drilling these too. So, yeah.

Exactly. So, with that pre-drilled. I'm gonna go ahead and secure this down.

[Music]

[00:24:02]

Okay. So go ahead and drop yours in.

Okay.

A couple quick things I wanted to show you. On this 45° here, we're gonna make sure that we've got at least a sixteenth of an inch.

Okay.

And also, make sure we've got a quarter right here.

Okay. So, I'm gonna use my square again and just make sure on this side.

Perfect.

Okay.

All right. So again, if you don't mind just go ahead and pre-drill. I know you're a little more comfortable with that. While you do that, I'm going to take care of this plug.

Okay.

Left over from earlier.

I'm going to go ahead and put my screws in here. Maybe you can lend a hand here.

Yeah. Sure.

Make sure we don't move around too much.

Okay.

[Music]

[00:24:54]

So, with that much done, we're gonna go ahead and secure the rest of this board down. Right? Get our picture frame done. Then we're gonna move on to our fascia.

Okay.

Okay. We are at the last step!

*That's awesome. *

*Put the fascia on. *


[If] you don't mind just helping me drop that in. Okay. Now we do need to keep about a quarter

inch gap at the end. How do we look?

That looks good right there.

All right. I also wanted to show you that I have gone ahead I pre-drilled all of these with a fascia bit. The reason I’m going to do that is, your hole needs to be a little bit bigger than our approved fascia screw. Okay?

Okay.

So that way it can expand and contract, move around a little bit. I think we're ready to go. So, if you don't mind grab that pry bar make sure that's nice and snug up against our picture frame border.

Okay.

I'm going to hold it over here. Yeah, that looks perfect.

Feels good.

Yep. I'm gonna get a couple screws in. I'll work my way down towards you. Make sure you still get a little pressure on the end for me. I'm gonna finish these last couple here. Why don't you go ahead and grab our next fascia board. We'll get this thing knocked out.

All right. Can't wait.

I know. We're almost done.

[00:26:05]
Man it feels so good to be done with this deck.

I know, and it looks so great.

Looks amazing.

Really happy with how it turned out.

Me too.

So, I kind of wanted to take a second to reflect on where we started and where we are now.

Sure.

Okay. So, I want to talk about time first. Remember we talked about that a little bit in the beginning. It's kind of rough to gauge but I do think if it was you and somebody like around your skill level [it] would take about three days.

Okay.

Okay. Another thing to think about is the tools. So, you've seen the tools that are required. You've used a lot of them. Right? How do you feel about that?

I feel good.

Pretty comfortable with those?

Mm-hmm.

Okay and then skill is the last one which they can kind of be hand in hand a little bit. I have showed you a few tips and tricks to make things go a little more smooth maybe get more

comfortable using those tools.

Right.

So with all that considered like how would you feel tackling a project like this?

I'd actually feel pretty confident. Like you said, if I had a friend with me, I think we could get it done in about three days time.

All right. That's great because this is just the beginning. We suggest that you watch our next video on how to replace an old pressure treated staircase and railing with Trex. So go to trex.com/academy to see that video and a whole lot more like it covering the entire decking process.

Thanks for watching.

How to Prevent Composite Deck From Scuffs and Scratches

Brushes, straw brooms, push brooms and rakes standing upright agaisnt a wall
PinterestSave

Like any other surfaces, composite decks can become scratched and scuffed over time. Fortunately, there are several tips on how to protect composite decks from scratches.

  • Use furniture pads: These pads protect the furniture from scratching the floor by keeping it in place.
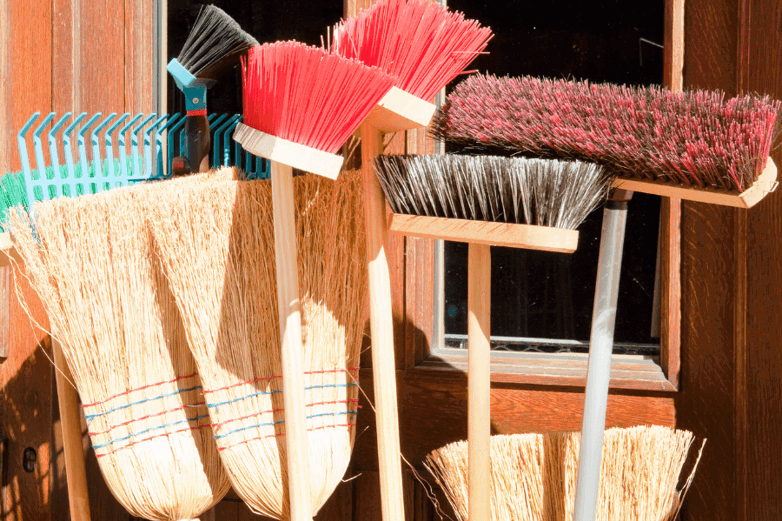
  • Use a broom instead of a shovel to clear snow. Never use a shovel with a metal edge. Some snow shovels will be plastic but have a metal edge on them. This will help avoid scratching the surface of the deck.
  • Put furniture away during cold months. This will help protect the deck from scratches and other damage that can occur when winter winds move the furniture.

Get Started with Removing Scuffs and Scratches from Your Composite Deck Today

Now that you know how to remove scuffs and scratches from composite decking, it's time to get started. With a little effort, you can keep your deck looking like new for years to come. And, if you need to replace any boards, remember to buy extra during the initial purchase, so you have them on hand when needed.

Find a Contractor or retailer to get started and let your composite deck be the envy of the neighborhood.


Popular Care Articles
Deck Cleaning

Pressure Washer Buying Guide

When it comes to cleaning your deck, it's important to choose the right pressure washer. Use this pressure washer buying guide from Decks.com to help with your decision!

Deck Finishing

How to Seal Your Deck & Best Deck Sealers

Once you clean or stain a deck, it is ready to be sealed. Learn how to properly seal your deck in order to protect it from damage caused by harsh climates and weather at Decks.com.

Repairs

How to Avoid, Prevent & Repair Deck Joist Rot

Rotted deck joists can cause homeowners headaches. Learn more about how to avoid, prevent and repair deck joist rot at Decks.com.

Next Step: Materials Articles
Composite Decking

Capped Composite Decking

What is capped composite decking? It's a great option if you like the look of wood but not the maintenance. Learn about capped composite at Decks.com.

Decking Reviews

Ultra Shield

Ultra Shield is a capsulated wood plastic composite material manufactured by the New Group Asia in Humble, TX.

Decking Reviews

TUF-board

TUF-board low maintenance decking is manufactured by INTEPLAST Group in Livingston, NJ.

Get more helpful resources delivered right to your inbox

Explore Articles by Topic

Popular Care Articles
Repairs

Deck Post Repair: How to Fill Cracks in Deck Posts

The right kind of wood can resist rot, mold, and insects, but they can still split or crack. You can repair the posts before the problem causes structural issues. Read our guide on deck post repair to help your outdoor space last as long as it possibly can.

Deck Cleaning

How to Remove Moss & Algae from Your Deck

Moss and algae growth can be detrimental to the integrity of your deck if left untreated.

Deck Finishing

How to Seal Your Deck & Best Deck Sealers

Once you clean or stain a deck, it is ready to be sealed. Learn how to properly seal your deck in order to protect it from damage caused by harsh climates and weather at Decks.com.

Next Step: Materials Articles
Composite Decking

Eco Friendly Composite & Wood Decking Options

Looking for the most environmentally friendly way to add a gorgeous deck to your home? Learn how composite decking is made from recycled materials at Decks.com.

Wood Materials

Pressure Treated Wood: Types, Grading Standards & More

Wondering if pressure treated wood is right for your project? Learn more about the different types of pressure treated lumber as well as how long they last at Decks.com.

Wood Materials

Types of Wood Decking Materials

There are many options for choosing the best wood for your deck, like pressure treated pine, cedar, redwood or mahogany. Compare types of wood at Decks.com.

Get more helpful resources delivered right to your inbox

Explore Articles by Topic