Loading

How to Demolish & Remove a Deck

Person using a reciprocating saw to cut the railing off a deck
PinterestSave

With a decade or more of exposure to the seasonal elements, decks can age and deteriorate. At first, it’s possible to refasten or replace a few deck boards and make other repairs. However, if the deck is too far gone, it might be necessary to remove the deck and rebuild. Learn more about what's involved in a deck demolition and removal project.

Common Reasons to Demolish a Deck

There are a number of reasons why demolishing a deck is a good idea. It should be a simple decision to demolish decks that are:

  • Unsafe
  • Old/rotting
  • Beyond repair

You might also consider a deck removal to:

  • Enlarge or upgrade the space
  • Build a shed
  • Add a garden
  • Install a patio
  • Remodel

What to Consider Before Removing a Deck

A little planning goes a long way. First, decide whether to hire a contractor or do the job yourself. Either way, protect your landscaping and clear a pathway to haul away the debris. Make plans to replace the deck. Factors to consider include your budget and the value that replacing the deck will add to your home.

Cost to Remove a Deck

When contractors estimate deck removal cost, they base it on the size, condition, and style of the deck. Demolition of a large elevated deck will likely cost more than removing a small ground-level deck. Plan to pay a contractor $600 to $1,000 for a small ground-level deck. For DIYers, there are two costs: rent for a trailer or trash tub and the fee for dumping the debris.

Create an After-Removal Plan for your Deck

What will replace your deck? It might be another deck, a garden or a shed. Maybe consider a concrete or paver patio, which has advantages and drawbacks compared to a deck. If you plan to rebuild the deck, make sure you consider all of your options, including composite decking, which lasts far longer than wood deck boards, minimizes maintenance, and has other advantages.

Ideally, you’ll hire a single contractor both to demolish/remove the deck and to build/replace it. This minimizes the lag time between deck demolition and new deck construction, which is usually an important factor. The contractor might also discount the demolition work.

Remember to factor in landscaping, lighting, and other auxiliaries—such as an outdoor kitchen, hot tub, or firepit—when you make your plans.

Will Removing a Deck Decrease Your Home Value?

Whether removing a deck will decrease your home’s value depends on what kind of deck you have and what replaces it. Failing to replace a large functional deck with a comparable deck or patio will reduce your home’s value in most cases. That’s especially true when most homes in your neighborhood include decks. That’s why replacement planning is important.

Should you DIY or Use a Contractor to Demo your Deck?

When deciding whether to hire a contractor or remove a deck yourself, weigh the advantages and drawbacks. There is the cost of hiring a professional to consider, but you could probably save about half of the cost by removing the deck yourself by following some necessary safe steps.

Are you up to it? Consider your experience and skill level and how much time you have. If you plan to hire a contractor to build a new deck anyway, it probably makes sense to roll deck demolition and removal into that job.

How to Demolish a Deck

The best way to demolish a deck is from the top down, with each component or assembly hauled away immediately from the work zone once it’s cut free. Wear long pants, long sleeves, sturdy shoes, gloves, as well as ear and eye protection. Always work from a comfortable, steady stance and don’t overreach.

Tools & Materials Needed

Demolished decks create more debris than you might expect. Get the right size trailer or dumpster for the job. As for deck removal tools, here’s what you’ll need:

  • Hammer
  • Wrecking bar or pry bar
  • Ratchet and socket set
  • Drill/driver and bits
  • Circular saw
  • Reciprocating saw and blades
  • Scrap plywood
  • Gloves
  • Eye and ear protection

Step 1: Access the Deck and Identify Safety Hazards

Open up multi-level and enclosed decks. Check for electrical connections and hire an electrician if you need to. Next, look for weak wood, missing or broken fasteners, and shaky posts. It’s not uncommon to find wasp nests or animal dens under and around old decks, too. Resolve all safety issues. Don’t try to work around them.

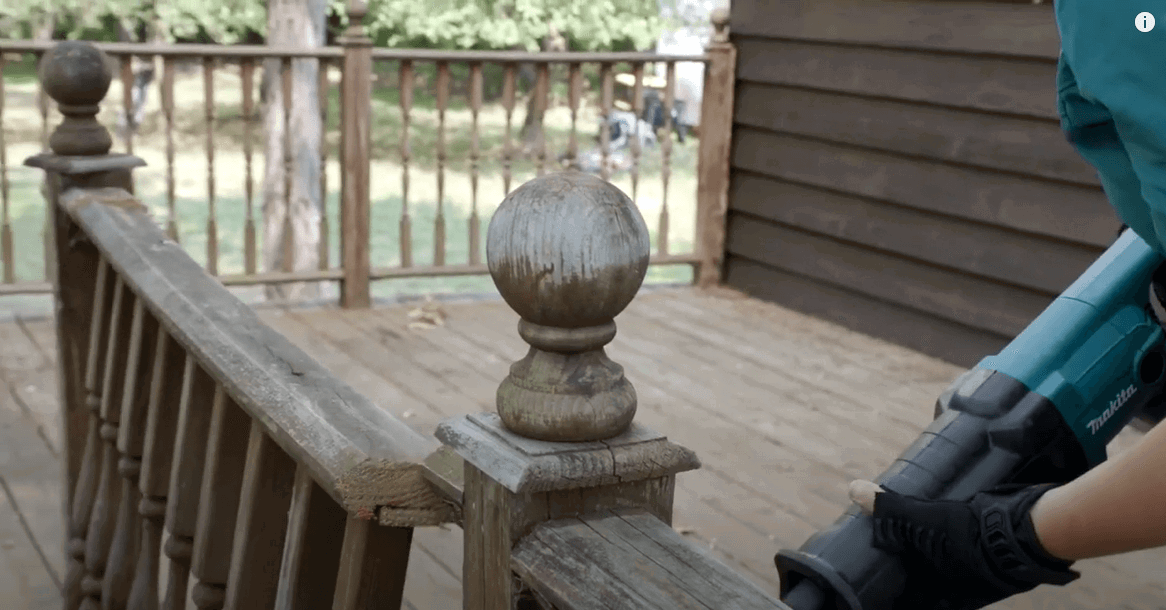
Step 2: Remove the Deck Railing

The railings go first. Using a reciprocating saw, cut through the bottom rail near the posts, avoiding brackets and fasteners. Do the same with the upper rail, but leave the balusters attached. Allow the entire rail section to fall safely away after it’s cut. Or have a helper hold the rail section while you cut. Haul the whole section to the trash in one piece. If it’s unwieldy, cut it in half first.

Step 3: Remove Deck Boards and Cut the Joists

How to remove the decking depends on the situation. If you can back out the screws or pry up nailed deck boards, you’ll spare yourself some labor but the job will take a little longer. For safety, use a scrap of plywood that spans at least three joist bays as a temporary platform. Bend over nails before disposing of the deck boards.

The other approach is to remove the two boards nearest the house and the last two boards at the other end. Sawing toward the house, cut through the deck boards at the center of two joist bays. Remove the cut boards with a wrecking bar or by cutting the fasteners with a reciprocating saw. Or you can leave the boards attached and cut the joists. When cutting joists, work in small sections.

Step 4: Demolish the Deck Stairs

Remove the stair railing as you did the other rail and baluster sections. Next, remove the tread boards, either by removing their fasteners or sawing them. Cut the stringers from the deck with a circular saw or reciprocating saw.

Step 5: Remove the Ledger Board

The ledger board will come off fairly easily once you unscrew the lag bolts that connect it to the house. The ledger is often a long, heavy, board(s) so stand clear of it when removing the last bolts. If you can’t pry the ledger off easily, look for lag bolts concealed by the joist hanger hardware. Cut the ledger in half or thirds if it’s too heavy to carry to the trash.

Step 6: Remove the Deck Beams

Beams are often two or three times the size of joists. Because of their weight and size, cut the beams into manageable pieces and knock any remaining pieces off the posts.

Step 7: (Optional) Dig Up the Deck Posts & Footings

Two people standing near a cirlce marked with orange paint. One person is holding a post hole digger.
PinterestSave

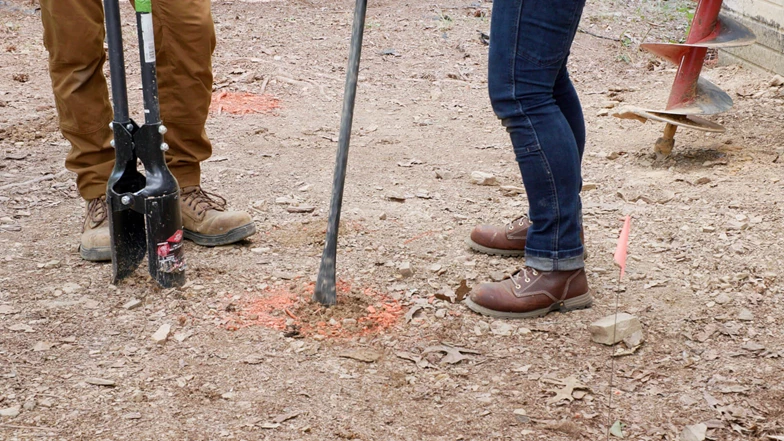
Some people cut posts to the ground and leave them in place, but it’s better to reuse them, if possible, or to remove them. If you have trouble extracting wooden posts, nail a block of wood low on one side of it and use a lever to pry it upward. You can also wrap the post with a heavy chain and use a skid steer to lift it out. This is the best option when concrete footings/posts are involved.

For more detailed instructions on how to demolish a deck, please visit Trex Academy.

Welcome to Trex Academy. Where you can learn everything that you need to know about building your decking project.

I’m Devin and I’m here with Lindsay and over the span of several videos we’re going to be showing you step by step how we turned this old, tired deck into a beautiful outdoor living space.

So, what we've got here is an old pressure treated deck that's about 22 feet wide and 10 feet deep. Now, 10 feet is a little shallow for a six-person seating area. So, what we're going to do is extend it out about 14 feet and add a set of stairs right about where Devin is standing. Okay, so if you want to see the videos of this entire build process and others you can go to trex.com/academy.

 So, before we start the teardown of our existing deck, we need to talk a little bit about personal safety. You should always make sure that you've got your safety glasses, hearing protection, gloves, and that you're wearing pants instead of shorts and that you have some kind of reinforced toe on your boots. It's also really important to always make sure you've got a first aid kit nearby. Okay?

So, since we've got all that covered, we're ready to start the demo of this deck. We're actually going to start by pulling off this lattice and taking a good look underneath because we never know what hazards we might be running into. [It] could be electrical wires, wasp nests, bee’s nests. Really… a number of different hazards could be under there. Exactly. So, we're going to take a look. Yeah. Let's get this removed so we can find out what we're looking at.

[Takes off lattice]

[A] spider nest way back there. Yep. [inaudible] Everything else looks pretty good. So, while it might look cool on camera to take a sledgehammer to your railing or maybe even give it a karate kick to just throw it off of your deck. That's not a safe way to do it. So, instead what we've done here is we've taken a reciprocating saw we've already cut it at the bottom, always making sure to miss our brackets. So, now we just need Lindsey to go ahead and cut the tops and I'll be able to take the entire railing set off to the dumpster.

Okay, very nice.

All right, great job. I'll take this to the dumpster. You can go ahead and get started on the next one. Will do.

Okay Devin, [the] railings are out so what's next? All right. So, now we're going to be removing our decking and all of our framing. So, there are definitely two common ways that you can do this. One more common than the other and that first being that you would just remove each board individually all the way down. That sounds like it would take forever. Yeah, it definitely does. Not only does it take forever but it can be a safety hazard as well, because as you're pulling them all up you've got in this case 20 plus year-old nails, and you have over 600 of them in this deck. So, they'd probably be all rusty and… Yeah. Well, don't ask me how I know but it can get pretty bad. Okay. Noted. [both laugh] So, because of that what I like to do is the other option I was talking about. Where we'll still remove these two boards on the end, and we'll remove the two deck boards near the house. Then we'll go back with the circular saw get in between our joists and we'll make a cut all the way towards the house. We'll do that on every bay. After that, we'll come back with a reciprocating saw cut the end of our joist on both sides. Now we've got a manageable section of decking with our deck boards and our joists are all connected. So, in the example, I was given earlier you're pulling deck boards off now you have to go and remove your joist. In this case, again, we've got nice manageable sections which we can easily handle and take to the dumpster. That sounds great so instead of constantly removing each board one after the other it’s just one fell swoop. Right. Exactly. It's a lot safer and I think it's a lot faster as well. I like it.

Now, these joists didn't look terrible would you ever keep a frame? Um, yeah. There are some situations which I might do that. I'm always looking out for a couple things though before I do so one is: It needs to have been built pretty recently. Okay. So, not this one? Definitely not this one. Okay, the other big thing that I'm looking for though is: Is it up to code or could it be easily brought up to code? Okay. So, obviously we can tell like you said this is out because it's far too old. There are a lot of things that we have to worry about. Just like you probably noticed this right here. Yeah. All this rust right here, it looks like it's almost resting through. Exactly. The hanger and the fasteners are rusting, and this is a critical connection point between our joists and our ledger board. So, if this fails right here your entire deck could go down because it's like this on every one of them. That's terrifying. Yeah, I know. The other big thing though is even though our joists might have looked good going all the way across the span. This is the important part that we need to look at. We have rot actually starting from the ends. We've got some at the top, splitting and cracking. That’s... that looks like a safety hazard. In addition to this. So, all together this is a very dangerous connection. That's why we have to change it out. Got it.

So, you mentioned code. Was this frame ever up to code. Um, very well could have been, it was built a while ago. So, there's no way to know exactly but definitely by today's standards it is not. So, we can see we've got some lag screws about every four feet. Yeah. We need to at least double those to get with code. The other big thing is we need to install some flashing between our ledger board and the house. So that flashing will allow the water to go away from the house and over the ledger. Makes sense.

All right. So, clearly you do not approve (Absolutely not) of keeping this frame. [It] sounds like a code official wouldn't approve of keeping this frame. I hope not. Let's say hypothetically: I am buying a house and I hire a home inspector to come out and take a look. Pretty normal. Probably a good idea. Right? Yeah? What would a home inspector have to say if they saw a frame like this? Okay, yeah, building a new deck on a frame like this? Yeah. Oh it would not pass. For sure. They would request that it be built up to code. Now, how that happens, whether that happens. That's going to be a negotiation between you as a seller and with the buyer, you guys come to some kind of terms. It’s just going to make it a little bit more of a headache during the buying process. Yeah. Sounds like it. Right. I can see why we're building a whole new frame! Absolutely.

We've almost got it demoed. So, let's go ahead and tear this ledger board off of here. Okay. Yeah.

This looks pretty bad. Would you say it's the worst you've ever seen? What are we looking at here? Um, okay. So, I'm not gonna say that it's the worst that I've ever seen but it is actually pretty close because this is really bad. How does it even get like this? Okay. So, as I was walking up one of the first things, I noticed it had no flashing. So, I kind of expected to see this. So, flashing would be the answer. So as water comes down that flashing's purpose is to divert the water over the top of our ledger board instead of letting it get down behind. So, without the flashing that's what happened. Water got behind the sheathing in our ledger board, it just sat there for years and years and this is the result. Gotcha, and this is one of the ledger boards that we actually ripped off right? Yeah. So, I actually tore this one-off last right here for a couple different reasons. You can actually get a big view a large view of what's all going wrong on this deck (that we had). So, we've got corrosion, rust on our hanger here, and our nails. Look at that. Yeah. It’s rusted all the way. Yeah, that looks terrible. Yeah, [it's] in really bad shape but even worse… as we turn it around. Now, we get a big view of all the problems that were happening behind this ledger board. That’s Wild. Look. That came right off with it didn't it? Exactly. It was so wet that it actually attached and it's all like glued on there because it's so rotten. Yeah, all right now riddle me this. I see where the lag screw went in right why do we have so many nails (which are rusted I might add) as well? So, I can only assume that when it was installed, they used only nails to hold this ledger board to our rim board. Which is not code compliant and it's actually a really common failure point of a deck. You never want to see this. So, it looks like at some point maybe a house inspector came by. Maybe they were selling the house and demanded that it be brought up to code. So, they added these lag screws. But even today's standards those lag screws spread out that far isn't up to code. That's why we're going to make sure that we do it right. Okay.

So, what are our next steps here then? Okay. So, the process already began as I said as I first walked up, I'm already inspecting I'm already looking for things that could be a problem. Missing flashing is a big one. So, I knew we were going to have some kind of water issues. So, our next step in the inspection process is now to get behind this building paper that we have here and we're going to be looking for where the water has stopped migrating upward. So, once we find that point, we know the parts that need cut away. Okay. The next thing we need to do is look for migration into the house or into the rim board of the house. See I didn't even think about that. That's super important because our lag screws are going in here for the new ledger. Right so it has to be sound. Exactly. Not only is that going to be supporting our deck but if this isn't structurally sound the wall on top of it isn't going to be structurally safe either. So, one more reason to make sure that this guy's in good condition. Yep.

Okay next question. How do we make sure that this damage doesn't happen in the future? Okay, right because we don't want to see this happen ever again right? Especially as a homeowner. So, what we're going to be doing after we've started our inspection, we're going to be tearing out all of this rotted sheathing here. Then, we're going to be inspecting this because with that gone, we'll get a really good picture of the condition of our rim board. Right. So, as long as that's safe and sound now we can cover that up with new sheathing. With the new sheathing installed, we'll be installing a waterproof membrane starting here. Where we had that piece of siding that we took off and it'll cover all of our new sheathing that we've installed. After we do that, we're going to come back and install the missing flashing. Okay. that'll go about here and then we'll have a narrow piece of waterproof membrane that'll just keep water from going behind our flashing and make sure that it all gets diverted over top of our ledger. So, if you don't mind… hold that there for me.

I'm going to show you another reason of why this whole system failed. So, missing flashing was the biggest part. Okay. But the appropriate gapping between our flashing light. If we put this all the way up here. Now, you have a spot for debris to get trapped, leaves that get trapped, that's going to act as a sponge and hold water. Or, if we come down here, now we have a better gap. So, we're going to make sure we have the appropriate gap here but… You can see how all that debris just got caked right in, and it actually rotted this out as well. Yeah, you can see on the back… same thing. Look at this. Yeah, that’s not in great shape. So, we don't want to see this either right? So, we're going to take care of that the right way.

So, after we do all of that. Will this be up to code? Yes. It'll definitely be up to code but it's always important to check with your local municipality because [it] could be different. They might require even more in your area. That makes sense. Yep.

Well, I guess we should get started but first we need to clean up this space. Yeah, we've got a lot of leaves, debris, a lot of large rocks as well. So, we definitely need to clear those out of the way and then we need to check the grade to make sure that it slopes away from the house. Okay. So, with that out of the way [would you] mind to get the smaller stuff. On it. I'm gonna start picking up these larger rocks.

[Music]

Okay so just to recap we've torn apart the entire deck and the last step of that process was to remove our ledger board from the house. And there was a lot of rot in the sheathing underneath that ledger board. Fortunately for us, the rim board for the floor system was still in good condition. Yeah, thank goodness that was a big deal. Huge deal, because that meant that we could still keep the rim board all we had to do was replace that rotted sheathing. Right, and to protect that sheathing we're installing a waterproof membrane on all the new stuff that we've installed. We've got one bigger section left here to put in and as we do that, we just want to make sure that we have an overlap right here and then we have a side lap at the end but to go one step further we're going to be installing a more narrow waterproof membrane and that's going to tuck up underneath their siding and again it's going to be overlapping on our larger sections. All of this back flashing is just to make sure that if water somehow does manage to get behind our ledger board that we're not going to see that same rotting problem that we had before. We do not want to see it again. Absolutely not. So, we're gonna go ahead and install this last piece. Just peel a few inches off the back there and we'll get started. [Get it] stuck up there and then we'll just work in small sections. I think we are stuck. Good. Work our way down… [Music] That last bits all you.

With our backsplash installed our next step is going to be to install our ledger so you can go to trex.com/academy where you'll find that video and a whole lot more covering the entire deck building process.

Thanks for watching!

Get Started On Demolishing and Removing Your Deck

Demolishing a deck is a big job, but it’s not difficult. The key is to plan your work. But if DIY isn’t for you, hire out the work. To get started, find a contractor in your area using our online tool. To shop for materials for your replacement deck, use our Find a Retailer tool.


Popular Decking Articles
Decking Installation

Decking Patterns

Installing your decking at a 45-degree angle is a popular style for decks. This can be done to reduce decking seams or just for appearance.

Decking Installation

How to Install Composite Decking

Learn about how to install composite decking. Topics include expansion and contraction issues and hidden fastener systems.

Decking Installation

Decking over decking

No; this is not a recommended practice.

Next Step: Stairs Articles
Staircases

How to Build Box Steps for Your Deck

Learn how to build a set of box platforms to act as stairs for a low deck. You don't need to cut stair stringers.

Staircases

Installing Stringers

Step-by-step instructions for installing 2x12 stair stringers.

Staircases

Stair Tread Nosing

Learn how to install treads to overlap the riser boards.

Get more helpful resources delivered right to your inbox

Explore Articles by Topic

Popular Decking Articles
Decking Installation

6 Best Alternatives to Wooden Decking

While wood decking was previously considered the standard material for building a deck, that’s changed. Homeowners have been exploring and embracing different types of materials, and the availability of alternative decking materials has grown significantly.

Decking Installation

Decking Patterns

Installing your decking at a 45-degree angle is a popular style for decks. This can be done to reduce decking seams or just for appearance.

Decking Installation

Tile decking

Installing tile over a standard deck frame in an exterior environment is a recipe for trouble.

Next Step: Stairs Articles
Staircases

Closed Stair Risers

Learn about the benefits of installing riser boards on your deck stairs.

Staircases

Support Long Stringers

Long stair stringers may need extra support from installing a brace at mid-span.

Staircases

Stair Tread Nosing

Learn how to install treads to overlap the riser boards.

Get more helpful resources delivered right to your inbox

Explore Articles by Topic