Deck footings form the structural foundation that supports the weight of a deck. In the sections below, you will learn what deck footings are, the role they play in keeping your deck safe, key considerations for proper installation and the step-by-step process for building them.
What is a deck footing?
In most cases, a deck footing is a cast or poured concrete base installed below the soil line that supports a deck post. However, other types of deck foundations, such as helical piers, are also used (more on types below). Based on building codes and local soil conditions, your local building department will determine the acceptable footing size, depth and type for your new deck. Here are the primary functions of deck footings:
Prevent Settling
Most deck posts are made of either 4x4 or 6x6 lumber. Because the surface area at the bottom of a post is not very big, placing posts directly on soil would concentrate the weight of the deck on a relatively small area. Over time, that weight could push the posts down into the soil.One of the main functions of a deck footing is to create a wider bearing surface that spreads the load over a larger area of soil.
Just as snowshoes help prevent a person from sinking into the snow, a deck footing helps prevent the deck from sinking or settling over time. A typical pier footing is about 12 inches in diameter, but that size can range from 8 inches up to 24 inches depending on the load it must support and the type of soil it rests on.
Increase Stability
In addition to supporting vertical loads, deck footings also help stabilize the structure against movement. When a post is embedded into the concrete or secured to the top of the footing with an approved post base anchor, the footing helps resist lateral shifting and uplift forces caused by severe winds or other external forces. Read this article to learn additional ways to reinforce a deck.
Protect Against Frost Heave
Deck footings are typically installed below the local frost line, which is the depth at which soil freezes during winter. When water in the soil freezes, it expands and can push structures upward. Placing footings below the frost line helps prevent frost from heaving them up and damaging the deck during freeze-thaw cycles. Read this article to learn more about frost depth.
Do You Need Footings for Your Deck?
Unless the ground directly below a deck post is solid bedrock, decks that are attached to a house require concrete footings that extend below the frost line. Some small freestanding decks built very close to the ground may not require traditional below-grade footings and can instead rest on approved surface supports, such as deck blocks or adjustable pedestals.
Before starting your project, check with your local building department to determine whether footings are required and to confirm code requirements such as footing depth, footing size, deck height limits and setbacks from property lines.
Types of Concrete Deck Footings
There are several approved ways to support a deck with concrete footings, each with its own advantages depending on soil conditions, load requirements and installation preferences. Some methods focus on simplicity and low cost, while others offer greater resistance to frost movement or higher load-bearing capacity. The following options represent the most common footing styles used in residential deck construction.

#1 Cylindrical Pier Footings
Cylindrical pier footings are simply made by digging holes and filling them with concrete.
Pros
- Among the easiest footings to install; just dig holes
- Among the least expensive to install
- Don’t require form tubes
Cons
- Tops need to be level with the ground, which can hasten post rot
- Frost can sometimes grab hold of rough edges and lift the piers
#2 Concrete Form Tube–Style Footings
Concrete form tube–style footings are the same as cylindrical pier footings but include form tubes.
Pros
- Easy to install
- Smooth edges make it difficult for frost to lift the piers
- Top surfaces can be raised above grade to help keep posts dry
Cons
- Require purchasing form tubes
- Require purchasing post base anchors
#3 Bell Footings
Bell footings are created by digging holes and flaring out the bottoms with a shovel. The larger footprint helps support heavier loads, which can make them a good choice for decks that need to support heavy additions such as hot tubs.
Pros
- Require digging smaller holes than Modified Bell Footings
- Large footprints can support heavier loads
- Unlikely to heave if the bells are below the frost line
- Don’t require form tubes
Cons
- Difficult to flare out the bottoms in extremely sandy soil, heavy clay or when footings need to be deeper than a few feet
- Tops need to be level with the ground
- Require more concrete
- Require purchasing post base anchors
#4 Modified Bell Footings
Modified bell footings have larger footprints like bell footings, which makes them well suited to support heavier loads. They are typically made by digging holes the size of the bottom pads, placing smaller form tubes inside the holes, and then backfilling around the tubes.
Pros
- Large footprints can support heavier loads
- Unlikely to heave if the bells are below the frost line
- Require less concrete than bell footings
Cons
- Require digging larger holes than other footing styles
- Require purchasing form tubes
- Require purchasing post base anchors
#5 Embedded Posts
Embedded posts are installed by digging holes, positioning the posts, and pouring concrete around them. Some inspectors require large bolts or sections of rebar to pass through the bottoms of the posts to prevent them from pulling out of the concrete.
Pros
- Provide the most lateral support
- Don’t require post anchors or form tubes
Cons
- Harder to place and keep posts in the exact right position relative to the frame
- Posts are more likely to rot sooner than in other systems
- May require digging larger holes
- More problematic if a post is cut too short by accident
- Frost can sometimes grab hold of rough edges and lift the piers

What is a helical pier deck footing?
Helical piers are installed by driving helical piles into the ground like large steel screws. The specialized equipment used to install them also determines the required depth by monitoring the torque needed to rotate the pile. Once the proper depth is reached, a post anchor plate is attached to the top of the pile.
Helical piers can be a good solution when building a deck on unstable soil or on large deck projects where a ready-mix truck cannot access the site and the number of footings required makes mixing bags of concrete impractical.
How much do deck footings cost?
For smaller projects, mixing bagged concrete is more practical than ordering a ready-mix truck. For example, a 12-inch-diameter x 36-inch-deep footing requires about 2.35 cubic feet of concrete, which equals about four 80-lb bags of premixed concrete. If each bag costs around $6, the total comes to about $24 per footing, not including hardware such as post bases or anchors.
If you have a bunch of footings to pour, say 10 or more, and the site is accessible to a truck, you could save time and your back by ordering from a ready-mix plant, but because there is a minimum order and hefty delivery fee, plan to pay double.
When planning your footing budget, don’t forget about the form tubes and post base anchors. A 4-foot x 12-inch diameter concrete form tube costs about $17. Post anchors can run from about $15 for a 4x4 anchor to over $60 for a decorative 6x6 option.
Footing Depth, Size & Layout
In most areas, deck footings must extend below the frost line, which is the depth the ground freezes in winter. Frost depth varies widely across the United States. In southern Florida, it's less than 1 foot, while in northern states such as Minnesota or Maine, it can reach up to 8 feet. Online frost-line maps provide general guidance, but you should always confirm the requirement with your local building department.
Footing size and layout should never be guessed. They depend on several structural factors determined during the deck design process, including:
- The load bearing on each footing
- The strength and type of soil supporting the footing
- The design of the deck beams and posts
Most decks require a building permit, and inspectors often check footing holes before concrete is poured. When applying for your permit, confirm the required footing size, depth, and layout and ask whether a footing inspection is required. To learn more about deck footing layout, check out this article about how to install deck footings.
Locate Utilities Before You Dig
Before digging your deck footings, it’s important to know what is buried below the surface. Striking underground utilities such as gas, electrical or communication lines can be extremely dangerous and costly to repair.
A free public utility locating service can mark most underground utilities. In the United States, you can request this service by calling 811. Contact them at least three days before you plan to dig so crews have time to mark the lines.
Be aware that private utilities and underground hazards, such as electrical lines, propane tank lines, irrigation systems, and landscape lighting wires, will not be included in the free service. Before the locator service arrives, clearly mark the perimeter of your planned deck so technicians know where digging will occur.
Tools and Materials Needed to Build Deck Footings
The tools needed to build deck footings vary depending on soil conditions and the type of footing specified in the deck plan. In many cases, basic hand tools are enough to dig the holes and mix the concrete, though additional tools, which can be rented, can help with layout, leveling, mixing and digging in difficult soil conditions.

Tape measure: Used to measure and locate footing positions during layout
String and stakes: Used to establish straight layout lines and mark the deck hole
Hammer: For pounding in stakes
Layout flags or ground-marking paint: Used to clearly mark footing locations before digging
Spade shovel: Used to dig the footing holes
Post-hole digger: Ideal for digging and removing soil from deeper holes
Long pry bar, pinch bar or digging bar: Helps break up compacted soil
Reciprocating saw: Useful for cutting through tree roots encountered while digging
Rotary hammer with drill bits and spade or chisel bit: Used to drill holes for post anchors and can help loosen very compacted soil
Power auger (optional): A rented drilling tool that quickly bores footing holes
Level: Used to ensure footing forms are plumb before placing concrete
Laser level (optional): Helps establish consistent footing heights
Utility knife: For opening concrete bags
Garden hose or bucket: Used to add water to the concrete
Hoe: Used for mixing concrete
Wheelbarrow: Used to move excavated soil and mix concrete
Cement mixer (optional): Used for mixing bags of concrete
Poking stick: Used to remove air pockets from the concrete
Trowel: Used to smooth the top of the concrete
Materials
Concrete
Concrete form tube (if necessary)
Rebar (if necessary)
Post base anchor (if necessary)
How to Install Deck Footings
Now that you have gathered your tools and purchased your supplies, you’re ready to begin installing the deck footings. Following the steps below will help ensure the footings are installed correctly and provide a solid foundation for your deck.
Step 1: Verify Slope and Final Grade
Make sure the soil beneath the deck slopes away from the house and has no low spots where water can collect. It’s important to establish the level of the final grade before installing the footings so you know the correct height to set them.

Step 2: Lay Out and Mark Footing Locations
After determining the proper spacing, size and depth for your footings, use a tape measure to locate them and mark the spots with ground paint or marking flags. If you need more than two footings in a row, locate the outer two first, then use stakes and a string line to keep the rest perfectly aligned.

Step 3: Dig the Footing Holes
Use a combination of a spade shovel and a post-hole digger to dig the footing holes. If you encounter extremely hard soil, use a long pry bar, pinch bar or digging bar to break it up. A rotary hammer with a spade or chisel bit can also work well for loosening compacted soil. If you dig too deep, make sure to compact any soil you replace in the hole.

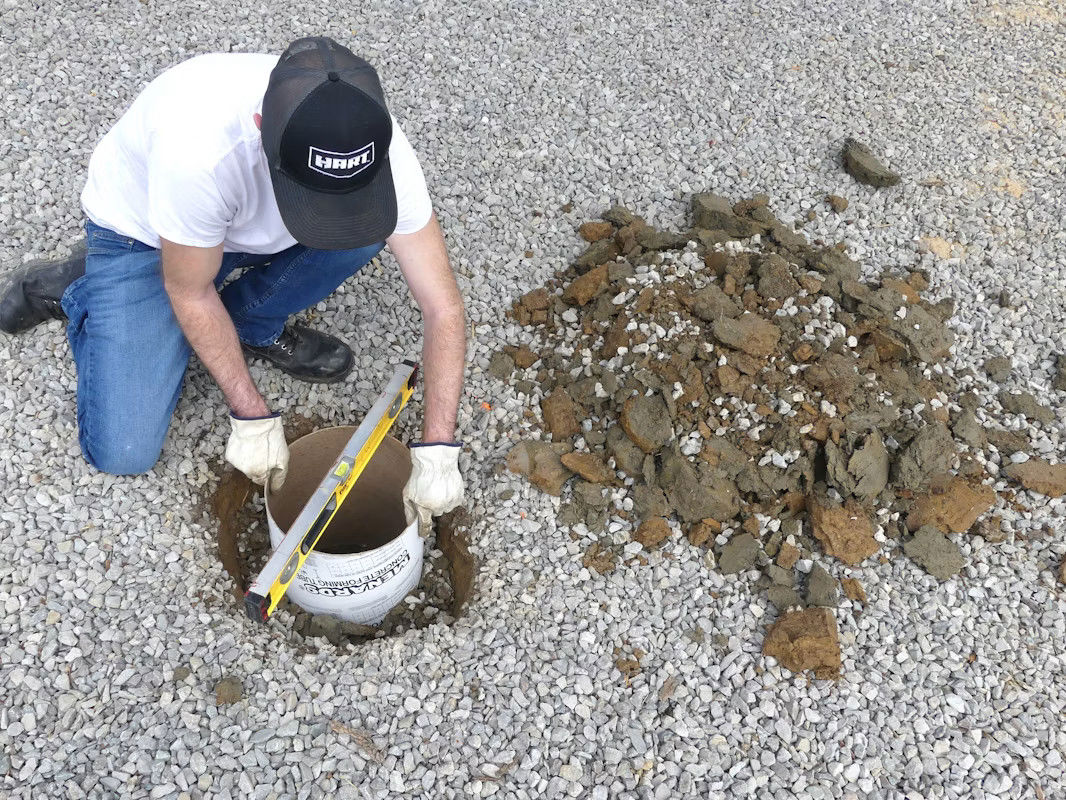
Step 4: Cut, Insert and Level the Tube
Insert the tube, then cut it to the desired height with a circular saw. As you backfill around the tube, pack the soil firmly with a board or similar tool to hold the tube in place. Use a level to make sure the tube stays plumb. This will help ensure the top of the footing is level. Rotate the level 90 degrees and check in two directions as you go.
Step 5: Have the Footing Holes Inspected
Depending on local building department requirements, footing holes may need to be inspected before the footings are installed. Schedule the inspection as required and do not pour the concrete until the holes have passed inspection.

Step 6: Mix the Concrete
Mix the concrete in a wheelbarrow or large mixing tub using a hoe. Read the instructions on the concrete bag to determine how much water to add. The mixed concrete should have the consistency of thick oatmeal. Do not add so much water that the mix becomes soupy. Too much water weakens the concrete.
Step 7: Add Rebar if Required
Concrete has tremendous compressive strength, so adding rebar is usually unnecessary for footings unless they extend far above ground and require additional lateral support. Check with your building inspector to determine whether rebar is required. If the footings will support a hot tub or a heavier structure such as a porch or gazebo, the inspector may require an engineer to specify the size, amount and placement of the rebar.

Step 8: Place the Concrete and Eliminate Air Voids
Shovel the concrete into the hole and poke it down with a stick to eliminate any air pockets. If the form tube extends well above the ground, lightly tap its sides with a hammer to help the concrete settle and release trapped air.

Step 9: Smooth the Top
Use a concrete trowel to smooth the top surface of the footing. If you don’t have a trowel, other flat tools can work just as well, such as a drywall taping knife or the smooth side of a tiling/flooring trowel. Smooth the surface evenly and avoid leaving a low spot in the center where water could collect.

Step 10: Install the Post Base Anchor
There are two basic types of post base anchors: those installed while the concrete is still wet and those installed after the concrete has cured. Anchors set into wet concrete generally provide better hold-down strength but must be positioned accurately when inserted. You may also need to clean up or re-smooth the surrounding concrete after placing them.
Anchors installed after the concrete has cured are typically attached with expansion or wedge anchors. The advantage of these types of post bases is that they allow you to fine-tune the post location as you begin laying out the deck frame. While base anchors should be located as close to the center of the footing as possible, shifting them slightly to achieve a perfectly plumb post is usually acceptable.
Whichever post base anchor you choose, follow the manufacturer’s installation instructions.
Common Mistakes to Avoid
Misaligned anchors or posts: Improper placement can complicate framing and compromise the deck's overall stability.
Undersized or too few footings: Footings that are too small or spaced too far apart can lead to settling and potentially structural failure.
Incorrect footing depth: Footings that don’t extend below the frost line are prone to heaving during freeze-thaw cycles.
Ignoring soil conditions: Building on unstable or poorly compacted soil can cause settling and structural issues over time.
Poor drainage: Allowing water to collect around footings can increase the chance of both heaving and settling and can accelerate rot if your posts are buried.
Adding too much water: Overwatering the concrete mix weakens its strength.
Neglecting inspections and permits: Skipping required approvals can lead to costly corrections and safety concerns later.
Frequently Asked Questions
How deep should footings be for a deck? Footings should extend below the local frost line to prevent movement from freeze-thaw cycles. Check with your local building department for the required depth in your area.
How wide should a deck footing be?
Footing width depends on the load and soil conditions, but most residential deck footings are at least 8 to 12 inches in diameter. Always size footings according to code requirements.What is the best footing for a deck?
Poured concrete footings are the most common and reliable option.Do I need rebar in my deck footings?
Rebar is not always required for standard residential decks, but it may be recommended in poor soil conditions or for larger loads. Follow local code requirements.How much do deck footings cost?
Costs vary based on size, depth and method, but most concrete footings range from about $25 to $100 each in materials.Can I use precast deck blocks instead of footings?
Precast deck blocks may be acceptable for low, freestanding decks in some areas, but they are often not allowed for larger or attached structures. Always verify with local codes.Do I need a permit to install deck footings?
Most deck projects require a permit and inspection to ensure proper depth, size and placement. Check with your local building department before starting.
For more detailed instructions, check out this Trex Academy video about How to Install Deck Post Footings.
Get Started On Your Deck Footings Project
While installing concrete deck footings may seem intimidating, it's doable with research and diligence. Looking for building support, find a contractor. Taking on the deck building yourself? Find a retailer to secure the supplies you need.