How to Build a Ground-Level Deck
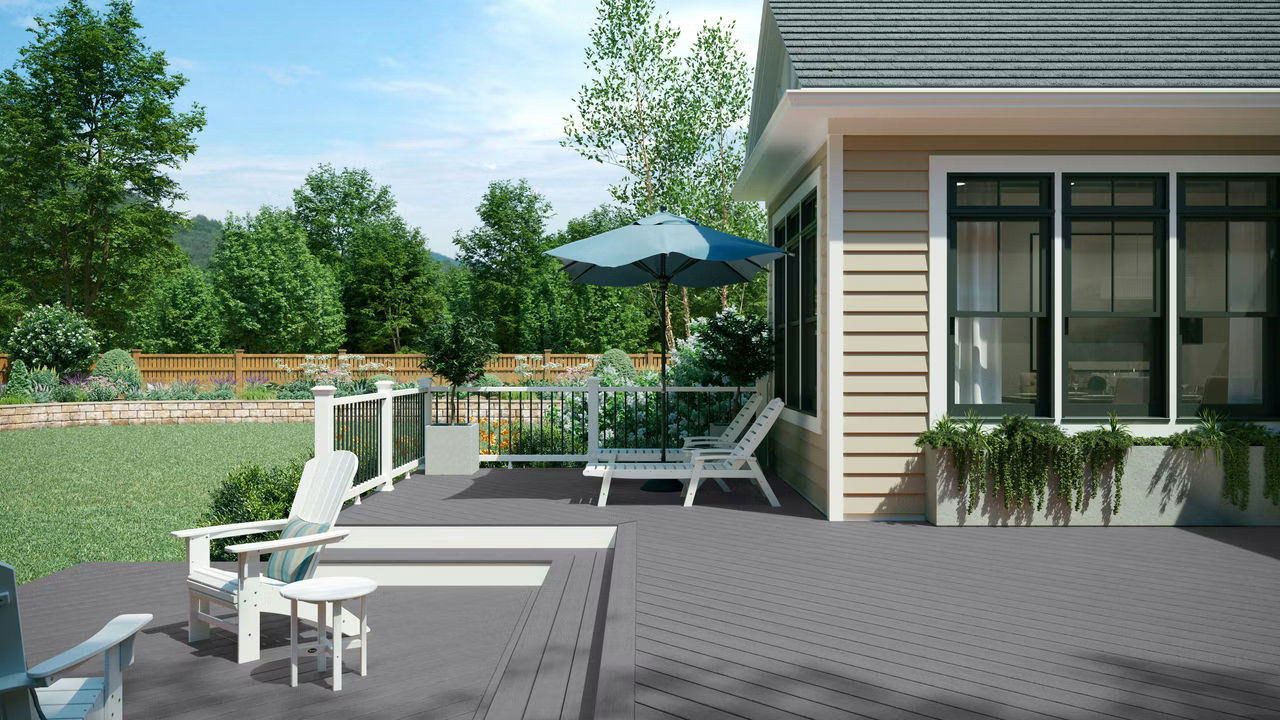
A ground-level deck, sometimes called a freestanding or floating deck, is one of the easiest ways to expand your outdoor living space and make your backyard more functional. Whether you want a defined area for grilling, a dedicated space for entertaining or a quiet spot to enjoy your morning coffee, a low-profile deck creates a solid, level surface for patio furniture and outdoor living.
In this guide, you’ll learn what defines a ground-level deck, when permits might be required, why they’re often more affordable to build and the step-by-step process for constructing a simple platform-style deck.
Can you build a deck on the ground?
Sometimes, in arid climates, such as the southwestern United States, deck joists can sit directly on a properly prepared, level base of drainable stone. In these dry regions, minimal moisture and a well-draining base can reduce the risk of rot and movement.
However, in most regions, a deck should not be built directly on soil. A proper foundation system, such as deck blocks, concrete footings, adjustable pedestals or another approved support base, is still the best way to support the framing and prevent moisture damage, settling, and structural movement.

How to Design a Ground-Level Deck
Start by deciding where the deck will provide the most benefit. Think about how you plan to use the space, whether for dining, lounging, grilling or creating a transition between the house and yard. Evaluate sun exposure, prevailing winds, privacy, and how the deck will relate to existing landscaping or walkways.
Size the deck carefully to make the most efficient use of decking materials. Plan the width so you can start with a full board and finish with a full board, avoiding the need to rip the last board down to a narrow strip. Find out the available lengths of the deck boards you plan to use. Common composite board sizes include 8, 12, 16 and 20 feet. Adjust the deck dimensions accordingly to minimize cuts and material waste.
Looking for inspiration? Explore this article showcasing a range of ground-level deck designs.
Consider Ground-Level Deck Drainage and Ventilation
The ground beneath a deck will get wet from rain, irrigation and natural moisture in the soil. Prolonged dampness can cause framing lumber and deck boards to deteriorate prematurely. To reduce moisture buildup, provide adequate ventilation and drainage so the area beneath the deck can dry between wet cycles.
Whenever possible, build the deck with at least 6 inches of clearance between the ground and the bottom of the joists. If the deck is less than 6 inches above grade, avoid solid skirting that blocks air movement. Instead, leave the perimeter open or use ventilated skirting. Also, make sure the soil beneath the deck is properly graded to prevent standing water.
What is the best type of material to use?
Because a ground-level deck sits close to the soil, material selection is critical for long-term durability. Build the frame using pressure-treated lumber. If the bottom of your framing is less than 6 inches above the soil, use treated lumber rated for ground contact. This type of lumber contains a higher level of preservative to help protect against rot, fungal decay and insect damage. The thickness of the joists you use will depend on how far each one spans. This joist span calculator can help you determine the proper joist span and spacing.
For the decking surface, many homeowners choose low-maintenance composite decking. Unlike traditional wood, composite boards won’t splinter, warp or require regular staining and sealing. And with its resistance to moisture, composite decking is perfectly suited for low-clearance decks where airflow may be limited and moisture exposure is higher
Investigate Local Deck Regulations
Before finalizing your deck design, investigate local code and zoning requirements. Verify whether a building permit is necessary and review any property setback requirements that may limit how close you can build to lot lines, easements or neighboring structures. And always check to see which local Homeowner’s Association regulations might restrict your design.

Building a Ground-Level Deck Step-By-Step
The steps below focus specifically on building a freestanding, ground-level deck supported by an approved foundation system, such as deck blocks or concrete footings, rather than a deck connected to the home with a ledger board.

Step 1: Install the Base
A ground-level deck still needs a stable, well-supported foundation. The right support system could depend on soil conditions, deck size and local code requirements. Here are some common foundation options:
- Concrete deck blocks can be a low-cost option, but they can be tricky to install because all blocks must be set to the proper height.
- Adjustable deck pedestals are becoming more popular because they can be placed directly on the ground and adjusted to the proper height. Using blocks or pedestals along the length of each joist can also eliminate the need for beams.
- Poured, concrete, frost footings that extend below frost depth provide greater stability and long-term performance.
- Poured, surface footings (shown here) can eliminate the need for a beam below the joists.
- Helical or screw piles can be a good option in areas with poor soil.
Before installing any ground supports, remove organic material and add a compacted gravel base beneath them to reduce settling. Use a string line and level to ensure all supports are aligned and set at the correct height.
Check out this article to find out more about deck footings. Once the supports are in place, install a barrier to prevent weeds from growing through the deck boards.
Step 2: Crown the Lumber

Before assembling the frame, identify the crown in each board. Most dimensional lumber has a slight natural curve along its length. The convex side, or the side that bows outward, is called the crown. Sight down the edge of each board to locate the crown and mark that edge with a pencil or marker. Install all joists and beams with the crown facing up. Positioning the crown up helps reduce sagging over time, and keeping all boards oriented the same way prevents wavy or uneven surfaces.
Step 3: Set the Beams
If your ground level deck rests on beams, once the footings or piers are in place, install the beams. Position the beams directly over the footings and ensure they are properly aligned and level across the entire span. Use a string line to check for straightness. If minor height adjustments are required, use composite shims that are rated for structural applications. Avoid wood shims, which can compress or deteriorate over time.
Secure beams to posts or piers using approved structural connectors, and fasten them according to manufacturer specifications and local code requirements. This beam span calculator can help you determine the proper beam span.

Step 4: Build the Frame
Space joists according to your deck’s span and the decking manufacturer’s requirements; 12 or 16 inches on center are most common. Depending on your layout, it may be easier to install the interior joists after the perimeter frame is assembled. For this deck, it was easier to fasten the joists to the rim joist closest to the house first, then push the assembled sections of the frame tight against the wall. The rim joist on the side away from the house was installed later, after most of the decking was in place (see Step 5).
Fasten the rim joists and end joists together using structural screws rated for treated lumber or code-approved joist hangers. Check with your local building inspector to confirm which is the best option.
Before attaching the frame to the beams or base below, measure diagonally from corner to corner to ensure the frame is square. Then run a string line along the perimter joists to confirm they are straight. Adding blocking between joists will help create a stiffer, more solid walking surface.

Step 5: Protect the Frame
Before laying the deck boards, it’s a good practice to apply joist tape or a protective membrane on top of the joists and other framing members. This barrier helps reduce water penetration, protecting the structure from moisture and extending the lifespan of the framing by minimizing rot.

Step 6: Start with a Clean Edge
The ends of composite deck boards don’t always come perfect from the factory. Before cutting to length, trim about half an inch off one end to create a perfectly square, clean starting edge. Then measure from that end to cut your board to the final length.

Step 7: Install the First Board
If the width of your deck doesn’t allow for an exact number of full deck boards, you’ll need to rip one board to fit. By starting with a full board at the outside rim joist, the final board you install (the one up against the house) will be the one you rip down. Placing the narrower board against the house keeps it less noticeable than at the outer edge.
On this project, we left the outside rim joist off and started with a full board at the house. Nearing the rim joist, we measured and trimmed the joists precisely. After cutting, we installed the rim joist and final boards, ensuring everything aligned perfectly with the fascia.
If you do use this method, it will only work when the total width of the deck can vary by a few inches and exact dimensions aren't critical. Additionally, when leaving the rim joist off, be sure to install a temporary brace (see photo in step 8) or temporary rim joist to keep all the joists aligned and prevent them from warping or twisting until you install the permanent rim joist.
Once again, confirm the frame is square and the edges are straight, and install the first board, using a string as a guide to make sure it runs straight. If the first board is curved, the rest of the boards will follow suit.

Step 8: Lay the Decking
Decking typically requires a gap between the boards to allow for drainage and drying. To accommodate seasonal expansion and contraction, gaps are often required at the ends of the boards as well. Always follow the manufacturer’s spacing recommendations.
Deck boards can be fastened using one or more of these types of fasteners:
- Face screws: The most common method for wood decking. Exterior-rated deck screws provide strong holding power and are easy to remove or replace if needed. Always use fasteners rated for pressure-treated lumber.
- Hidden fastener clips: Often used with grooved composite decking, these self-gapping clips fit between boards and fasten into the joists, creating a clean, fastener-free surface.
- Plug systems: For composite or PVC decking, some manufacturers offer color-matched plugs that conceal face screws for a more seamless appearance.
As you install the boards, use a string to periodically to check that the rows are straight and that the distance between both ends of the last row and the end of the frame are the same. You might have to adjust the gaps slightly to make sure the last board runs evenly with the outer rim joists.

Step 9: Trim the Ends
Instead of cutting each board to length before installation, another approach is to run one or both ends long and trim them in place. This allows you to cut all the boards at once to create a straight line. Be sure to snap a chalk line or use a straightedge or track saw to guide the cut.
On this deck, we installed one of the picture-frame boards first, ran the deck boards long on the opposite end, then trimmed them so the picture-frame board on the other side fit cleanly.

Step 10: Install the Fascia
Use fascia boards to finish the outside face of the framing lumber. Cut each one to length and dry-fit before fastening the fascia boards in place. Miter the outside corners for a clean look. To allow for expansion, leave small gaps at each miter joint, especially when using composite or PVC fascia. Fasten the boards into the rim joist using manufacturer-approved screws and spacing, taking care not to overdrive them.
Step 11: Add the Steps
If your deck needs a step or two, start by measuring the total rise from the deck surface to the finished grade. For more than one step, lay out and cut stringers from pressure-treated lumber rated for ground contact. Make sure the risers are consistent and that the tread depth meets local code, then secure the stringers to the deck framing.
If only a single step is needed, build a simple box frame instead of cutting stringers. Whether you use stringers or a box step, keep the assembly level, well supported, and properly fastened. Provide a solid bearing at the bottom on a concrete or paver landing pad for a safe transition to the yard, and top the step with decking that matches the main surface.
Step 12: Enjoy Your Deck
With the structure complete and the details finished, it’s time to put the deck to use. Add furniture, a grill, planters, and other personal touches that define the space and make it your own. Invite a few friends and neighbors over, fire up the grill and break in the space properly.
Common Mistakes to Avoid When Building a Ground-Level Deck
Ground-level decks may look simple to build, but small framing and planning mistakes can lead to sagging, movement, moisture problems or a bouncy surface. Avoid these common errors to help ensure your deck performs well for years:
- Not using beams. You can’t support a deck only at the corners and expect the joists to span freely. Every joist needs proper bearing, whether from a beam or from individual supports such as deck blocks or pedestals. Without adequate intermediate support, the frame will sag and feel unstable.
- Poor ventilation or drainage. Trapped moisture is a major threat to low-deck longevity. Make sure water drains away from beneath the deck and that air can circulate beneath the framing.
- Skipping blocking. Blocking between joists stiffens the frame and reduces bounce.
- No weed control. Install landscape fabric beneath the deck and consider adding a layer of gravel over it to keep it in place.
- Undersized or overspaced joists. Follow span tables and manufacturer requirements. Composite decking often requires closer joist spacing than wood. Exceeding span limits can lead to sagging, a spongy surface underfoot, and voided warranties.

FAQ: Ground Level Deck Building
Building a ground-level deck raises several practical and code-related questions. Here are answers to some of the most common ones.
Are ground-level decks easier to build?
Yes, because they are typically less than 30 inches above grade, ground-level decks usually don’t require stairs, guardrails, posts, or bracing. Their low height simplifies framing, reduces material needs, and minimizes the use of ladders during construction.
Do ground-level decks cost less?
Yes. While costs vary based on size, the simpler structure, lack of ledger board and reduced material needs make a freestanding, ground-level deck an efficient way to create a defined outdoor living space.
Do you need footings for a ground-level deck?
In many areas, yes. Even a low deck may require frost-depth footings or approved deck blocks, depending on local building codes. Always check with your local building department.
Can you build a ground-level deck on grass?
It’s not recommended. Grass and topsoil can shift over time and hold moisture, which can accelerate rot in framing lumber. Remove sod and organic material down to firm subsoil, then install weed-control fabric and a layer of compacted gravel. Any deck blocks, piers, or support pads should bear on stable, well-compacted soil to prevent settling and movement.
How close can a deck be to the ground?
There is no universal minimum, but most builders try to maintain at least six inches of clearance for airflow and drainage.
What is the best foundation for a ground-level deck?
Common options include precast deck blocks, adjustable pedestals and concrete piers. The best choice depends on soil conditions, frost depth, and local code requirements.
Do you need a permit for a ground-level deck?
In many municipalities, decks under 200 square feet, less than 30 inches high, and not attached to the home may not require a permit. Always check with your local building department before starting to confirm code requirements in your area.
Does a deck need to be sloped?
No. A deck with gaps between the deck boards and proper drainage below does not need to be sloped. However, some builders incorporate a slight pitch away from the house to help prevent standing water from the top of wood deck boards.
How do I find a qualified contractor to build my deck?
To find a qualified contractor to build your deck, check out this simple find-a-builder tool.