


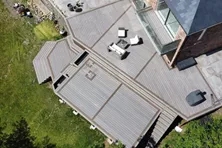
How to Install Flush Deck Headers & Beams
While all deck beams are designed to carry weight, there are different ways to install them. The average deck built at a home normally sports two different types of beams:
- Drop beam
- Flush beam
The drop beam is one which sits below the plane of the floor joists. The flush beam is one that's in the same plane as the floor joists and you might recognize one as the ledger board attached to the side of your home.
What is a Flush Beam?
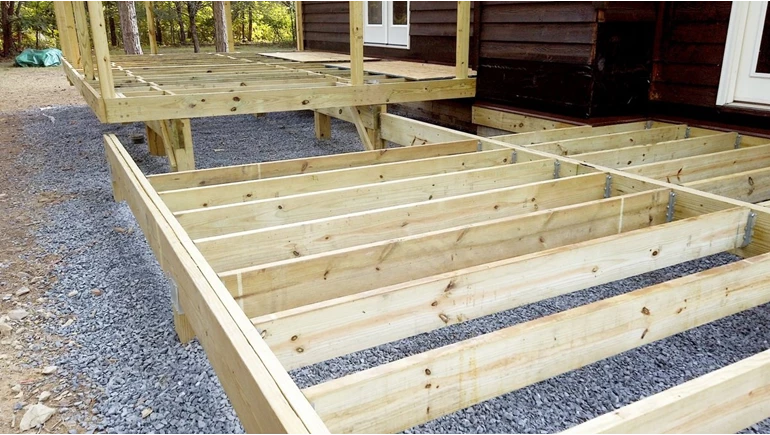
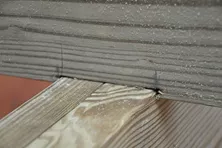
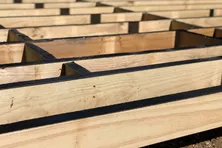
A flush or header beam is a structural member positioned at the same level as the joists. Because the joists and beams are in the same plane, you must use joist hangers to transfer the weight of the joist to the beam. This is the same situation one typically finds where a deck connects to a house where the joists connect to the ledger board.
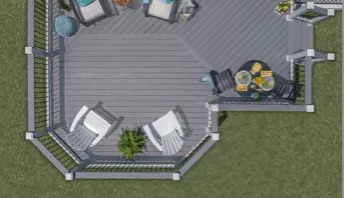
Flush beams are commonly used for framing angled deck forms such as octagons or on stair landings where a cantilevered beam would be less practical. Make sure you install your beams with the crown side up.
The crown refers to the curve you often see when looking down the edge of a long 2x piece of lumber. If you've paid attention to the shape of bridge decks that you drive across, then you've seen how they're not flat but have an upward hump to them. This is a crown.
Pros & Cons of Using a Flush Beam on a Deck
The biggest pro is that a flush beam allows you to save vertical space, often as much as 11 inches. In certain situations, this might mean the difference between building a deck or abandoning the project.
One con is that most railing manufacturers don't test their railing systems using flush beams. Another con is the need for a double rim joist so that the railing on the side of the deck is inset the same distance as the front of the deck.
Comparing Flush Beams vs. Drop Beams
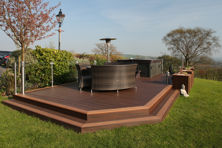
A flush beam is normally the go-to beam for decks close to the ground. A traditional drop beam may end up buried in the soil. If you do bury a pressure-treated beam in the soil, only use a beam rated for ground contact, and consult your local municipality prior to submitting your building permit to verify this application is allowed.
Before you start down the path of building a deck so close to the ground, you must take into consideration what the decking requirements are. Check with the decking manufacturer as many require a certain amount of open-air space between the bottom of the decking and the soil.
Differences When Installing a Flush Beam and Drop Beam
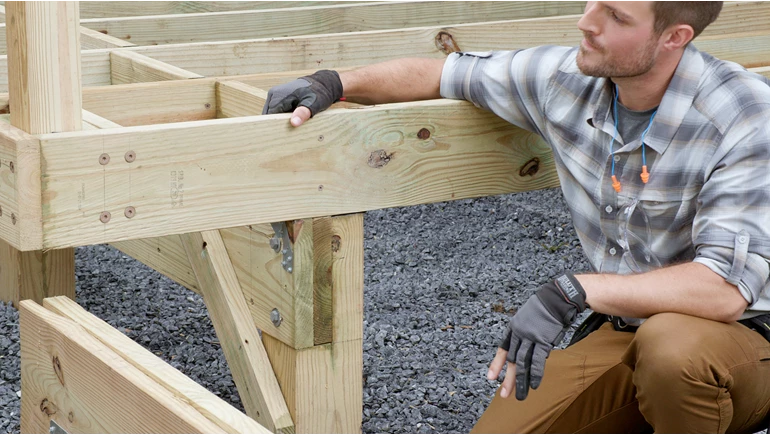
The support posts or columns for both a flush beam and drop beam are the same. For connecting the posts to the beams, one option is to use 6x6 treated-lumber posts and make a notch in the post to accept the beam, connecting the beam to the posts with code-approved structural bolts. Another connection option is to use structural post-to-beam connection hardware.
Always follow the hardware manufacturers' fastener requirements. Never hang a beam from a post using bolts only. The extreme weight of the beam, the joists, the decking, furniture, and people are concentrated on the tiny surface area of the bolts.
When installing joist hangers, be sure you use ones that are rated by the joist hanger manufacturer to survive direct contact with modern treated lumber that's exposed to the weather. They must be able to survive the chemical brew created when rainwater leaches copper out of the treated lumber and puts this liquid in contact with the metal joist hangers and fasteners.
The manufacturer may allow the use of either specific joist hanger nails or small structural screws that are manufactured by the same company that makes the joist hangers. Never ever use roofing nails as they're not structural fasteners. Read the instructions that come with the joist hangers and use the correct fasteners as well as the correct length.
For more information on installing drop vs flush beams, please visit Trex Academy.
Tools & Materials Needed to Install Flush Beams
A minimum amount of tools and materials are required for a deck flush beam installation.
Tools:
- Step ladders
- Measuring tape
- 4-foot level
- Circular saw
- Reciprocating saw
- Hammer
- Wrenches
- Builder's Optical or Laser Level
Materials:
- Material specified by architect or engineer for the beam which could be a 2x2,2x4, 2x8, etc.
- Hot-dipped galvanized nails to connect the beams together
- Joist hanger
- Correct joist hanger fasteners
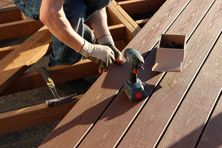
How to Install a Flush Beam on a Deck
It's quite simple to install a deck flush beam. Some refer to this as installing a deck header.
Step 1: Determine the height of the notch in the post
Since the top of the flush beam will be the same as the top of the deck floor joists, you need to transfer this elevation to the deck posts that might be in position and temporarily braced. This is the safest method instead of trying to do math with respect to the top of the ledger board at the house. A builder's optical or laser level comes in very handy in making this mark. Be sure to double-check the beam calculations for accuracy.
Step 2: Assemble the Beam
Assemble the beam using hot-dipped galvanized nails. Stagger the seams, but only directly over a support post, if you have to create a beam longer than the actual 2x material. Don't underestimate the weight of the beam. Long flush beams can weigh hundreds of pounds so be cautious when lifting the beam.
Step 3: Cut the Notches in the Posts
Once you've assembled the beam, you know how deep to make the notch in the support posts. Be sure the top of the post ends up about 1/4-inch below the top of the beam. You'll be through bolting the beam to this tongue of post timber that extends up alongside the flush beam.
Step 4: Install the Beam and Bolt It
Making sure the posts are securely braced in all directions and are plumb, lift the beam up and place it in the notches in the posts. Immediately tack the beam in place to the posts so it will not fall down. Use 16d hot-dipped galvanized nails for this connection. You can also drive long timber screws that are corrosion-resistant.
Using a 12-inch-long 1/2-inch auger bit, drill through the beam and through the upward-extending tongue of the post. Stay two inches down from the top of the beam and up from the notch, although you should always check with your local municipality for the regulations in your jurisdiction. Center the holes in the post tongue. Use a hammer to tap the 1/2-inch through-bolts in and through the holes. These bolts, washers, and nuts should also be hot-dipped galvanized, although coastal environments may require the use of certain grades of stainless steel. Use the wrench to tighten the nuts on the bolts.
Get Started On Your Deck Header & Flush Beams Project
It's important to know that, while it's not hard to install a flush beam, it can be dangerous work and there is a chance you can get hurt if you drop the beam during installation. If you lack the skills or the confidence, your best bet is to Find a Contractor near you who can help. You can also Find a Retailer and consult the Pro Desk or in-store experts when you are ready to get started on your project.
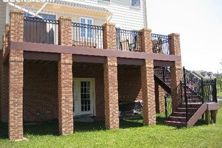
How to Decorate Deck Support Columns
Browse some examples of decorative deck support posts for tall decks.
Using Shims to Level the Deck Surface
Install shims or notch joist bottom across uneven joists to level your deck surface.
How to Extend a Deck
A deck extension is a great option when you feel like you need more outdoor space. Learn the step-by-step process of extending an existing deck.
How to Install Decking Over Existing Concrete Slab, Patio, or Porch
Discover the best techniques to build a deck over concrete, ensuring proper drainage and stability, while creating a beautiful outdoor space.

Best Time to Build a Deck
People often wonder when the best time to build a deck is. Learn why building a deck in winter or fall might be your best bet.
6 Best Alternatives to Wooden Decking
While wood decking was previously considered the standard material for building a deck, that’s changed. Homeowners have been exploring and embracing different types of materials, and the availability of alternative decking materials has grown significantly.
More Helpful Resources


Explore Articles by Topic
Footings
Information related to installing frost footings for decks
Framing
Learn structural framing methods
Decking
Learn about wood and composite decking materials
Stairs
An in-depth look at the complex issue of how to build stairs
Railings
How to install guardrails and handrails to meet IRC code

Features
An overview on water drainage, benches, planters and lights
Design
The basics of deck design

Planning
Learn about permits and working with contractors

Porches & Patios
Build a covered deck to enjoy all seasons
Ledger
Proper attachment techniques

Care
Maintain your deck to maintain your investment
Materials
An overview on water drainage, benches, planters and lights
Why is Joist Protection so Important for Your Deck?
If you’ve ever seen a piece of wood left out in the weather for any period of time, you know what happens: decay. Whether through wet rot, insect damage, or mildew, the fibers begin to break down.
Deck building tools
As with any professional job, having the right tools can make all the difference.

Roof Top Deck Construction
Rooftop decks transform otherwise wasted space into beautiful planes for entertaining, dining, relaxing and even gardening. The views will make your deck the talk of the neighborhood and draw frequent guests to your home or business.

What to Consider When Building A Wrap-Around Deck
Looking to add a wrap-around deck to your home but unsure of what the process involves? Check out this guide to learn more about top considerations when building a wrap-around deck.

Dos & Don'ts for Homeowners to Consider When Building a Deck
Your dream deck can take whatever shape you like. The trick is making it fit your budget and site conditions. While the deck doesn’t have to be built as a rectangle, there could be good reasons for doing just that.
Picture Frame Decking
Install a picture frame or perimeter board to finish the edge of your deck with style.
Explore Articles by Topic
Footings
Information related to installing frost footings for decks
Framing
Learn structural framing methods
Decking
Learn about wood and composite decking materials
Stairs
An in-depth look at the complex issue of how to build stairs
Railings
How to install guardrails and handrails to meet IRC code
Features
An overview on water drainage, benches, planters and lights
Design
The basics of deck design
Planning
Learn about permits and working with contractors
Porches & Patios
Build a covered deck to enjoy all seasons
Ledger
Proper attachment techniques
Care
Maintain your deck to maintain your investment
Materials
An overview on water drainage, benches, planters and lights