


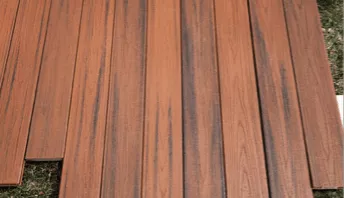
Deck Joist Sizing and Spacing
Bringing your favorite people together to enjoy a beautiful summer day on your deck is a great way to unwind and relax. And while it’s important to have a deck that’s aesthetically pleasing, you first have to make sure it’s structurally sound. That includes knowing the difference between a joist and a beam and what purpose they serve to your deck and its functionality and safety.
What Is a Joist?
Joists are the repeated structural members that are used to build a deck frame. The minimum size joist used in deck construction depends on the distance the joists span between bearing points and the species and grade of the treated lumber used to create the joists. The building code has strict minimum standards for the weight a deck floor must hold. You can determine the size of the joists using a span table.
What Is a Beam?
A beam is the main load-bearing element for the structural soundness of your deck. It’s not only responsible for supporting the weight of the joists, but other building elements as well.
The joists sit on top of a beam or are attached to a beam using joist hangers. Beams away from the house are almost always supported by vertical posts or columns. The size and construction of beams are very important, and should be specified by an architect, a residential structural engineer, or the building department of your local municipality.
How Far Apart Should Deck Joists Be Spaced?
Many questions revolve around joists when it comes to building a deck.
- What is the proper placement?
- How far apart are floor joists placed?
- How to keep them even?
Deck joist spacing is typically 16 inches apart, on center. Before you build your deck, verify this with your local building department and review the installation guidelines for your decking material. For instance, some decking materials installed at a 45-degree angle to the run of the joists require the joist spacing to be 12 inches on center.
Commonly used joint sizes are 2 x 8, 2 x 10, and 2 x 12. The size you choose depends on the distance the joists need to span and how much load they need to carry. The larger the span and more weight they need to support, the larger the joists need to be. Refer to the span chart below, and double check with your local building official about the specific building code requirements in your area.
In typical deck construction, with a ledger on one end of the joist and a beam on the other, the size of the joists is driven by the size of the deck and based on the general maximum spans mentioned above. For best results, refer to our wood and composite deck joist span table.
You can also use Decks.com’s Joist Span & Spacing Calculator to determine how long your deck joist should span.
Deck Joist Spacing by Wood Type & Deck Size
This chart outlines allowable joist spans based on wood species, joist size, and spacing. Always ensure compliance with local building codes and guidelines.
| Joist Spacing (o.c.) | 12" | 16" | 24" | |
|---|---|---|---|---|
| Species | Size | Allowable Span | ||
| Southern Pine | 2x6 | 9'-11" | 9'-0" | 7'-7" |
| 2x8 | 13'-1" | 11'-10" | 9'-8" | |
| 2x10 | 16'-2" | 14'-0" | 11'-5" | |
| 2x12 | 18'-0" | 16'-6" | 13'-6" | |
Douglas Fir-Larch, Hem-Fir, Spruce-Pine-Fir | 2x6 | 9'-6" | 8'-4" | 6'-10" |
| 2x8 | 12'-6" | 11'-1" | 9'-1" | |
| 2x10 | 15'-8" | 13'-7" | 11'-1" | |
| 2x12 | 18'-0" | 15'-9" | 12'-10" | |
Redwood, Western Cedars, Ponderosa Pine, Red Pine | 2x6 | 8'-10" | 8'-0" | 6'-10" |
| 2x8 | 11'-8" | 10'-7" | 8'-8" | |
| 2x10 | 14'-11" | 13'-0" | 10'-7" | |
| 2x12 | 17'-5" | 15'-1" | 12'-4" | |
### **Deck Joist Spacing by Wood Type & Deck Size*
*Source: [2021 International Residential Code (IRC) Section R507.6](https://codes.iccsafe.org/s/THPOTIRC2021P1/part-iii-building-planning-and-construction/THPOTIRC2021P1-Pt03-Ch05-SecR507.6)*
*Disclaimer: Always verify spans with your local building authority and adhere to regional requirements.*
What are Joist Hangers?
Joist hangers are used to attach the ends of joists to the face of a beam or ledger board. Joist hangers must be exterior grade and approved for contact with the newer treated lumber with a higher copper content. Each time it rains, a chemical brew is created from the rainwater touching the joists. This solution will corrode substandard joist hangers and the fasteners used to connect them to ledger boards and flush beams.
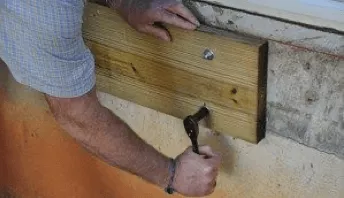
What About Attaching Joists to Ledger Boards?
Be particularly cautious to follow an approved ledger connection method to the house. Always follow local code guidelines for installing and properly flashing the ledger board, or consider building your deck as a freestanding structure. Incorrectly installed ledger boards account for many deck collapses every year. Refer to the Decks.com article on ledger boards for more information.
What are Other Joist Installation Considerations?
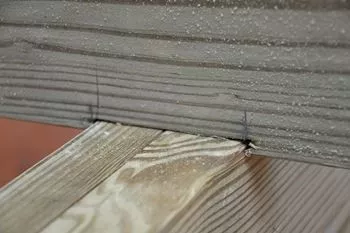
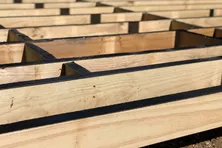
Joists are rarely perfectly straight. Most have a crown. Crowns can help prevent low spots mid-span in heavily loaded joists. You’ve probably never paid attention as you cross one, but almost all bridges have a crown for the same reason.
If you identify a crown on the board, you should always install it, with the hump pointing upwards to the sky.
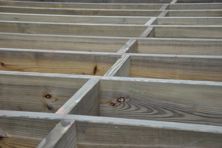
The layout term for joists is “On Center,” which is the center-to-center measurement from one joist to the next. Most decks use 16" on center spacing for joists, and most decking is not strong enough to support wider spans than 16". Some builders reduce joist spacing to 12" on center to strengthen the deck frame or to increase maximum allowable joist spans.
Joist Spacing for Composite Decking
Before building a composite deck, always read the installation instructions from the manufacturer, paying special attention to the required joist spacing for that specific composite decking. Most composite decking materials, like Trex composite decking, limit maximum joist spacing for composite decking to 16" on center spacing for straight decking and 12" on center joist spacing for 45-degree angle diagonal decking.
Many composite decking materials also require 12" or even 9" on center stair stringers spacing to support composite stair treads. If you install composite decking over an existing frame, you may need to install new intermediate joists or stair stringers to meet the installation requirements.
Since most composite products are more flexible than their wood counterparts, they don’t hide imperfections in the framing. This can sometimes cause an uneven surface. That’s why stretching a string across the joist for composite deck boards can help detect spots that may be higher than others. These spots can be addressed with a power hand planer to give you a more uniform surface for the deck of your dreams.
How to Space and Lay Joists For Decking
As they serve an integral role in the structural integrity of your deck, taking the time to learn how to space floor joists is essential to the safety of the final result. Start by ensuring any existing structures are sound.
You’ll also need your deck plan ready, including dimensions and layout for the railing, especially if your railing installation method would otherwise interfere with the blocking of your frame. With a game plan and a little hard work, figuring out how to lay joists for decking can be relatively simple.
Materials & Tools Needed
You may need:
- Circular Saw
- Miter Saw
- Hammer
- Tape measure
- Drill
- Chalk Line
- Level
- Pencil/marker
- Fasteners
- Spare Lumber
- Safety Glasses
Step 1: Layout the joist positions.
If possible, lay out the locations of the joists on the rim board, ledger and beam while they’re laid out next to each other to ensure accuracy. It helps to know the layout of the railing posts locations, so a joist won’t interfere with through-bolt installation if needed. Also, keep in mind that you’ll need extra joists when building a picture framed deck.
Step 2: Mark the joist locations.
Using a pencil or marker, you can ether draw a line marking the location of both sides of the joist or draw one line and an X on the side of the line where you want your boards to set.
Step 3: Locate the crown on the joists.
Inspect all the joists and use a pencil or marker to make an X on the crown “hump up” side of each joist. It’s often easier to inspect and mark all the joists first, instead of inspecting each one right before you install them.
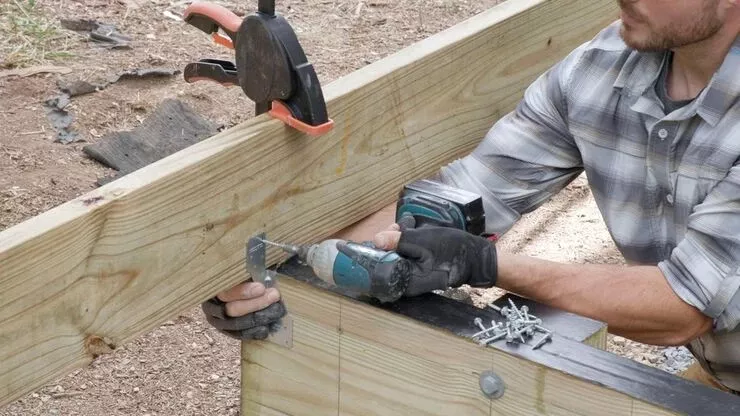
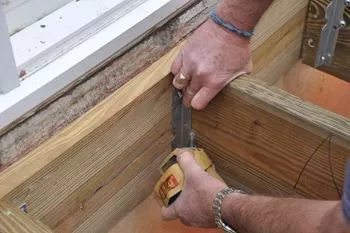
Step 4: Attach the joists to the ledger.
Toenail the joists to the ledger board at their proper locations. Make sure the crown is up, and the top of the joists are flush with the top of the ledger. Set the joists on the beam in the corresponding location as you go. You can toenail the joists to the beam if you want to but it’s not necessary. The nails are only meant to hold the joists in place until you secure them permanently with structural hardware. Instead of toenailing the joists in place, you can install the joist hangers first, but in order to do that, you need to account for the variation in the width of the lumber (see pro tip below).
Pro Tip: Account for inconsistent lumber widths.
The widths of modern framing lumber, especially treated lumber, can vary, sometimes as much as 3/8” from one to another. So, if you set all the hangers on the ledger first to accommodate a joist that’s 9 1/4” wide (for example), when you install a joist that’s only 9” wide into a hanger, it will be 1/4” lower than the 9-1/4” joist next to it. This will result in a wavy top surface. The same problem arises when you set different sized joists on the beam. There are a couple ways to deal with this. You can raise narrow joists with shims or lower wide joists by creating notches in them. Discuss this process with your local building official to see which method they recommend.
Step 5: Secure joists to beam.
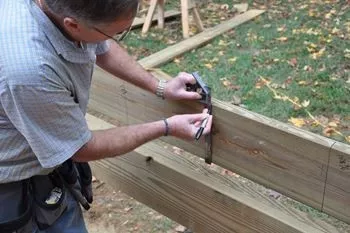
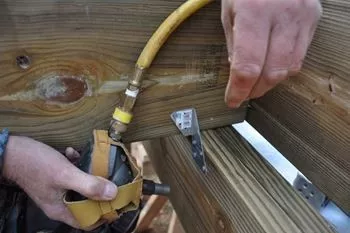
Use approved rafter tie connectors—often called hurricane clips—to secure each joist to the beam. There are a few different brands and configurations that will work, but be sure to use the fastener size, type, and quantity specified by the hardware manufacturer. The same applies to the joist hangers you select.
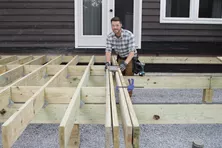
Step 6: Trim off the ends of the joists.
While it is easier to cut each joist to size on a sawhorse, you’ll get a straighter rim joist if you wait until they are in place. If there’s a bow in the house wall, or if you don’t get every joist to fit perfectly flush against the ledger, your rim joist won’t be straight. A circular saw is the best tool to accomplish this step.
Step 7: Install the rim joist.
Once the joists have been trimmed, install the rim joist so each joist lines up on the marks you made earlier. It’s easier to nail the rim joist in place, and come back and add your structural screws or joist hangers after.
Step 8: Install the joist hangers.
Install the joist hangers on the joists attached to the ledger and to the rim joist if you didn’t secure the rim with approved structural screws. Check out this article for more information on which joist hanger will work best for your deck frame.
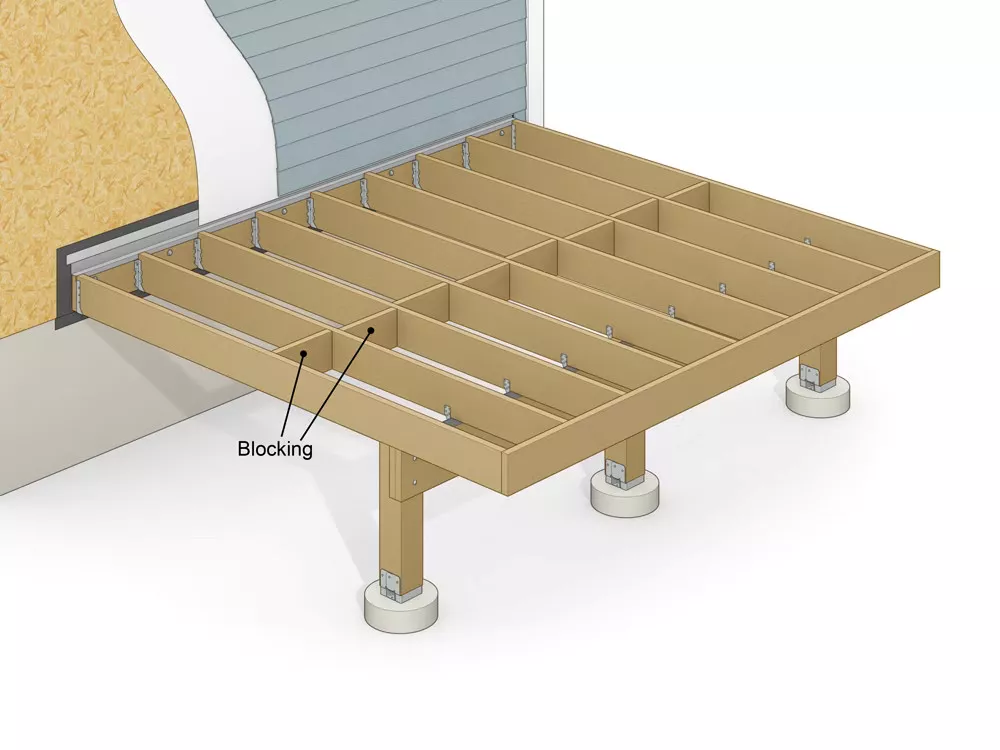
Step 9: Install the blocking.
Mid-span blocking will make your deck sturdier and will help keep the surface uniformly flat. Where you install it depends on how large your deck is and if you’ve incorporated any other type of bracing. In addition to joists blocking, you’ll also need to install the blocking for your railing posts. The type of blocking required for a post depends on the installation instructions provided by the manufacturer of the railing system you plan to install.
Need more help building your deck?
Building a safe frame can be challenging work, because even the smallest mistakes need to be remedied. Finding professional deck contractors near you can ensure your project is completed in accordance with all local codes, constructed on schedule, and up to the highest standards. You can also use our find a retailer tool for the most appropriate materials or kits to make installation easier.
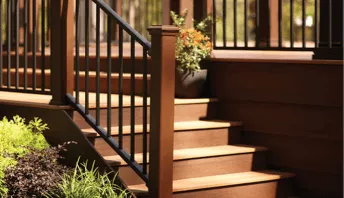
How to Decorate Deck Support Columns
Browse some examples of decorative deck support posts for tall decks.

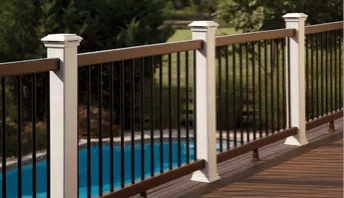
Building Above Ground Pool Decks
Add that finishing touch to your above-ground pool with a customized pool deck. Learn the essential steps from planning and permitting to installation and maintenance. Discover tips on choosing materials, ensuring safety, and deciding between DIY and professional help for a seamless and stylish poolside experience.

Building A Deck Over An Air Conditioner
Things to consider when building a deck near an air conditioning unit. You may want to relocate the AC unit if possible to avoid some problems.
How to Install Decking Over Existing Concrete Slab, Patio, or Porch
Discover the best techniques to build a deck over concrete, ensuring proper drainage and stability, while creating a beautiful outdoor space.

Introduction to Decking
Spacing between deck boards provides several critical functions, such as drainage & drying. Learn how to space and stagger deck boards at Decks.com.

Hidden Deck Fastening: 3 Ways to Fasten Your Composite Deck Boards
Hidden deck fasteners are the ideal option for DIY builders looking to hide their hardware, without sacrificing the stability of their deck. From nearly invisible deck plugs to color-matched deck screws, knowing how to choose and install these hidden fasteners is an easy way to level-up your deck project.
More Helpful Resources


Explore Articles by Topic

Footings
Information related to installing frost footings for decks

Framing
Learn structural framing methods
Decking
Learn about wood and composite decking materials
Stairs
An in-depth look at the complex issue of how to build stairs
Railings
How to install guardrails and handrails to meet IRC code

Features
An overview on water drainage, benches, planters and lights
Design
The basics of deck design

Planning
Learn about permits and working with contractors

Porches & Patios
Build a covered deck to enjoy all seasons
Ledger
Proper attachment techniques

Care
Maintain your deck to maintain your investment

Materials
An overview on water drainage, benches, planters and lights
Why is Joist Protection so Important for Your Deck?
If you’ve ever seen a piece of wood left out in the weather for any period of time, you know what happens: decay. Whether through wet rot, insect damage, or mildew, the fibers begin to break down.
Reinforcing Deck Rim or Band Joists
Learn a technique to strengthen your guard rails by installing a double rim joist and adding structural blocking to reduce bounce.
How to Sister Deck Joists
Learn about how to sister deck joists over a beam for framing a large deck or adding onto an existing deck.

What to Consider When Building A Wrap-Around Deck
Looking to add a wrap-around deck to your home but unsure of what the process involves? Check out this guide to learn more about top considerations when building a wrap-around deck.
How to Install Decking Over Existing Concrete Slab, Patio, or Porch
Discover the best techniques to build a deck over concrete, ensuring proper drainage and stability, while creating a beautiful outdoor space.

Best Hidden Deck Fasteners
Hidden fasteners create a clean deck surface and can be used with composite, wood and other materials. Learn about hidden deck fasteners at Decks.com.
Explore Articles by Topic
Footings
Information related to installing frost footings for decks
Framing
Learn structural framing methods
Decking
Learn about wood and composite decking materials
Stairs
An in-depth look at the complex issue of how to build stairs
Railings
How to install guardrails and handrails to meet IRC code
Features
An overview on water drainage, benches, planters and lights
Design
The basics of deck design
Planning
Learn about permits and working with contractors
Porches & Patios
Build a covered deck to enjoy all seasons
Ledger
Proper attachment techniques
Care
Maintain your deck to maintain your investment
Materials
An overview on water drainage, benches, planters and lights