


How to Build a Multi-Level Deck
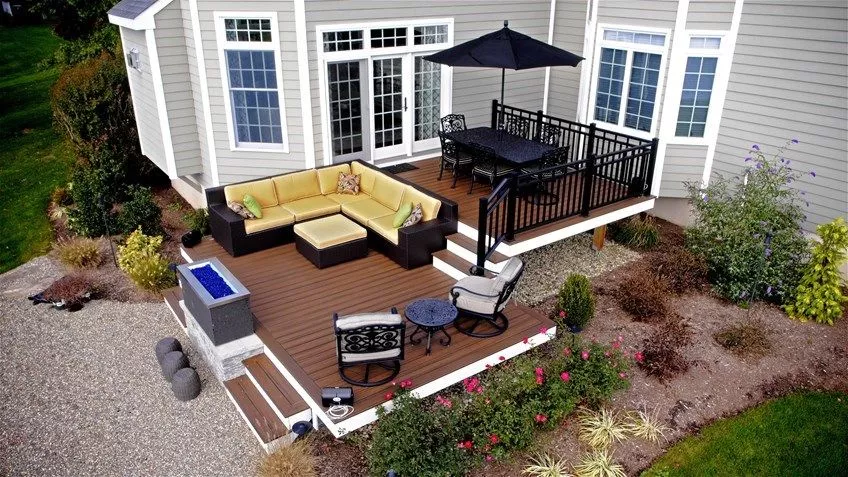
A multi-level deck expands your outdoor living space and adds elegant settings for dining areas, hot tubs, and fire-pits. It can also accentuate gardens and water features and bridge sunny and shady areas of your backyard. Naturally, multi-level decks require extra planning and work but don’t sweat it. They use many of the same construction techniques as single-level decks. Here’s how to build a multi-level deck, including how to select deck materials, estimate costs, set footings, build deck platforms, and install stairs to connect the upper and lower levels.
Multi-Level Decking Material Options
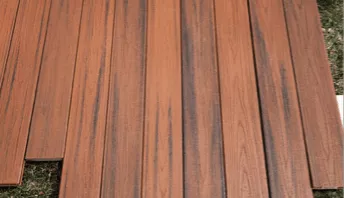
The materials used for a multi-level deck are the same as those used in single-level decks: Pressure-treated lumber for the structure, and wood, composites, or synthetic materials for the decking. Which of these decking materials is best for your project depends on your budget, the look you prefer, and the amount of time and money you have for maintenance.
- Pressure-treated Wood - made from Douglas fir or southern yellow pine, pressure-treated decking is made bug- and rot-resistant by infusing it with insecticides and other chemicals. It’s the most inexpensive and most common decking option. Drawbacks include the need for frequent maintenance, including cleaning, staining, and replacing deck boards that split or warp.
- Cedar - A traditional material that is naturally resistant to insects and rot, cedar is soft and easy to cut and fasten. It’s about twice the cost of pressure-treated decking. To keep it from turning gray, you must apply a stain and/or sealer every few years.
- Composite Decking - Using a combination of wood waste and plastic, composite decking resists the elements and requires little maintenance beyond a twice-yearly cleaning using mild soap and water. While a multi-level composite deck is more expensive than wood, it never needs stain, sealer, or paint. Plus, it comes with a 25-50 year warranty against splitting, cracking, rotting, and insect damage.
- Redwood - Like cedar, redwood resists insects and the elements, but it requires regular cleaning and refinishing to maintain the desired look. It’s also more expensive than PT decking. There are also concerns about its sustainability since it is sourced from old-growth forests that are difficult to renew.
- Ipe - This hard, dense, and heavy wood is native to South American rain forests. It looks good and resists rot and insects, but it’s expensive. Plus, because of its weight and density, ipe is difficult to work with compared to other materials.
- PVC - Decking is made from polyvinyl chloride and doesn’t rot, while resisting insect damage. However, color selection is very limited, and PVC lacks the warmth and character associated with natural wood and high-end composite decking.
Structural Materials
The type and quantity of materials required to build the structure of a multi-level deck depend on its size and design of it. Use this list of materials as a starting point to create your own.
- 4x4 and/or 6x6 pressure-treated lumber
- 2x8, 2x10 and/or 2x12 pressure-treated lumber
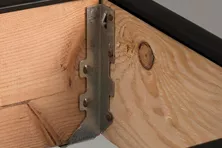
- Joist hangers, such as Simpson LUS
- Concealed joist hangers, such as Simpson LUC
- Standoff post base, such as Simpson ABA ZMax or ABU ZMax
- Anchor bolts, such as Grip Rite 1/2 in. x 8 in. Hot-Galvanized Anchor Bolt
- Post-pour anchor bolts
- Structural wood screws, such as Simpson Strong-Drive SDWS Timber Screws
- Lag screws
- Hurricane straps, such as Simpson H Series
- Carriage bolts with nuts and washers
- Hot-dipped galvanized framing nails
- Metal and butyl flashing
- Concrete mix
- Tubular concrete forms
- Wood sealer/preservative
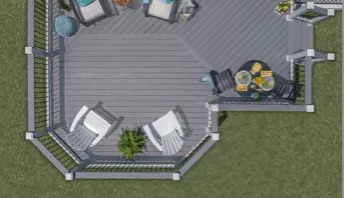
Planning Your Multi-Level Deck
There are many reasons to build a multi-level deck. Different levels can help separate the deck for unique use cases such as entertainment, cooking, and smaller group sitting areas. Multi-level decks can also follow a slope of the yard by tiering up or down as the ground level does. In this guide, we will walk you through the additional steps required to frame a multi-level deck.
For a refresher on the deck framing basics, check out these guides on Deck Framing Layout, How to Install Deck Frame Beams and Posts, How to Install Deck Ledger Board and Attach Flashing, and How to Install Deck Joists.
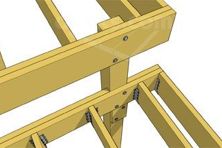
Step 1: Decide if you are using a freestanding or connected deck framing approach.
The framing of each individual deck can be free-standing, or they can be connected. A freestanding deck means that the deck stands alone and is not attached to the other levels. The different levels could be built as separate decks and finished one at a time. Connecting the decks is having the framing from each level attached to the next level. With the connected approach, the finished product would be completed after the framing was done for all levels. Before starting your multi-level deck project, consult your local municipality to determine which connection type is right for your build.
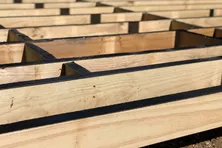
Step 2: Decide if you want to build each level with a flush beam or a drop beam.
The different levels can be built with a flush beam or a drop beam. The design of the deck will determine if you should use a drop beam or a flush beam. A drop beam can give more design flexibility if there is enough room to fit the beam between the deck frame and the ground. A drop beam would be attached under the joists. A flush beam is used when the deck is very close to the ground. A flush beam will have the top of the joists flush with the top of the beam. An angle bracket can be attached to the top of the joist and hung slightly over the edge of the joist for ease of installation.
Consider Costs
Because multi-level decks come in all shapes and sizes, estimating costs can be difficult. The best way to compare the options is to base your cost estimates on square footage. Expect to pay about $3-$6 per square foot for pressure-treated decking, $7-$15 for cedar decking, and between $5 and $13 for composite decking. These are retail prices for the decking materials only. If you plan to hire a contractor to build everything, including the structure, expect to pay about $25-$43 per square foot for a deck with pressure-treated wood decking, $41 for cedar decking, and $30-$60 for composite decking. For help calculating multi-level deck costs, try using our decking cost calculator.
Design a Deck Plan
Once you have an idea of the rough costs, sketch out a multi-level deck that fits your budget. You can do that on paper or with online tools, such as Decks.com’s Designer Tool. Take your time in planning. It’s easier to fix mistakes made during the planning stage than it is to relocate concrete footings.
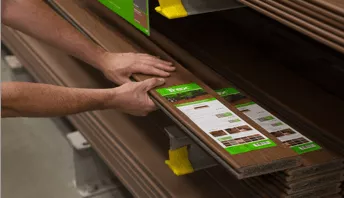
Select Your Materials
Most builders use pressure-treated wood to build the substructure, which can also serve as decking. This is the least expensive option but requires the most upkeep. While composite decking like Trex can be a larger up-front investment for decking material it lasts longer and requires less maintenance over time.
Ensure You Have All Necessary Permits
Permit requirements differ from place to place, but building authorities typically ask for a scale drawing of a multi-level deck’s structural framing. You might also need to specify the size and location of the footings and describe how you will connect the different levels to each other and to the house in your multi-level deck plans. Learn more about permit requirements here.
Tools Needed to Build a Multi-Level Deck
You may already own many of the tools required to build a DIY multi-level deck. Specialty tools, such as a cement mixer or auto-feed screw gun, can be rented. Below is a list of what you’ll need for the project from start to finish
Safety
- Protective eyewear
- Earplugs/headphones
- Leather gloves
- Dust mask
Measurement and marking
- 25-ft locking tape measure
- Ground-marking spray paint
- Pencil
- Chalk line
- Mason line
- String level
- 4-ft Level
- Post level
- Framing square
- Speed square
- Plumb bob
Construction
- Circular saw
- Power miter saw
- Hand saw
- Claw hammer
- Flat pry bar
- Drill and drill bits
- Impact driver and driver bits
- Screw gun with an auto-feed
- Ratchet wrench and sockets
- Chisel
- Wheelbarrow
- Shovel
- Posthole digger
- Cement mixer/mixing tub
- Trigger clamps
- Sawhorses
- Paintbrushes
How to Build a Multi-Level Deck
DIY projects can save you money, but they rarely save you time. Be patient. When you build a multi-level deck, focus on making each stage of the project a success. Step by step, your multi-level deck – your backyard oasis – will come together.
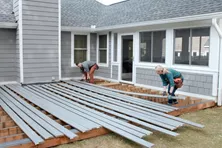
Step 1: Prepare the Landscape
Call 811 to have the utilities located before you dig. On sloped building sites, remove enough soil to make it level or near to level. Even if the site is flat, remove the sod and organic soil. That will improve drainage and help prevent weeds and trees from taking root. Landscape fabric can be added later.
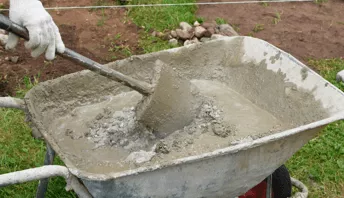
Step 2: Set the Footings
Using a measuring tape, a line level, and a plumb bob, determine where to dig the footings and mark each spot with spray paint. Use a posthole digger or auger to reach the required depth and insert cardboard forms into the holes. Plumb the forms and make them level with one another, then fill the forms with concrete and level the top. After the concrete hardens, fasten the post- or beam-connecting bracket to the footings. Helical piers are an alternative to poured footings, but they require specialized hydraulic machinery to drive them into the ground.
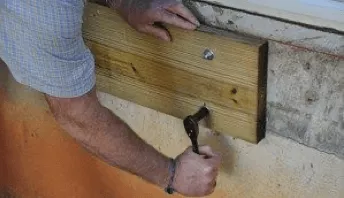
Step 3: Attach the Ledger Board
Establish the height of the finished deck at the house, subtract the decking thickness, and draw a level line. Using the straightest board(s) available, anchor the ledger(s) along this line with structural screws. Avoid placing the screws where the joists will attach and verify that the screws are reaching a solid structure. Engineered trusses/joists will likely need reinforcement from inside. On the exterior, add coated steel flashing and butyl-based tape to keep water away from the ledger and house. You might have to temporarily remove a row of siding to do this.
Step 4: Install Support Posts
At the footings, measure from the top of the post bracket to the top of the ledger board and subtract the height of the beam. This is the post length. Don’t worry about small variations in length. Just keep track of which post goes with each footing. Plumb the posts and screw them into the post brackets.
Step 5: Install the Beams
With a helper, set a beam on top of the posts, centering it from side to side. Make sure the beam is level and in full contact with each post top. It shouldn’t teeter and there shouldn’t be any gaps between the posts and beam. Verify that the beams are square to the ledger and to one another by measuring diagonally from corner to corner. Connect the posts to the beams using brackets and/or structural screws.
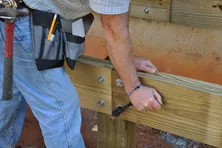
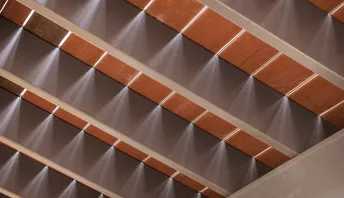
Step 6: Attach the Upper-Level Deck Joists
Pressure-treated lumber varies in size (dimension) more than untreated, kiln-dried lumber for interior use. That's because the moisture content of each board varies depending on storage conditions, time in storage, etc. To compensate, screw an angle bracket or wood scrap to the joist so it overhangs one end. This tab keeps the joist flush with the ledger or flush beam while you install the joist hanger. Be sure to push the joist hanger support flange tight with the bottom of the joist then install the manufacturer’s approved structural connectors as instructed.
Step 7: Install Blocking and Nailers
Add blocking between all the joists at the midpoint of their span to prevent them from twisting. Install more blocking around the deck’s perimeter to stiffen it. When using a dropped beam, which supports the joists from underneath, use blocking between the joists directly over the beam.
Step 8: Frame the Lower-Level Deck
Frame the lower level as you did the upper level. Since there is typically no ledger board to support the lower-level deck, attach it to the upper level’s structure or support posts. Note that the beams of the lower level typically rest directly on the footings instead of on support posts.
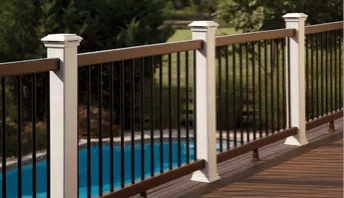
Step 9: Install the Railing Posts
If either deck will include railings, now is the time to install the posts to support them. Anchor each post to at least two structural members using the attachment method approved by your local municipalities building department. A trigger clamp is handy for holding the post in place while you fasten it. You can also screw a cleat to the side of the post to keep it at the correct height. Never notch a 4x4 post that will support a safety rail. That’s a hazard and a code violation.
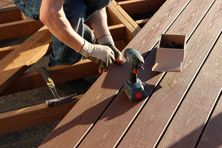
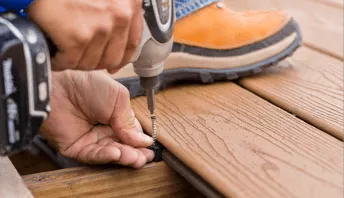
Step 10: Install the Deck Boards
Apply butyl-based tape to the joists and beams to protect them from rot. Using deck screws or an invisible fastening system, install the boards keeping a uniform gap between them. Let the ends run long, and later, when all the boards are secured, snap a chalk line and cut them to length. Use polymer-coated decking screws that are self-drilling and Composite deck screws will be desired if using composite decking, and self-countersinking. You can spare yourself some joint pain and speed up the job by renting a screw gun with auto-feed.
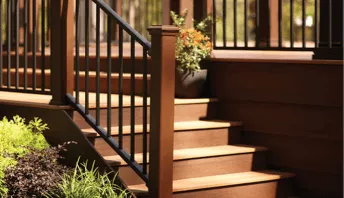
Step 11: Build Transition Box Steps to the Lower Level
A backyard multi-level deck calls for multi-level deck steps. A box step is nothing more than a smaller platform installed between the lower and upper decks, usually, after the deck boards have been installed. The box step’s height should split the distance between the upper deck and lower deck evenly, with no more than a 1/4-inch difference. Each step’s height should be no more than 7-3/4 inches and no less than 4 inches. Attach the box step to the upper deck framing using 3-inch structural screws. Fasten the front rim of the box step to the lower deck’s framing using brackets, such as Simpson Strong-Tie L70Z on the inside of the box prior to installing the deck boards.
For more detailed instructions on building a multi-level deck, please visit Trex Academy.
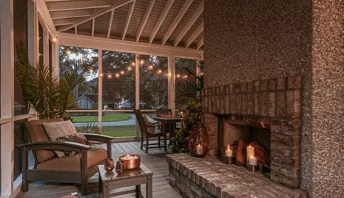
Enhancing Your Multi-Level Deck
A multi-level deck adds visual appeal and makes your outdoor space more user-friendly. But don’t stop there. Take it up a notch by adding some finishing touches.
- Rug - The strongest, most weather-resistant outdoor rugs are made from synthetic materials, including polypropylene, nylon, and polyester. To keep the rugs looking their best, clean up spills quickly and vacuum them often. Manufacturers of PVC decking boards typically discourage the use of rugs so check with the manufacturer first.
- Furniture - Multi-level decks can create outdoor “rooms” that call for fit-for-purpose furniture, including dining sets, end tables, and casual seating. It’s also possible to use the upper-level deck and/or the box stairs as informal seating.
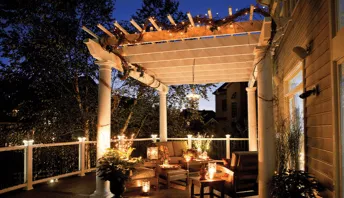
- Lighting - Outdoor lighting is not only functional—extending your deck time beyond daylight hours—but it also establishes an ambiance and enhances safety. For best results, run the wiring for your lights before you install the decking. Solar-powered lights require less wiring but need at least 6 to 8 hours of direct sunlight to charge the battery.
- Hot tub - To support a hot tub, place it on a concrete pad at ground level and build the deck around it. Engineering is usually required when placing a hot tub on a deck.
- Firepit - People are naturally attracted to the glow and warmth of a fire, which you can bring closer by adding a firepit. Fire pits fueled by natural gas or propane are common on decks while wood-burning fire pits are uncommon and can be very dangerous. Check with your homeowner's insurance company to see which type, if any, fire pits are allowed. Also, check with the decking manufacturer to see how fire pits may affect your warranty.
Get Started on Your Multi-Level Decking Project
Designing and building a multi-level deck is a big undertaking, but don’t let that overwhelm you. Instead, follow this step-by-step plan and take your outdoor enjoyment to a new level.
Let us help you find a contractor to design and build your multi-level deck.
We can also help you find a retailer to supply decking and other building supplies.
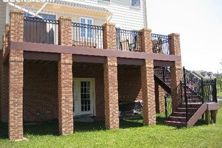
How to Decorate Deck Support Columns
Browse some examples of decorative deck support posts for tall decks.
How to Build a Freestanding Deck
You may need to build a freestanding deck if you can't attach a ledger board to the house. Learn how to build a self-supporting deck.
Deck Joist Water Protection
Learn about a technique used by many pro builders for wrapping deck framing lumber with a waterproof barrier to prevent corrosion and rot.
How to Install Decking Over Existing Concrete Slab, Patio, or Porch
Discover the best techniques to build a deck over concrete, ensuring proper drainage and stability, while creating a beautiful outdoor space.

Anatomy of a Deck
A comprehensive guide to help you learn the names and understand the functions of every part of your deck.

Building an Outdoor Space with James DeSantis
Composite decking can not be placed directly on concrete. But a substructure can solve for this. Explore this deck project with James DeSantis
More Helpful Resources


Explore Articles by Topic
Footings
Information related to installing frost footings for decks
Framing
Learn structural framing methods
Decking
Learn about wood and composite decking materials
Stairs
An in-depth look at the complex issue of how to build stairs
Railings
How to install guardrails and handrails to meet IRC code
Features
An overview on water drainage, benches, planters and lights
Design
The basics of deck design
Planning
Learn about permits and working with contractors
Porches & Patios
Build a covered deck to enjoy all seasons
Ledger
Proper attachment techniques

Care
Maintain your deck to maintain your investment
Materials
An overview on water drainage, benches, planters and lights
Why is Joist Protection so Important for Your Deck?
If you’ve ever seen a piece of wood left out in the weather for any period of time, you know what happens: decay. Whether through wet rot, insect damage, or mildew, the fibers begin to break down.
How to Use Shared Load Deck Support Posts
Learn how to support an upper and lower deck using one support post and a larger footing by bolting the lower deck into the side of the post.
How to Slope a Deck for Water Runoff and Drainage
Learn if your deck needs to be sloped and how to do it.

What to Consider When Building A Wrap-Around Deck
Looking to add a wrap-around deck to your home but unsure of what the process involves? Check out this guide to learn more about top considerations when building a wrap-around deck.
6 Best Alternatives to Wooden Decking
While wood decking was previously considered the standard material for building a deck, that’s changed. Homeowners have been exploring and embracing different types of materials, and the availability of alternative decking materials has grown significantly.
Anatomy of a Deck
A comprehensive guide to help you learn the names and understand the functions of every part of your deck.
Explore Articles by Topic
Footings
Information related to installing frost footings for decks
Framing
Learn structural framing methods
Decking
Learn about wood and composite decking materials
Stairs
An in-depth look at the complex issue of how to build stairs
Railings
How to install guardrails and handrails to meet IRC code
Features
An overview on water drainage, benches, planters and lights
Design
The basics of deck design
Planning
Learn about permits and working with contractors
Porches & Patios
Build a covered deck to enjoy all seasons
Ledger
Proper attachment techniques
Care
Maintain your deck to maintain your investment
Materials
An overview on water drainage, benches, planters and lights