Not all decks are attached to a building. It’s not uncommon to have a free standing deck that’s used as a viewing platform or a hidden retreat to read a book or relax from a grueling day at work. You may not know how to build a freestanding deck, but it’s really not much different from building a standard one. The key to building a floating or detached stand-alone deck is to make sure the support legs don’t wobble. Other than that, it’s really straightforward.
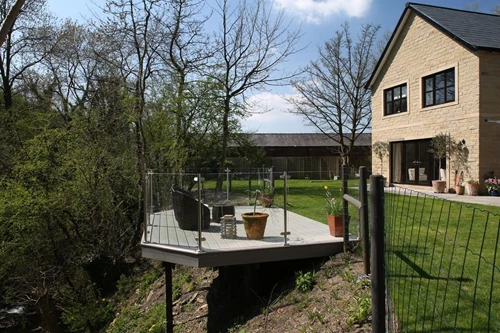
What is a Freestanding Deck?
A freestanding deck is a self-supporting deck structure built independently from a house wall ledger board attachment. Some freestanding decks stand alone in an open area. Above-ground pool decks are often built freestanding in this fashion.
Why Build a Freestanding Deck?
Some decks can't be attached directly to the house using ledger boards because of a house cantilever or a brick veneer. In other cases, such as stuccoed houses, many builders prefer to build a freestanding deck to avoid the mess and difficulty of cutting and flashing stucco. Some older houses may be built with uncertain wall construction that may not be strong enough to support a deck addition. These decks can be built freestanding using an additional beam and posts situated next to the house wall. It is important that these frost footings are installed on top of compacted soil to prevent them from sinking. Many new houses have unsettled soil surrounding the house foundation that was backfilled during construction. You may be required to install these footings below the house foundation.
What to Consider Before Building a Freestanding Deck
Structural Design
Freestanding decks greater than 2 feet above grade must be able to resist lateral and horizontal movement by providing diagonal bracing. Because there isn't a house to anchor one end of the deck, uplift and racking forces are greater issues that must be addressed in the structural design.
Diagonal bracing in the form of 4x4s bolted between the support posts and the beams at 45-degree angles can help resist movement on the deck parallel to the house. These braces are very common to support livestock fencing, especially corner posts. You’ll see a diagonal brace extend from the top of the corner post down to the bottom of the next closest fence post. Do this on both sides of each corner of your freestanding deck.
Diagonal decking and sway bracing installed under the joists can reduce racking forces. Buried support posts can help brace the deck and resist uplift from strong winds that could tip a freestanding deck over. However, buried posts are susceptible to wood-destroying insects. Structural hardware can connect deck posts above the ground to the concrete footings. This hardware is designed to resist uplift forces.
Any freestanding deck that’s higher than 4 feet above the ground should be designed by a registered residential structural engineer. The Internet is littered with videos of deck collapse videos and the threat of a collapse is a real danger. It’s easy to strengthen a freestanding deck to prevent collapse and an engineer will show you exactly how to build a safe structure. The money spent on a plan created by a structural engineer is the best money you’ll spend on the project.
Start With the Zoning Department
Before you hire a structural engineer to create your structural plan, you need to verify that you’re allowed to build the deck. Many cities and towns have very strict zoning laws that limit what you can build and how close the deck can be to your property lines.
It’s easy to get advice from your zoning officials and be sure you get a written copy of the zoning code showing that you’re allowed to build the deck. The zoning code will guide you with respect to how big or small your new deck must be.
If you have an issue satisfying the zoning requirements, you can file for a zoning variance that would allow you to build the deck. Keep in mind that zoning variances are usually only granted if you can prove you have a hardship complying with the zoning code.
Obtain a Building Permit
Decks of any type require a building permit. You’ll need to supply a plan of the deck and possibly elevations to obtain the permit. Consult with your building department officials to see what your plans must show so you can get the permit.
Before you go to a tremendous amount of work and expense in this part of the process, be sure your new deck is large enough for what you want to do on it. For example, if you want to have a table and chairs that might sit four people, your new deck will need to be a minimum of 12 feet by 12 feet so you have room to walk around the table while people are seated.
It’s always best to look at decks you love and know to be spacious. Record the measurements of the decks you’ve been on that you like. Use these measurements as your north star to come up with your plan.
Freestanding Deck Footings
Freestanding deck footings are the foundation for your deck. Decks create very large concentrated loads on the footings because the entire weight of the deck might be transferred to the ground by only six or eight 6 x 6-foot posts. The average deck can easily weigh several tons once loaded with furniture and people.
This is why the footings must be no less than 2 feet in diameter in most cases. Ask your structural engineer to specify the diameter and thickness of the concrete footings that will ensure the deck doesn’t sink into the ground.
Frost Depth is Important
You may live in an area where the ground freezes in the winter. In these locations, the bottom of the deck footings must be lower in the ground than the frost level. In the USA, the frost level in some areas can be deeper than six feet!
If you don’t put the footing below the frost level, the freezing ground can actually lift the entire deck up creating all sorts of stress that can damage the structural connections. Don’t overlook this very critical step. Your local building inspector will almost always want to make an on-site visit to ensure the footing holes are deep enough before you fill them with concrete.
It’s important that these frost footings are installed on top of compacted soil to prevent them from sinking. Many new houses have unsettled soil surrounding the house foundation that was backfilled during construction. You may be required to install these footings below the house foundation.
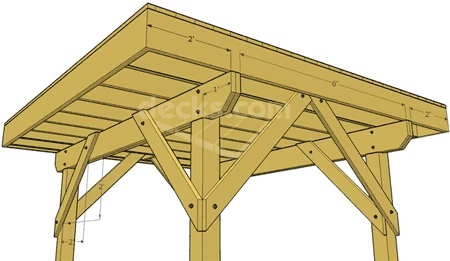
Freestanding Deck Framing
The most important thing to consider when thinking about freestanding deck framing is all of the diagonal bracing that needs to be done to ensure the deck doesn’t collapse. Decks of any type can start to sway back and forth if you have a large amount of people on the deck that are moving or dancing. You don’t want to risk a deck collapse, most certainly not when a large number of people are on the deck having a good time.
Don’t underestimate the amount of bracing that might have to be put under the floor joists. The most important bracing will be the cross-bracing that needs to be installed from the top of one post to the bottom of an adjacent one. Once again, your structural engineer will draw these braces and call out the exact materials needed to install them.
Lastly, be sure you keep 2 inches of air space between the deck and the house structure. You don’t want debris to get wedged in this space that could cause water damage to the house.
Deck Height
You might not think that deck height is important, but it is. You’ll discover that a finished deck surface that’s 2 inches lower than the finished floor level of the home is a very comfortable drop. This will ensure that water won’t find its way under the threshold of the door leading from the house to the deck.
When given the opportunity to choose the deck height, try to make the finished height of the deck some multiple of 7.5 inches above the ground, patio, or poured landing pad at the base of the steps leading up to the deck. Just about any architect or seasoned builder will tell you that a set of steps with 7.5-inch risers and 10-inch treads is the most comfortable set of steps to go up and down. They’re also among the safest.
How to Build a Freestanding or Detached Deck
Step 1: Layout & Prepare the Deck Site
The first thing to do is to get rid of any unwanted vegetation and debris that would be under the deck. The ground doesn’t have to be level, but the closer to level it is the easier your job will be.
Assemble a box using long 2 x 4 material that is the exact outer dimensions of your deck. If your deck is a square or rectangle, you can square it without doing any math. When the two diagonal measurements across the box are equal, it’s square. Once you have the box square, add a few 8-foot long diagonal braces at each corner so the box holds its shape and stays square.
Lay this box on the ground below where the deck will be once it’s built. Level it up using temporary small 2 x 4 legs, brick or anything to support it. You’ll now be able to locate the exact location of the footing holes as drawn by your structural engineer or architect.
Use spray paint to outline the outer diameter of the footing holes that need to be dug. Move the box out of the way and set it aside carefully making sure it stays square. You’ll be using the box again to carefully place the anchor bolts in the wet concrete when you pour the footings.
Step 2: Dig Concrete Footing Holes
Use shovels, picks, spud bars, post-hole diggers, etc., to dig the proper diameter holes to the required depth as called out on the plans provided by the structural engineer or architect. Precut any required reinforcing steel before you mix concrete. It’s wise to make the bottom of the hole wider than the top. This helps to distribute the weight of the deck across more soil and it also helps to prevent frost heave of the footings.
The top of the concrete footing should be at least 4 inches above the soil or finished grade at each footing location. This allows the wood or steel deck support posts to be up away from any puddles or overland water flow. It also allows you to easily detect any future insect infestation. You may have to build small forms to create a good looking top to the concrete footing. You can buy durable cardboard tubes and some special plastic forms made specifically for deck footings.
Once the holes are dug to the correct depth and you’ve compacted any loose soil at the bottom of the holes, you can put back in place the 2 x 4 box you assembled exactly where the deck will be positioned. Use this box to help you locate the forms for the footings. Keep in mind you need to know the exact place where the center of your deck support posts will be. This center point is where you’ll eventually have to install an anchor bolt in the wet concrete.
Step 3: Pour the Concrete Footings
Depending on how much concrete you need, you can either order it from a ready-mix concrete plant or you can buy bagged concrete and mix it yourself. When you do the math, you’ll probably determine the bagged concrete makes far more sense in most cases.
Read the instructions on the bagged concrete and only add as much water to the mix as is required. Adding too much water will weaken the concrete. The concrete consistency should resemble thick applesauce once mixed.
Pour the concrete into the holes and keep mixing it until you have enough for each hole to fill up the form. Use a wood or magnesium float to smooth the top of the footing that’s sticking up above the ground. Insert the anchor bolt at the exact center of where each deck support post will be.
Step 4: Install the Posts
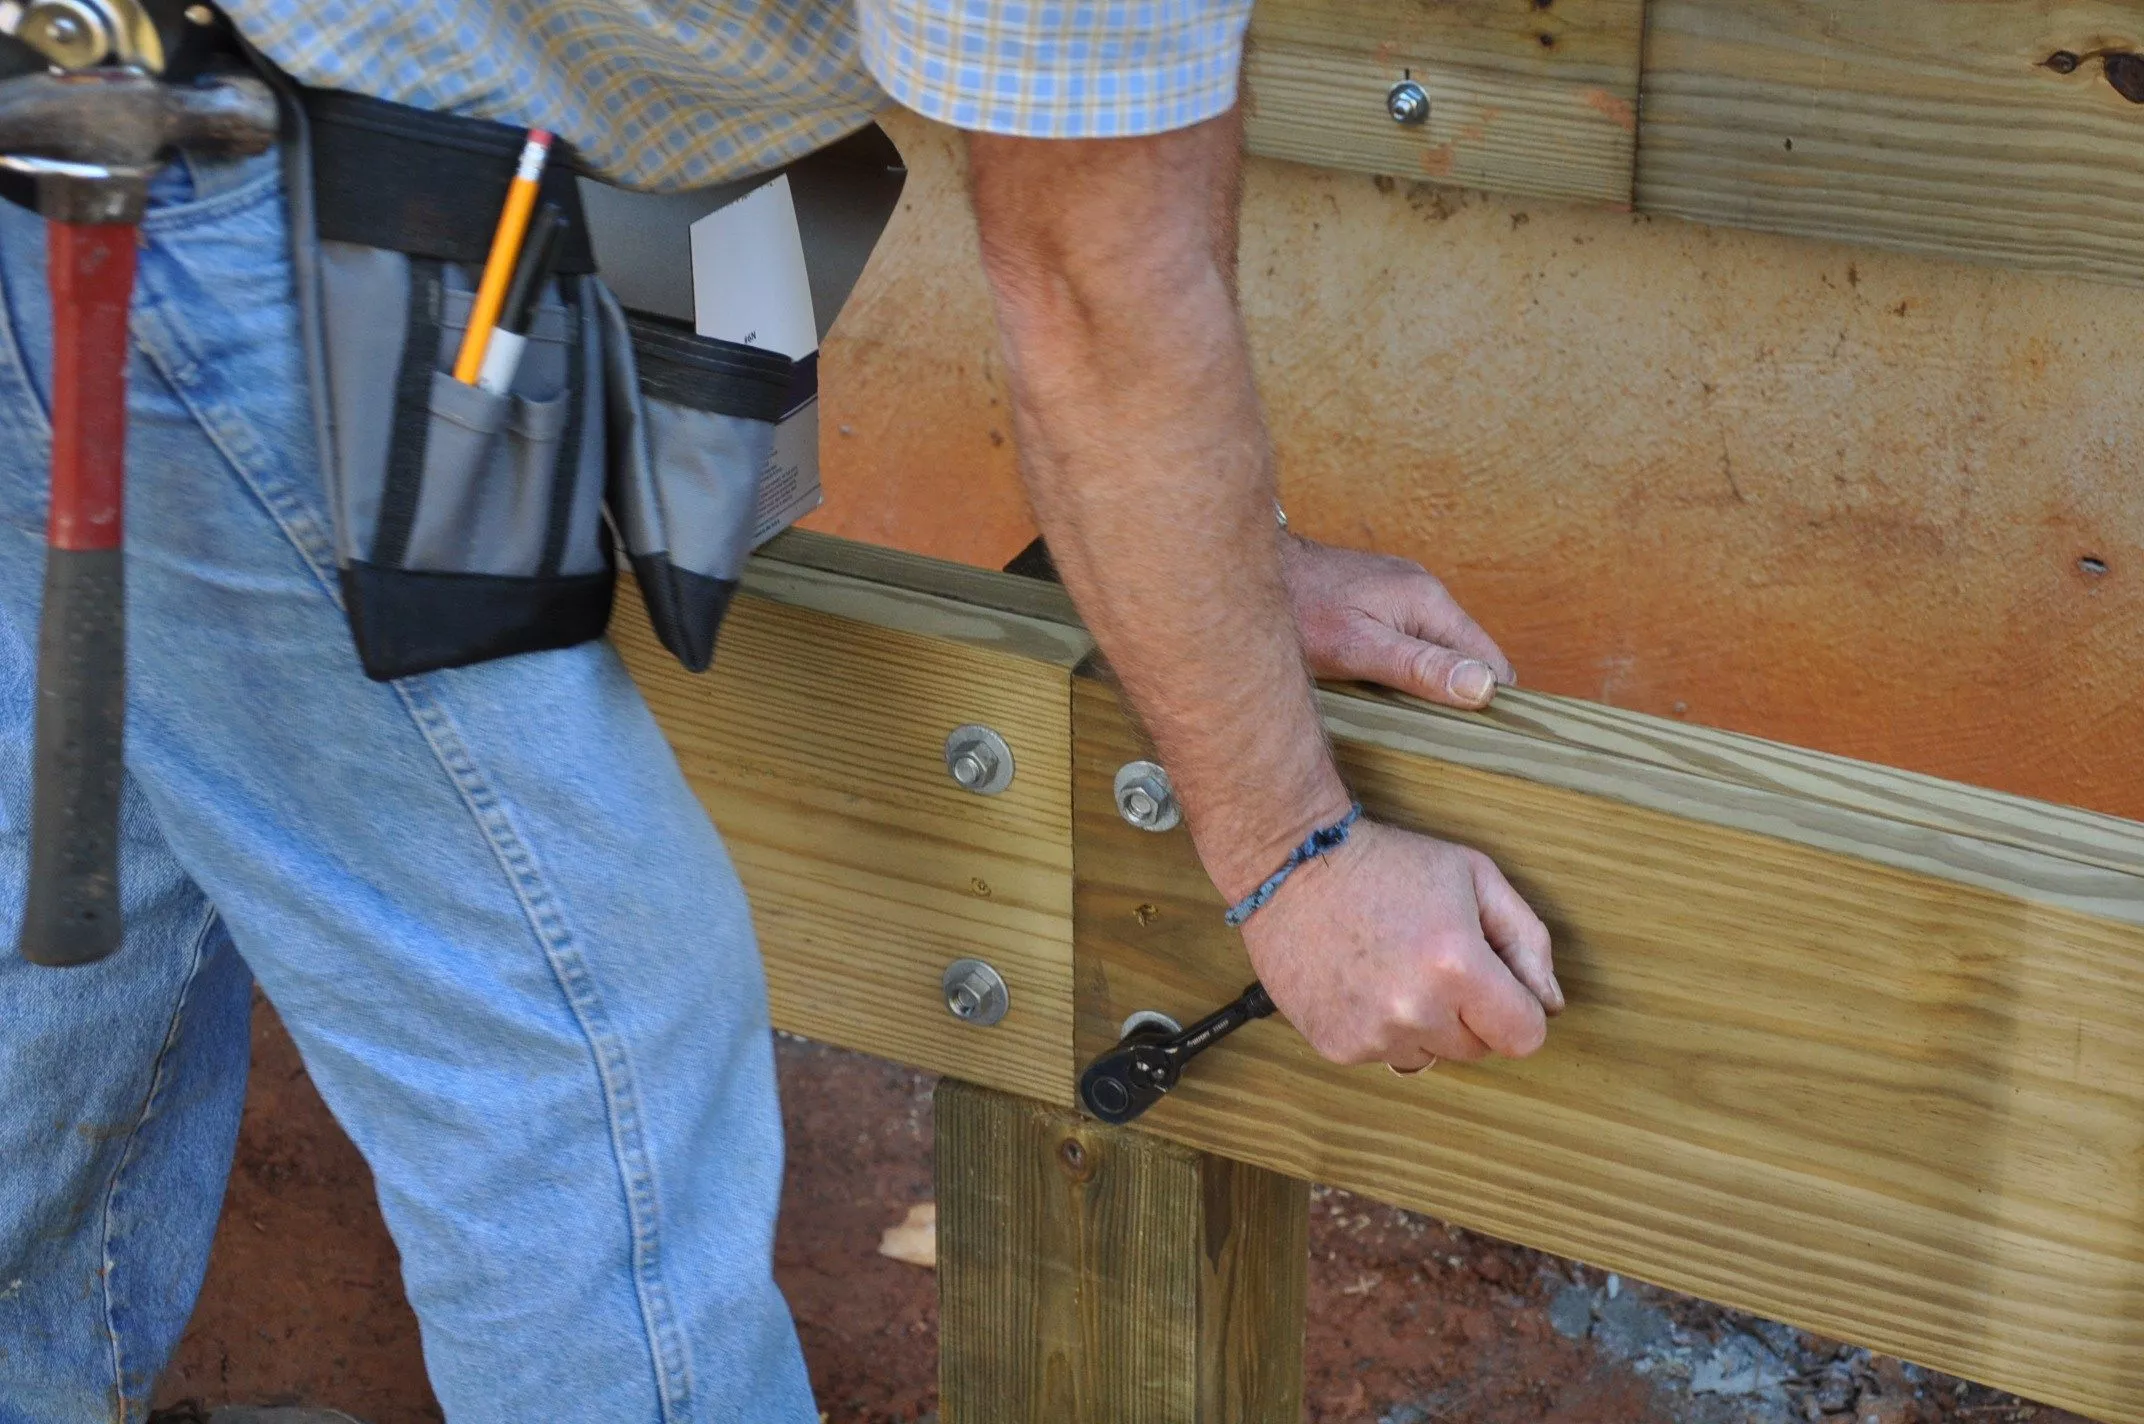
Your freestanding deck posts are extremely important. They’re the only thing that transfers all the weight of the deck to the concrete footings. You don’t want weak posts. It’s very likely the engineer or architect will specify 6 x 6 wood posts for this reason.
The posts will nest inside special galvanized hardware post support brackets that are secured to the concrete footings with the anchor bolt you installed. This hardware gets the wood post up off the concrete about an inch or so. This is a good practice to keep the wood post as dry as possible.
Install all the posts on the concrete footings using the special hardware post bases and brace them with 2 x 4s that are staked into the ground. You want each post to be plumb in both directions. Be sure the posts are a little longer than necessary as you’ll cut them or notch them to the correct height for the beam once they’re all in place. Check the braces so the posts are secure and can’t fall over.
The deck will probably have two beams, one each on the two longest legs of the deck. These beams should sit inside an L-shaped notch that you create using a circular and reciprocating saw. You can purchase special steel framing connectors that allow you to rest the beams on top of the posts should you not want to create the L-shaped notch. Never simply rest the beams on top of the posts and toenail them into the post. This is unacceptable.
Once you’ve determined the height of your beam, you then can calculate where the top of the posts must be. Use a traditional builder’s optical level or a laser level to help you get the tops of all the posts perfectly level. Triple check your measurements before you cut off any excess from each post. You only get one chance to get this right.
Step 5: Build the Beam
The engineer or architect will have sized your beam(s). Try to purchase #1 grade lumber for the beam(s) as well as the joists. This lumber has fewer knots and is stronger. Pay attention to the directions on the structural plan as to how you’re to build the beam(s). In almost all cases, you’ll have to nail or bolt two pieces of lumber together.
Modern treated lumber has a high concentration of copper in it as a preservative. This copper, in the presence of water, can cause severe corrosion of iron or steel. It’s imperative you use nails, bolts, and hardware that’s rated for this exposure. Simpson Strong-Tie is a great resource to help you make the right decision when it comes to the correct fasteners and structural hardware. The engineer or architect can also call out the safest fasteners.
Step 6: Set the Beam
The beam will be heavy. It’s best to use pipe scaffolding to be able to stand on a platform if the height of the beam is over 5 feet off the ground. Secure enough help to lift and hold the beams in place while they’re secured to the posts. Once again, follow the instructions on the plan created by the engineer or architect. Don’t guess at how the beam is to be connected to the posts. Your life, and those of your loved ones, depends on you building this freestanding deck so it will not collapse. Once the beam is in place, check it for level and check to make sure it’s at the correct height.
Step 7: Install the Floor Joists
Your plan will call out the size and on-center spacing of the floor joists. Be sure you use joists that are as straight as possible and have minimal crown. Crown is a hump in the joist once it’s in place. You want all joists to be crowned the same direction, so the hump points up to the sky. Any joist that has a severe crown should be cut. You can chalk a line across the crown and cut it off or you can trace the crown of an acceptable joist on top of a badly crowned one. If you want your decking to look smooth once installed, it’s imperative all joists are either flat or have nearly the same crown.
Read the instructions of any composite decking you might install. You may have to attach a treated 2 x 4 along the top of any joists where you’ll have decking butt seams. Many composite decking products require the ends of the decking rest on 1.5 inches of solid wood, not ¾ -nch as you might have should you have a butt joint on top of a single joist.
Use the correct nails or screws to attach the joists to the beams. Drill pilot holes, if necessary, to avoid splitting out the base of a joist where it rests on the beam.
Step 8: Lay the Deck Boards
Read all instructions if you’re installing composite or some other non-solid wood decking. Composite decking has very specific installation procedures.
Traditional treated wood decking should be installed making sure you have a minimum of an ⅛-inch gap between the decking boards as you install them. Treated wood almost always shrinks and you want to end up with a 1/4-inch gap between the boards once the shrinkage is complete.
Before installing any decking, install strips of joist tape on top of the joists. This tape is made to prevent water from getting into the joists through the cracks that develop from the fasteners used to attach the decking to the joists. Do not skip this step, especially if you’re installing composite decking, which has a performance expectancy of 25 years or more. If you don’t install the tape, the cracks in the wooden foundation joists may grow over time causing the deck boards to become loose.
If you’re using traditional wood decking, install the decking so the flat grain humps up to the sky. If you install the decking the wrong way, you’ll end up with water puddles on each of the decking boards. This water will accelerate the breakdown of any sealer and the wood itself.
Screwing down the decking is preferred. Nails will almost always pull out at a later date. Use stainless steel fasteners if your deck is near an ocean or sea. Saltwater will accelerate corrosion of non-stainless-steel fasteners.
Step 9: Install Steps & Railings
You’ll discover that 2 x 12s are required to create the stringers that support the stair treads for your new deck. Assuming you did your math right, you’ll be building steps with the 7.5-inch risers and the 10-inch treads. Make sure the stringers are no more than 16 inches on center. This means you’ll need three stringers for a set of steps 3 feet wide.
It’s best to have the steps end on a concrete landing pad if possible. The steps will never kick out or drop if you’re able to bolt a treated cleat to the landing pad. You simply notch the stringers so they fit tight against the cleat.
Railing posts and railing must meet strict building code requirements. The engineer or architect will have drawn great details about how to meet or exceed this code requirement.
Ready to build your freestanding deck? Find a retailer to shop materials or if you want help building your deck, find a contractor.