All wood decks should be stained to protect the wood from ultraviolet sun damage and moisture damage. Stains help to keep water from soaking into the wood decking. Allow water to enter the wood and you’ll soon see small checking cracks. If cracks are already present, the stain must penetrate into them to prevent water from causing the cracks to enlarge. Decks.com recommends that you use a high-quality water-based stain.
The best stain is one that penetrates into the wood pores and doesn’t create a film on top of the wood. Film-forming sealers will peel over time. To achieve a consistent look the next time you stain your deck, you’ll need to possibly strip off any old film-forming stain. This can be very hard work. Do your homework and take your time locating a stain that specifically indicates on the label that it’s a penetrating finish and doesn’t create a film as does urethane, paint, or solid-color stains.
Best Time to Stain a Deck
Many people often wonder, when should I stain my deck? You should look to the label of your stain for guidance. In almost all cases, the label will state the ideal temperature range for applying the stain. Match your local weather conditions to the mid-point in the temperature range. Avoid staining the deck when the temperature is at the low or high end of the temperature range as stated on the label.
When to Stain a Deck for the First Time
For the best results, you should stain cedar, redwood, exotic hardwoods and clear pressure-treated decks as soon as the deck is built. You may find it’s easier to apply a thin maintenance coat of stain every spring afterward. That said, once again read the label on the stain can. It may say to check the moisture content of the wood. Some treated lumber fresh from the treatment plant is saturated with liquid and the stain might not penetrate as deep as it should.
If you’re planning on building a deck using saturated treated lumber like this, it might be best to build the deck early in the spring or when the outdoor temperatures are in the 40° F range. The worst thing you can do is build a deck using saturated treated lumber in hot weather. If you allow the decking and railing to dry in these conditions, the wood can develop lots of small tension checking cracks in just days.
Best Weather & Temperature to Stain a Deck
The best weather for staining a deck is when you’re not suffering from either heat or cold and the sealer has a chance to penetrate into the wood before it dries too quickly. You’ll discover that overcast days with temperatures in the 60°-75° F range are ideal. Try to aim for days with little to no wind.
If you could talk with the chemists that developed the stain you’ll be using, they’d probably tell you they want the stain to dry somewhat slowly. This is why applying wood deck stain on a blistering hot day with temperatures at or above 90° F with a 15 mph wind are to be avoided.
Because you’ll probably be using a water-based stain, rain can wash wet stain away or cause it to dry with a blotchy and unsightly appearance. Don’t stain your deck if there’s a threat of rain. Once again, read the stain can label and see what the drying time is. It’s also a great idea to do a small test on a scrap piece of wood. See how long it takes for the stain to dry to be immune from rainfall damage.
What to Know When Staining a Deck
Perhaps the most important step in staining a wood deck is to stop and read the label on the stain can. Most stain failures and homeowner discontent with deck stains can be traced back to those who thought they knew what to do and skipped reading the instructions. Seriously, invest the five or ten minutes and read the label.
Cleaning Your Deck
One of the first things you’ll discover when reading the stain can label is the manufacturer wants your wood deck to be clean. You wouldn’t think of putting on a suit or dress to go out to dinner without taking a shower if you’ve been working outside all day and are sweaty and filthy, right? Deck stain will perform much better if it’s applied to clean wood.
Avoid using a pressure washer even though many say they’re safe to use with the correct tip. A pressure washer will erode the lighter colored bands of wood that you see in between the darker bands. The light bands are spring wood and are much less dense than the darker bands created by the tree in the summer months. A pressure washer can take smooth wood and age it 30 years in a matter of minutes.
While it’s more work, you’ll protect your investment by using a traditional scrub brush on a painter’s pole. You’ll need smaller hand brushes, even a clean toilet brush, to get the railings clean. The smaller brushes can get in between the balusters in the railing with ease.
Avoid Chlorine Bleach
Do not use chlorine bleach to clean your wood deck. You need to be careful when purchasing deck cleaners. Any product that says it contains sodium hypochlorite should be avoided. That’s the fancy chemical name for chlorine bleach.
Chlorine bleach will:
- Destroy the lignin that holds the wood fibers together
- Remove the natural color of the wood
- Accelerate the corrosion of all metal fasteners and structural hangers/connecters
- Kill all vegetation under and around your deck
The best cleaner for wood decks, except redwood, is certified organic oxygen bleach. Use oxalic acid to clean redwood decks.
Oxygen bleach is a powder you mix with warm or hot water. It’s non-toxic, and it will not remove the color nor lignin from the wood. It doesn’t harm any of the metal fasteners nor connectors. It adds beneficial oxygen to the soil so all vegetation will be happy!
You can apply the oxygen-bleach solution with a hand-pump sprayer. Saturate the wood and allow it to work on its own for 15 or 20 minutes before you start to scrub. Always work in the shade when cleaning your deck. You never want the oxygen-bleach solution to evaporate. It’s best to work early in the morning before the sunlight has started to warm up the wood. You want to apply the cleaning solution to cool wood.
Stain Railings & Handrails First
Always stain the railings and handrails first. Put a heavy drop cloth under the railings to capture the stain that otherwise might drip onto the wood deck below. If you drip stain onto the wood and it dries, you’ll see each of these spots later in the process as you stain the decking. Each drip will be a darker spot than the wood next to it on the deck that receives just one coat of stain.
It’s vital you maintain a wet edge. This is why it’s ideal to apply stain early in the day on a cool overcast day. The stain will not dry as fast under these conditions.
Failure to maintain a wet edge will result in lap marks. When you brush on the stain over dried stain, you’re adding a second coat. Just as you’d see drips under a railing, the lap marks are extremely unsightly. You may have to have a helper working with you to ensure you’re maintaining a wet edge at all times.
Do whatever is necessary to project adjacent surfaces such as siding from stain splatters or accidents. You may find simple pieces of cardboard leaning up against your house will do a splendid job. Take your time when working close to surfaces you don’t want the stain to touch.
Your First Time
If you’ve never stained a deck before, it’s imperative you start staining your deck where it’s least seen. For example, don’t start staining the deck side of the railing where you first walk out onto the deck. Go to either end of the deck and start on the outside so you can see how the stain is absorbed into the wood and how hard it is to apply it evenly. You want to make mistakes in the places least seen by you or your guests.
Two-Coat Deck Stains
Some deck stains suggest that you apply two coats. If this is the case, pay very close attention to the label instructions. Some products want the second coat applied within so many minutes of the first coat application.
More Is Not Better
Don’t think that more stain is going to give you better results. Never allow the stain to puddle. Always brush out the stain so you have achieved a good coating. You shouldn’t have so much stain sitting on a single board that if you continued to spread it the stain would cover another foot or two of board. If this is happening, you’re leaving too much on the surface.
Can You Stain a Deck Without Sanding?
Once again, follow the instructions on the label of the stain can. In almost all instances you’ll discover it’s not necessary to sand a wood deck unless it’s been neglected or ruined with a pressure washer. While it’s not necessary for your wood deck to be as smooth as a piece of furniture, the finished stained deck almost always will look better the smoother the wood is.
Think about doing a small test on a few pieces of wood that match your deck. Have one piece that’s just clean, another one that’s clean and you lightly sanded, and the third test piece that’s clean and has been sanded nice and smooth. Once the stain has dried for a few days, look at how all three compare to one another. If they all look the same and you’re happy, you don’t have to sand!
Often, you’ll see a peach-fuzz appearance after cleaning a deck with a pressure washer. The fuzzy areas are small wood fibers that are still connected to the deck lumber. You’ll want to sand these off for sure. Experiment with 60-grit sandpaper and a sanding block to see if it cuts the fuzz away but doesn’t leave deep scratches.
Handrails that have been cleaned with a pressure washer almost always have to be sanded. The extreme water pressure can cause the dark summerwood bands to transform into sharp edges similar to a razor. Sand handrails so they’re smooth and no one will get cut.
How Long Does Deck Stain Take To Dry Outside?
Drying time for deck stains varies. What you should be most interested in is when is the stain rainproof?
These factors all play a part in the drying time for deck stains:
- Air temperature
- Wind speed
- Moisture content of the deck wood
- Direct sunlight or shade application
As stated earlier, most deck stains are formulated to be applied in the best conditions that allow for them to have plenty of time to soak into the wood before the vehicle in the stain evaporates. This is why it’s a very bad idea to apply deck stain to a hot deck surface in the middle of a windy day in direct sunlight.
If you’re in doubt, it’s always a great idea to do a small test. Apply some stain to a scrap piece of wood and see how long it takes for it to dry to where it’s not transferring stain to your finger as you softly stroke it across the stained wood. Allow the sample to dry in the shade, not the sun. You’ll probably discover that in most cases after 2 or 3 hours, the stain is dry enough to be safe from rain.
How to Properly Stain a Deck
Materials Needed
You’ll need the following materials to complete your deck-staining project:
- One or more 5-gallon buckets for cleaning solution
- Certified organic oxygen bleach - each 2 lbs. cleans 400 square feet
- Deck stain - all the same color and batch - verify batches on the label
- Different scrub brushes and an adjustable painter’s pole
- A garden hose that will stretch out over the entire deck
- Ladders for any high work
- Assorted paint brushes - 2-inch tapered works well for railings and cut-out work
- Paint roller pan, roller, roller covers
- Heavy canvas drop cloths
- Rubber gloves, eye protection, and any other safety equipment
- Old clothes
How to Choose the Best Brushes and Roller Covers to Stain a Deck
You’ll discover it pays to use high-quality brushes and roller covers. They produce better results and it requires less work on your part to apply the stain. A two-inch tapered brush is an excellent choice for railing work. A three-inch brush is a great tool to use to apply stain to deck boards. You may find that a four-inch brush is too hard to handle. Don’t assume a particular roller cover is going to work well. You need to test to see how it really applies the stain.
Keep in mind you’ll need to apply the deck stain to the edges of the decking for a professional look. Not all decking has the same spacing between the boards. Determine the best tool for your deck as to how you’ll get the stain in this narrow gap.
Be very careful about applying too much stain in these narrow gaps between decking boards. Apply too much and the next day you’ll see all sorts of unsightly runs on the deck joists below the decking.
Prepping & Cleaning Deck Before Staining
Always make sure the deck is clean and dry before you begin staining. Sweep the deck to remove any loose debris. If power washing to remove old paint or stain, wait at least 24 hours after washing your deck to apply new stain to ensure that it is completely dry.
Also, it is important to add painter’s tape to exterior walls to protect them during the staining process.
If you intend to roll on your deck stain in the wide-open areas of the deck, you may want to test this method first on some scrap wood. You might be surprised by the finish and texture left by some roller covers. Some foam roller covers can generate unsightly bubbles in the finish. You’ll never regret testing different application methods. Keep in mind once the deck stain dries, any imperfections in the finish will be seen for the next three years. That’s how long your deck stain might last. You don’t want to be looking at mistakes for three years, right?
Applying Deck Stain
It’s not hard to apply deck stain. Most deck stains have the consistency of water. They’re not thick-bodied like a house paint. This means they’ll drip easier and splatter from going too fast. Mistakes can happen without warning.
You’ll quickly discover if you’re applying the stain to a railing and holding the brush so the handle points down to the deck that the stain will soon run out of the bristles onto your hand. This is messy and can be problematic. You can minimize this by not loading the brush with too much stain. Dip the brush in the stain, and press the bristles against the lip of the can to get excess stain out of the bristles.
Create a Plan
Think about how you’re going to start the staining process and then finish. How can you work so that you don’t get trapped on the deck or work yourself into a corner?
Think about applying the stain to one board or strip at a time maintaining the wet edge going back and forth the entire length of the deck. This will become a problem if the outer edge of the deck has a railing as you’ll end up getting squished against the railing. This is why working in the shade in the cooler part of the day allows you to maintain a wet edge along a larger wide area of decking instead of just working on one board at a time.
Do a test to see how lap marks look. Yes, testing takes time, but take a piece of scrap decking and stain half of it. Let it dry. Then restrain the rest of the wood but take your brush and go over a small part of the dry stain. You’ll immediately produce a lap mark. If you can live with this imperfection, fine. If not, you’ll do whatever is possible to maintain wet edges. Employing others to help stain is the best way to maintain a wet edge.
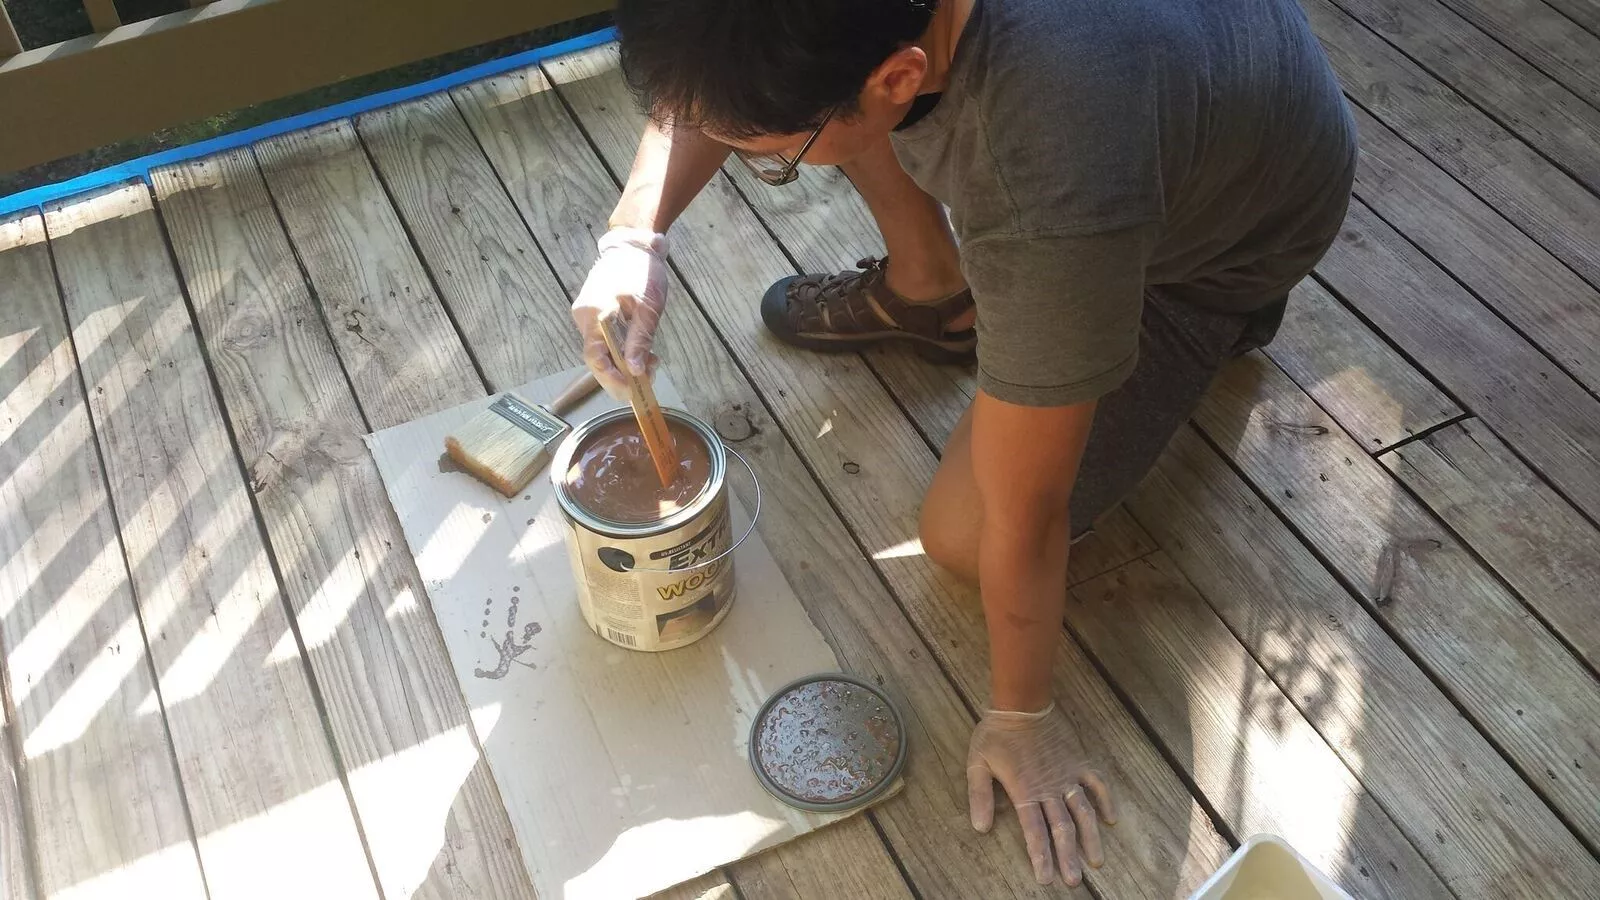
Step 1: Mix wood stain with a stir stick
Make sure to mix your stain before using.

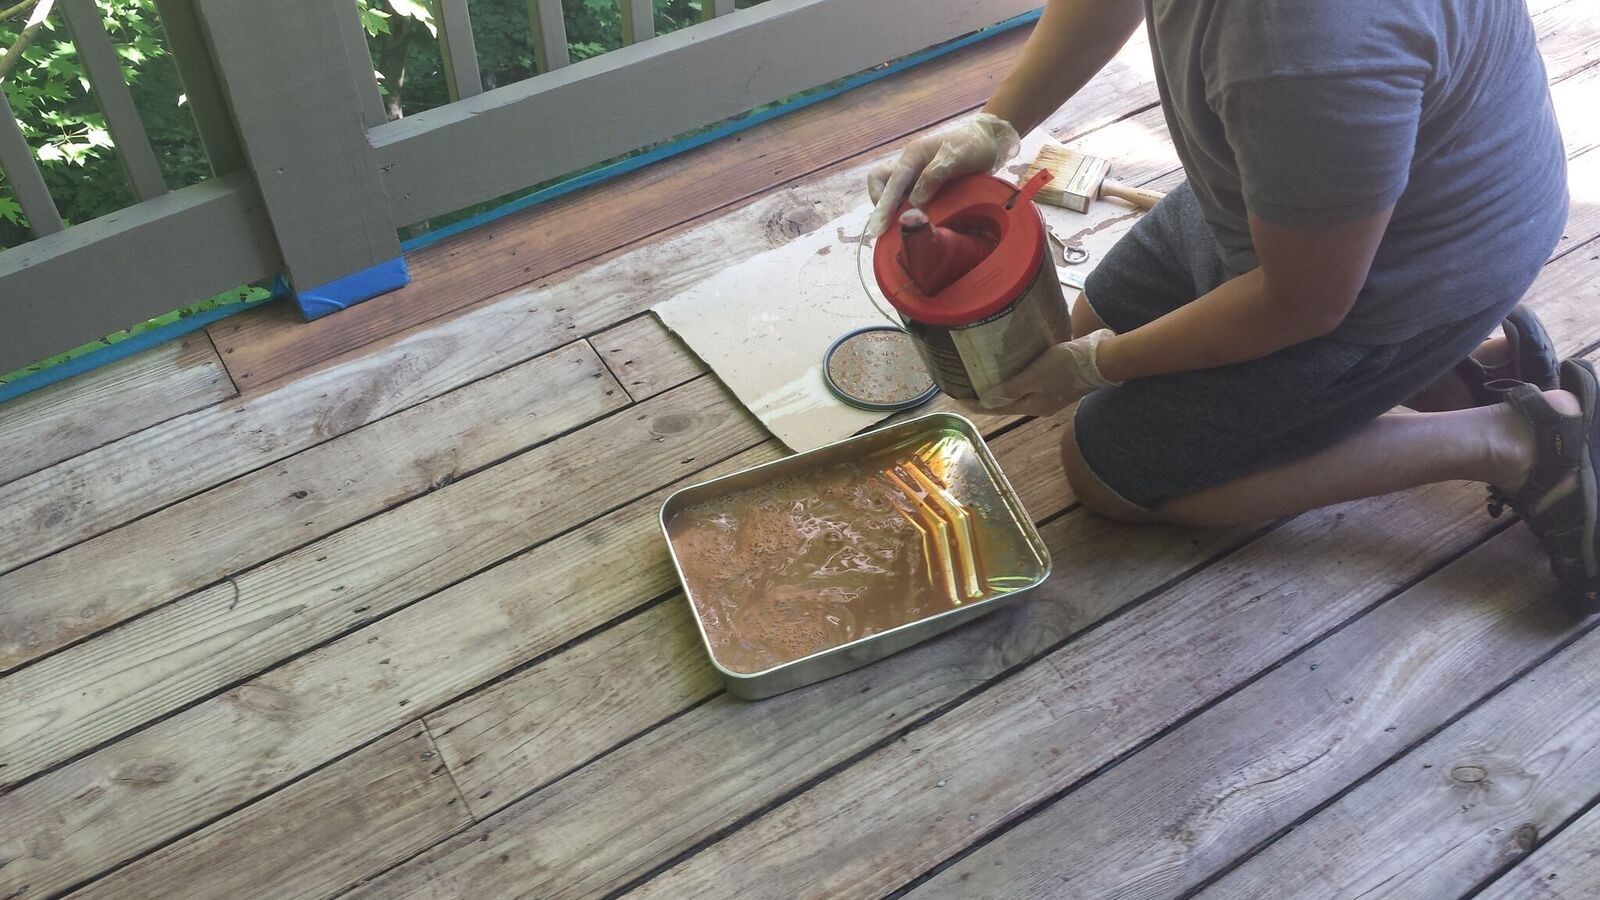
Step 2: Pour the stain into a paint tray
Pour your stain from the can to a paint tray.
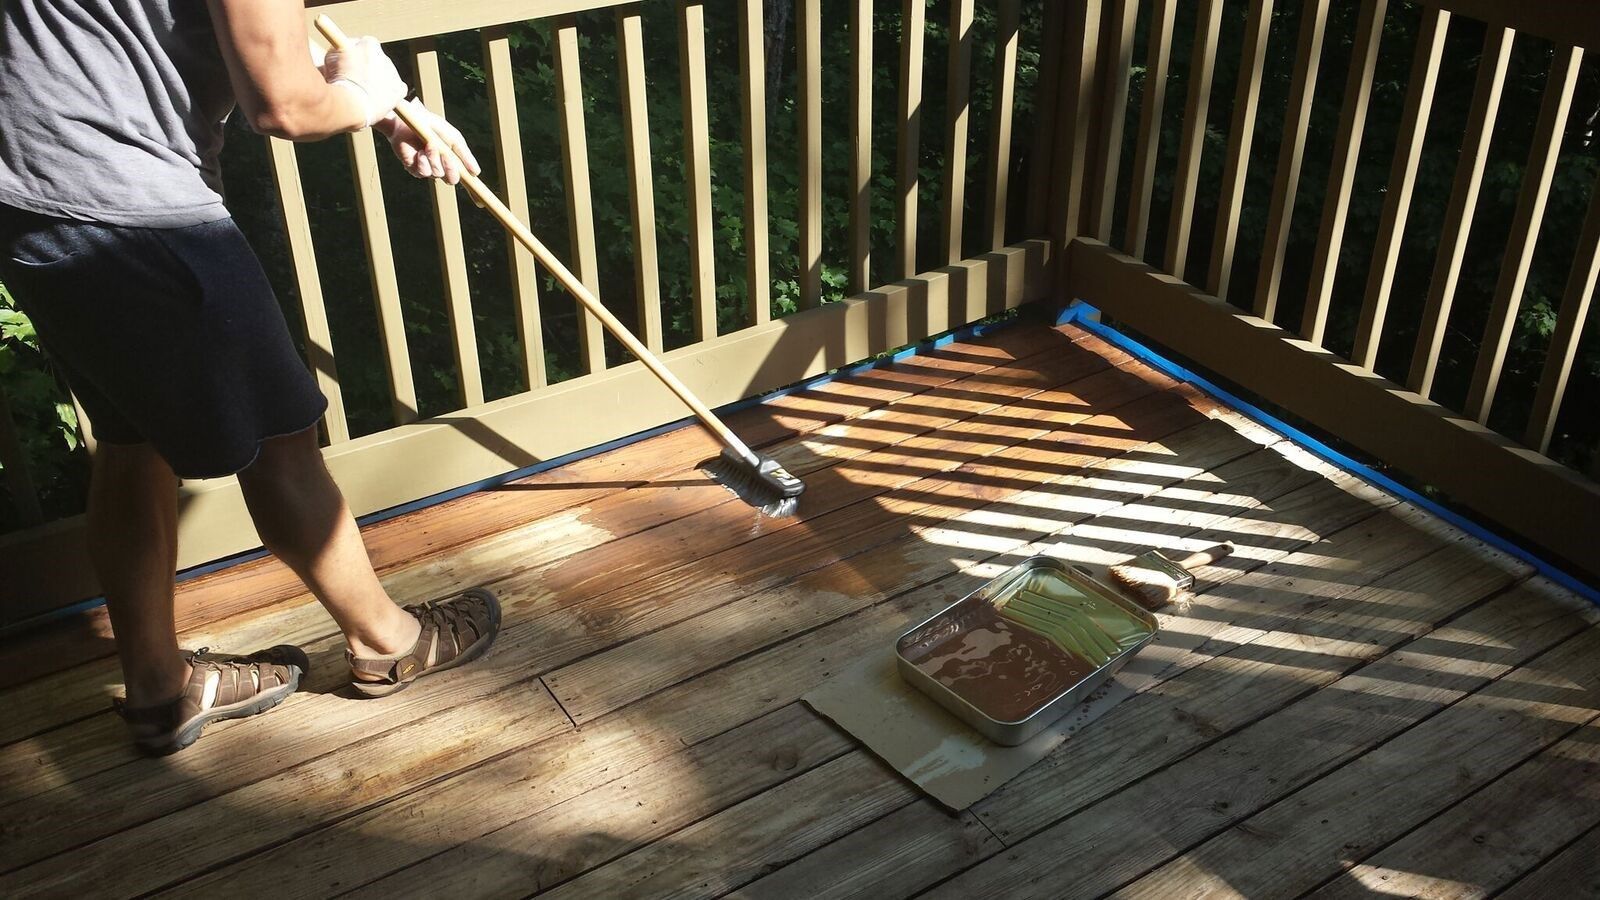
Step 3: Use a long handled car wash push brush to apply satin
It is best to apply the stain to a clean dry surface with temperatures below 80 degrees F. Use a long handled car wash push brush to evenly apply the stain to the wood surface.
Ready to stain your deck? Shop stains and other materials at a retailer near you.