


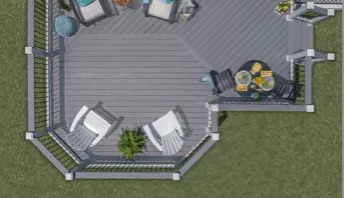
Deck Post Spacing & Layout
Accurately transferring the deck post layout from your plan to the job site is critical. Learn how to use stakes and string to pinpoint the deck footings and establish the correct deck post spacing below.
Why is Deck Footing Spacing Important?
Footings support a deck's posts and beams. Spacing and deck footing size should be properly calculated. and must be spaced and sized accordingly. To figure the deck footing spacing, factor in the size of the footing and beam, as well as the beam's span. In most cases, it's best to space the footings/posts no farther apart than 8 feet in the center. Installing a hot tub on a deck requires a structural engineer to calculate the required structural support to carry the concentrated load of the hot tub as well as review by your municipalities' building department before a permit is approved. Other heavy loads on the deck may call for more or larger footings and/or tighter spacing. Stairs should have footings at the bottom corners. For help determining deck footing spacing, enter your deck's measurements into this footing and beam calculator. Also, be sure to check with your local municipalities' building department for specific regulations given influences such as soil type in your area and total load minimums.
Deck Layout Method
For most DIY deck projects, batter boards, mason lines, measuring tape, and simple math are all you need to establish the deck footing spacing. Batter boards--two wooden stakes with a cross piece-work better than just a single stake. They stay in place better and the cross piece makes it easy to adjust the mason line stretched between them. Use scrap wood for batter boards or build them from 1-x 2-inch or heavier ground stakes. A 12-pack of 3-ft stakes costs about $12. Whether you connect the cross piece before or after setting the stakes is up to you. Avoid string or twine. Genuine mason line is stronger and doesn't sag.
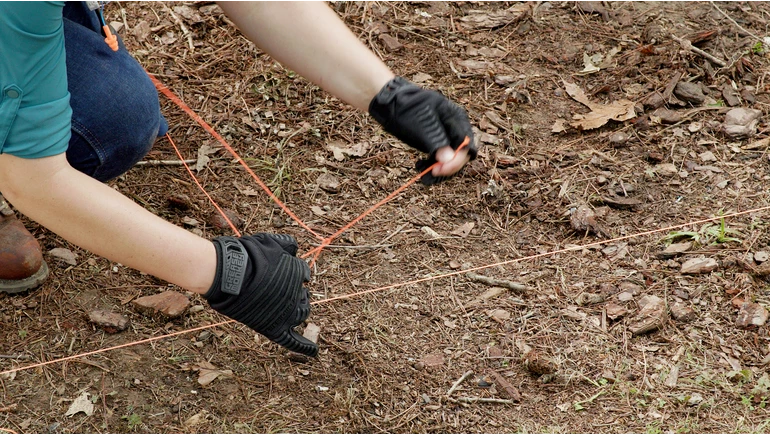
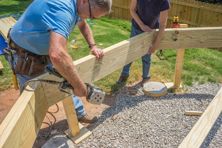
How to Lay Out Deck Footings & Posts
Use these simple techniques to lay out the deck footings and establish the deck post spacing. The help of an assistant will improve accuracy and make the job go faster. Remember to keep your tape measure and layout lines level.
Tools and Materials
Layout work requires no special tools and minimal materials. Don't skimp on the mason line. It isn't expensive and gives a better result.
- Tape measure
- Mason line
- Plumb bob
- 4-ft level
- Line level
- Landscape spikes
- Ground stakes for batter boards
- Construction screws for batter boards
- Survey tape
- Ground-marking spray paint
- Heavy hammer
- Tubular cardboard form
- Screw gun
- Sawhorse or tripod
Step 1: Remove Debris and Prepare the Site
Call 811 or go to 811.com to have utilities located and marked before you dig. Next, clear the site of sod and plants. Fill low areas. Slope the ground to drain water away from the house. Don't add landscape fabric or crushed rock until the footings are poured.
Step 2: Use the Ledger Board to Establish Reference Points
Most decks are rectangular, and the ledger board forms one side. More precisely, the ledger board is a framing member and a handy reference point to locate deck footings. Start by transferring the reference points-the ends of the ledger board-to the ground. There are two ways: hold a 4-ft level plumb with the ledger board end or dangle a plumb bob from it. Either way, stick a landscape spike in the ground where the level or bob makes contact. Wrap the spike head with landscape tape so it's easy to see. Repeat this procedure at the ledger board's other end.
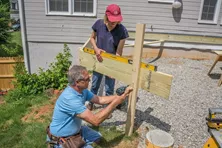
Step 3: Install Batter Boards
Pound in the batter boards at each location so that each cross piece is approximately centered over each spike. Using a level or plumb bob, transfer the location of each spike to the cross piece and mark it with a pencil. Next, measure out the length of the deck, add two or three feet, and install a batter board opposite the one at the house. (It doesn't have to align exactly because the cross piece allows adjustments.) Return to the house-side batter board, tie mason line at the pencil mark, stretch the mason line to the far set of batter boards. Repeat this procedure on the other side.
Step 4: Square Up the Batter Boards and Connect Them with Mason Line
With a helper, apply the 3-4-5 method-or the identical 6-8-10 method-to square the line to the house. Start by measuring along the house and mark 8 ft. On the mason line, mark 6 ft. Then measure the diagonal distance from endpoint to endpoint. Move the string left or right at the far batter board until the diagonal measurement is 10 ft. This indicates that the mason line is at a 90-degree angle to the house. Tie off the line at the far batter board and repeat the procedure on the other side. These two mason lines represent the outside edges of the deck's frame or rim joist.
Step 5: Locate the Front Edge of the Deck
To establish the front edge of the deck frame, measure along each mason line and put a spike in the ground at the correct length. Set up two batter boards two or three feet to the outside of the mason lines and stretch a mason line between them so that it aligns over the two spikes. Adjust the line so that it is 90 degrees to the two lines it crosses while remaining at the correct distance from the house. To confirm that your layout forms a perfect rectangle, measure diagonally corner to corner. The distances should be equal.
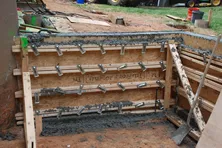
Step 6: Lay Out the Deck Beam Placement
From your plan, determine the distance from the house to the center of the first beam. Measure and mark that distance on the mason lines of each side using a pencil. With a plumb bob, transfer each mark on the line to the ground and place a spike there. Erect batter boards two or three feet outside the lines and stretch a mason line between them, just as you did to establish the deck's front edge. Square this new line to the side lines using the 3-4-5 method. The new line represents the centerline of the deck's first beam.
Step 7: Mark the Deck Footing Locations
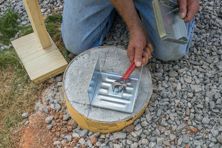
From your plan, determine the distance between the outside edge of the deck frame to the center of the first footing along the beam's centerline. Mark it on the mason line. Determine the spacing of the other footings along the beam's centerline and mark those on the mason line accordingly. Transfer all these marks to the ground using a plumb bob and landscape spikes. Your plan should also specify the footing sizes (diameters). Buy a tubular cardboard form of the correct size and cut off a short section of it. Center the section over one of the spikes and coat the ground with spray paint. Do the same at other locations. Double-check all your measurements before you start digging.
For more detailed instructions on how to layout and space deck footings, please visit Trex Academy.
Start the Deck Layout & Spacing Process Today
Batter boards are inexpensive and easy to make. Plus, the math is basic. Time to find your footings!
To find decking materials, use our Find a Retailer tool. To find a contractor, use our Find a Builder tool.
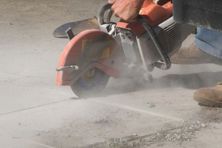
Cutting a Concrete Pad
Learn how to use a concrete saw to cut a hole in a patio slab to install a deck footing.
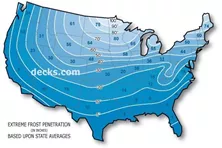
Deck Footing Depth
Find out how deep you need to dig your footings in your area. Look at our U.S. map of extreme frost penetration.

Soil Conditions
Learn how soil conditions can affect the size of your deck footings. Do you have gravel, sand or clay soil?
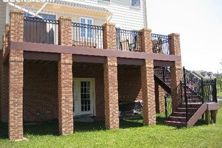
How to Decorate Deck Support Columns
Browse some examples of decorative deck support posts for tall decks.
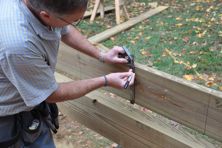
How to Nail a Deck Beam
Learn how to nail a beam together. How many nails should you use? What type of nails should you use?
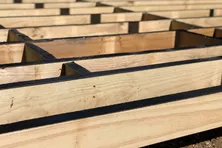
Deck Floor Joists
Step-by-step instructions and tips on how to frame. Learn how to install treated wood joists and beams to build a strong deck.
More Helpful Resources


Explore Articles by Topic
Footings
Information related to installing frost footings for decks
Framing
Learn structural framing methods
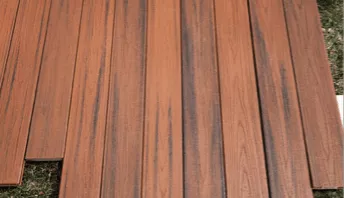
Decking
Learn about wood and composite decking materials
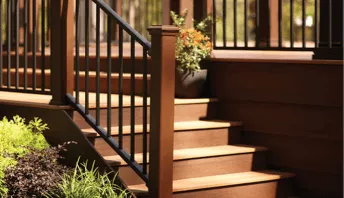
Stairs
An in-depth look at the complex issue of how to build stairs
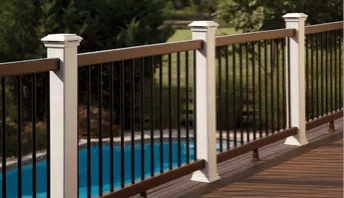
Railings
How to install guardrails and handrails to meet IRC code
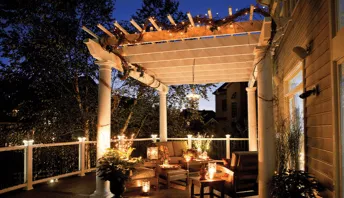
Features
An overview on water drainage, benches, planters and lights
Design
The basics of deck design
Planning
Learn about permits and working with contractors
Porches & Patios
Build a covered deck to enjoy all seasons
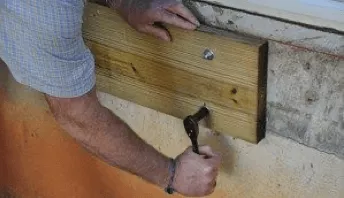
Ledger
Proper attachment techniques
Care
Maintain your deck to maintain your investment
Materials
An overview on water drainage, benches, planters and lights
How many footings do I need?
Avoid a wobbly deck! Learn how to calculate the right number of footings to keep your structure safe and solid.
Retaining Walls
Avoid problems related to digging deck footings near retaining walls. Learn some tips from the pros for how to handle these difficult situations.

Do I need to use rebar?
Our inspector discusses using steel rebar for deck footings.
Why is Joist Protection so Important for Your Deck?
If you’ve ever seen a piece of wood left out in the weather for any period of time, you know what happens: decay. Whether through wet rot, insect damage, or mildew, the fibers begin to break down.
Determining Deck Beam Height
Learn how to measure in order to set your posts to properly position your deck beam to the correct height. We recommend sloping your deck to shed water away from the house.
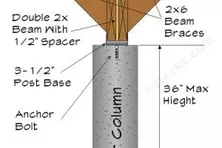
How to Install Concrete Support Deck Posts & Columns
Learn how to install concrete deck piers to support your deck frame. Use cardboard form tubes to extend your footings above grade.
Explore Articles by Topic
Footings
Information related to installing frost footings for decks
Framing
Learn structural framing methods
Decking
Learn about wood and composite decking materials
Stairs
An in-depth look at the complex issue of how to build stairs
Railings
How to install guardrails and handrails to meet IRC code
Features
An overview on water drainage, benches, planters and lights
Design
The basics of deck design
Planning
Learn about permits and working with contractors
Porches & Patios
Build a covered deck to enjoy all seasons
Ledger
Proper attachment techniques
Care
Maintain your deck to maintain your investment
Materials
An overview on water drainage, benches, planters and lights