


How to Build a Built-in Deck Bench

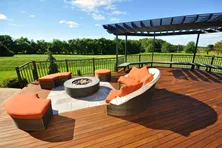
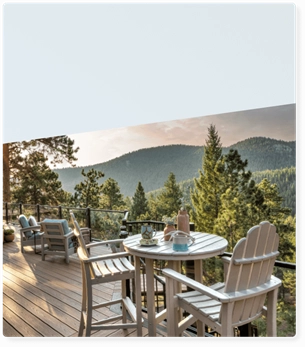
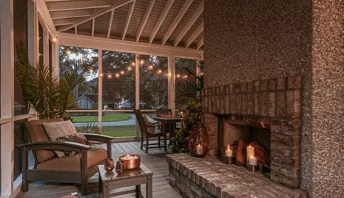
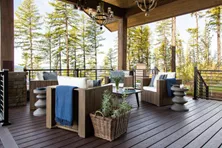
The availability of good seating can transform a deck, and few options compare with built-in deck benches. Well-executed benches can provide a more welcoming space for entertaining guests, reinvent the aesthetic of your deck, or simply save space.
Built-in benches can allow you to get creative with the layout of other deck furniture. If you’re handy with woodworking or adventurous and willing to try, learning how to build built-in deck seating can be a great project for DIY homeowners.

What is a Good Height For a Bench?
A deck bench should be elevated about 16”-20” off the floor to provide a comfortable sitting position. Examine the heights and width of chairs and benches to get an idea of what dimensions you want to use for your built-in deck benches.
Benches, planters and other accessories on a deck are only regulated by building codes unless they are fixed in place. Otherwise, they are merely custom-built furniture. As furniture, there are no building codes that address their construction. However, if the bench or planter is at the edge of a deck and near a guardrail or portion of a guard, you’ll need to check local codes to make sure benches aren’t prohibited (due to the ability for someone to stand on the bench and climb over).
Required Materials
For an 8-foot DIY deck bench, you’ll need several boards and other assorted materials, including:
- One (1) 2x6
- One (1) 4x4
- Three (3) 1x6s
- Four (4) 2x4s
- Stain - ½ gallon
- 3-3/8” Hot-galvanized lag bolts – half a dozen
- Coated or stainless steel decking screws - 1/4lb
- Cleats
Required Tools
The type of bench you decide to make can impact the tools you’ll need. However, the most essential tools you can plan to use include:
- Tape measure
- Carpenter square
- Paintbrush
- Wood clamps
- Circular / cordless saw
- Miter saw
- Power drill
How to Build a Built-in Deck Bench
Once you’ve gathered all of your tools and materials, follow these steps to create a built-in deck bench. While you can always try to freestyle it, you may also want to look online to see if there are any specific blueprints or plans to follow to guide you, giving you a visual representation to follow as you assemble your built-in deck bench.
Step 1: Planning the Layout
For aesthetic reasons, you usually will want to make built-in benches with the same material as your deck. After material considerations, you’ll need to plan placement. Building deck benches is easiest when the bench runs parallel to the joists. If you decide to build the bench perpendicular to joists, the length of your bench will depend on joist spacing, and you’ll want to place supports every 4-5 feet.
If you’re placing the seating on the edge your deck, elevated decks need railing behind the seating, but a ground level deck usually does not.
Step 2: Taking Measurements & Constructing a Frame
Assemble a frame using your 2x4s for the length, and then six cross-sections to fill the center of the frame. Pre-drill and then screw the frame together.
The frame should be 4” shorter and narrower than the final length and width of the seat. Standard height for the seating area is around 16”, but you can use your own judgement and sense of style to determine how high you want your bench. (As an alternative to building a frame, it’s also possible to connect your bench to posts protruding from the edges of your deck.)
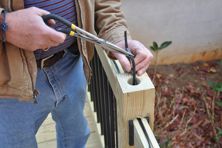
Step 3. Attach Legs, Blocking, And Seat Rails
An 8’ bench will require a third set of legs near the center, so use a miter saw to cut your 4x4s into three sets of legs. For a freestanding bench, keep the length of the legs even. Some of the most comfortable built-in deck benches create a gentle slope in the seating area by making the rear legs 1” shorter than the front legs. This is an option to consider only if the bench is positioned securely against a wall.
For a standard build with a 10” depth to the seating, you’ll want rails in the neighborhood of 16”. Use a circular saw to cut your 2x6 rails to the planned width of the seat. Next, pre-drill and connect the rails to the legs.
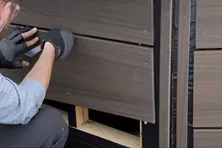
Step 4: Installing the Cleats and Slats
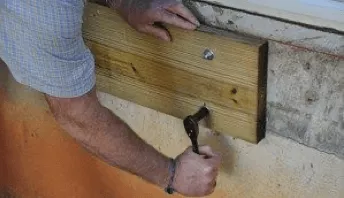
Place cleats with their edge flush against joists, creating a surface to connect the bench to decking. If you’re using slats with overhang that exceeds 6” past the seat rails, consider installing slats before connecting the frame to your deck. You may also want to apply stain prior to placing the frame. Otherwise, proceed to secure your frame using a pair of lag bolts.
Step 5: Installing Seating Slats
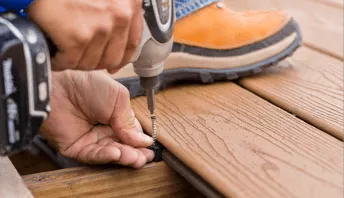
Finally, prepare to place your 2x2 slats for seating. Square each slat against the railing, then screw it into position. Once the first slat has been placed, space each addition slat using a ½” board. This can allow you to avoid having to square every additional board before screwing it into position. With the final slats in position, you’ve managed to successfully build your own built-in deck bench.
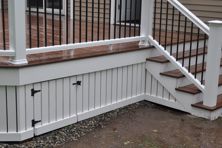
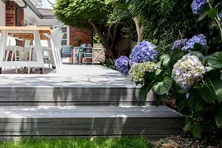
Deck Skirting and Fascia
Skirting can be an attractive feature that can be added to any low-level deck.
Deck Skirting Ideas
Deck skirting offers more than aesthetics. From added storage to critter deterrence and concealing structures, explore our top ideas for your backyard's transformation.
How To Install Deck Lighting
Step-by-step instructions on how to install low-voltage post cap lights. Learn about cutting a groove to hide your wiring.
10 Tips For Designing A Great Deck
This is an introduction to design. Start here to get some fresh ideas before designing your dream deck this year.
Deck & Patio Furniture Buying Guide
Interested in buying furniture for your deck and don’t know where to start? Learn how to choose the best deck & patio furniture with our buying guide.
Small Deck Ideas
With the right setup and décor, you can transform a small deck into a perfect outdoor oasis. Get inspired with these design ideas for small decks at Decks.com.
More Helpful Resources

Explore Articles by Topic
Footings
Information related to installing frost footings for decks
Framing
Learn structural framing methods
Decking
Learn about wood and composite decking materials
Stairs
An in-depth look at the complex issue of how to build stairs
Railings
How to install guardrails and handrails to meet IRC code
Features
An overview on water drainage, benches, planters and lights
Design
The basics of deck design
Planning
Learn about permits and working with contractors
Porches & Patios
Build a covered deck to enjoy all seasons
Ledger
Proper attachment techniques
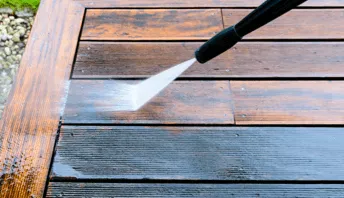
Care
Maintain your deck to maintain your investment
Materials
An overview on water drainage, benches, planters and lights
Deck Skirting Ideas
Deck skirting offers more than aesthetics. From added storage to critter deterrence and concealing structures, explore our top ideas for your backyard's transformation.
The 9 Best Deck Boxes for Outdoor Storage
Deck boxes are a great way to add necessary storage to your outdoor space. Get our recommendations for how to choose the best deck box.
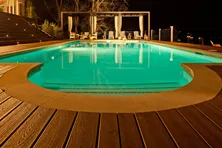
Outdoor Water Features to Enhance Your Space
Looking to add a water feature to your backyard or patio? Check out our top ideas to add some tranquility to your outdoor space.
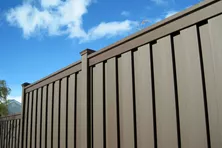
10 Fence Ideas to Add Privacy and Style to Your Yard
10 Fence Ideas to Add Privacy and Style to Your Yard
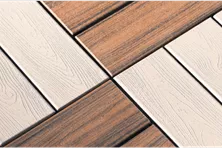
Selecting The Best Composite Decking Color For Your Home
There are many composite decking color options. How do you select the right one for you?
Deck & Patio Landscaping Ideas
Looking for landscaping inspiration and ideas? Check out our ideas for turning your patio or deck into a beautiful oasis for entertaining and relaxing.
Explore Articles by Topic
Footings
Information related to installing frost footings for decks
Framing
Learn structural framing methods
Decking
Learn about wood and composite decking materials
Stairs
An in-depth look at the complex issue of how to build stairs
Railings
How to install guardrails and handrails to meet IRC code
Features
An overview on water drainage, benches, planters and lights
Design
The basics of deck design
Planning
Learn about permits and working with contractors
Porches & Patios
Build a covered deck to enjoy all seasons
Ledger
Proper attachment techniques
Care
Maintain your deck to maintain your investment
Materials
An overview on water drainage, benches, planters and lights