


How to Avoid, Prevent & Repair Deck Joist Rot
If your deck wasn't built using the best-treated lumber, you might be adding replacing deck beams and deck joist repair to your list of things to do. Understand that replacing deck joists can be extremely difficult and time-consuming. Unfortunately, if rot is advanced and the joist has lost significant strength, rotten joist repair might require major deck surgery.
Why Do Deck Joists Rot?
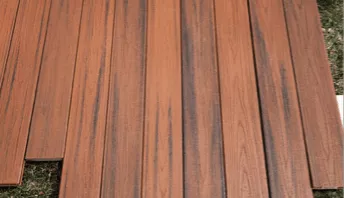
The simple answer is: that any wood that regularly gets wet and can’t dry out will rot. It’s important to realize you can avoid having to repair deck joist rot by starting with the best-treated lumber you can get. When building a new deck, consider purchasing treated lumber that’s rated for direct ground contact or burial. This lumber contains the highest amount of copper preservatives you can get.
Treated lumber rot often occurs when a deck drainage system is improperly installed below the joists, so wood joists stay wet.
Under-deck drainage systems mounted below the joists can cause damage in three ways:
- First, this type of system can trap moisture. The drainage system attached to the bottom of the deck joists creates an environment of exceptionally high humidity. The drainage system forms the bottom of an elevated swimming pool of sorts. Debris can collect on the top of the drainage system. This can decay, creating an organic goo that holds moisture. The only ventilation is through the quarter-inch (or less) space between the top boards and where the water exits the drainage system.
- Second, in the hot months of summer, the temperature further cooks this trapped, wet wood and accelerates the rotting. Over time, this is the perfect formula for wood rot: moisture + heat - ventilation = destruction.
Another common source of rotted deck joists is when homeowners paint the exposed joists (on three sides), which can cause further damage because as the wood on the top gets wet, there’s no way for the painted wood to release the moisture.
Factors that Can Speed Up Deck Joist Rot
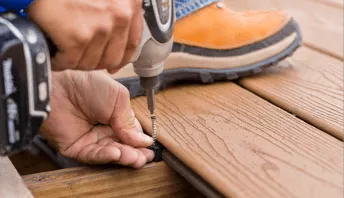
Several other factors can accelerate deck joist rot. First and foremost is the failure to install deck joist tape on top of deck joists before the decking is applied. This tape was developed once it became apparent that the fasteners that hold down decking were contributing to rot. Once you apply this tape to the top of joists, you can scratch replacing rotted deck joists off your to-do list.
The issue was that decking fasteners would create micro-cracks in the top of the deck joists. Water seeping under the decking would enter the cracks and cause the treated lumber to swell. This movement would slowly over time enlarge the crack. The larger the crack, the more water would enter.
The lack of tape also created a perfect storm for you having to repair deck joist rot. While it may seem that the decking protects the top of the joist from getting wet, it contributes to it because of the narrow space between the two separate pieces of wood. Capillary attraction pulls water under the decking, and it’s slow to evaporate. When the sun hits the decking, it can cause its temperature to rise to well over 120F creating accelerated rot conditions.
How to Prevent Deck Joist Rot
Deck joist rot prevention begins with purchasing the best treated lumber. Once again, use treated lumber rated for direct ground contact or burial.
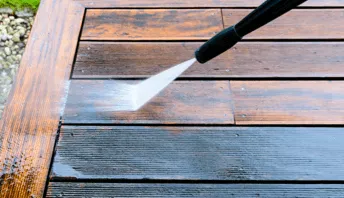
If your deck is already built and you can’t install joist tape, do your best to keep the gaps between the decking clear of debris. Inspect the deck each fall and remove any accumulated debris that’s resting on top of all joists. Brush out the debris with a stiff brush and wash it with a stream of water to completely clean the wood.
Clean the exposed sides and bottom of deck joists as soon as you see any signs of mildew, mold, or algae. These organisms contribute to deck joist rot. Your goal is to have all exposed treated lumber looking like it’s brand new all the time.
Avoid sealing or painting the underside of deck joists. Paint and film-forming sealers will slow or prevent moisture from escaping from the treated lumber. If the treated lumber wasn’t treated properly, this trapped moisture will lead to rot.
Install a Deck Drainage System
One of the best ways to avoid deck joist rot is to install an under-deck drainage system. The best deck drainage systems are installed above the joists. This will provide 100% protection of all the joists and beams from moisture penetration. This type of system also helps to hold the screws in place longer.
If you’re building the deck yourself, choose an over-the-joist system that’s easy to install. Use this handy chart for comparison. If you’re hiring a builder, ask if the drainage system being installed is above the joists.
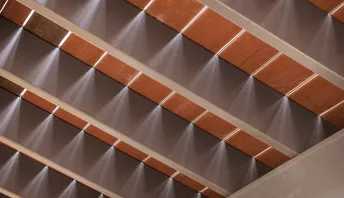
If you want a finished look to the underside of a deck, you should add a waterproof material to the underside of the joists that are protected by the deck drainage system that’s on top of the joists. To add extra protection, especially in high humidity areas, add ventilation to your under-deck ceiling with strip vents. These vents release hot air and help mitigate temperature extremes.
Choose Pressure Treated Wood
Pressure treated wood rot can happen for a host of reasons. It’s a known fact that treated lumber can and does rot. One source of the problem is poor quality control at the treatment plant. Mistakes happen and you might get treated lumber that simply doesn’t contain enough preservative. Unfortunately, there’s no way for you to test to make sure your lumber is going to perform well before you install it.
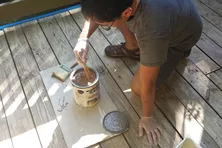
There are DIY liquids you can apply if you feel you may be at risk or you’ve inherited a treated lumber deck that you didn’t install. You can brush on copper naphthenate solution to help prolong the life of the deck joists.
Properly Ventilate your Deck
The best way to ventilate a deck is to keep all treated lumber at least 18 inches away from the soil. The next thing to do is to resist putting a decorative ceiling under the deck. Even if ventilation slots are incorporated into the ceiling, the lack of moving air hitting the deck can contribute to deck joist rot. You want any water that gets onto the deck joists to dry as rapidly as possible.
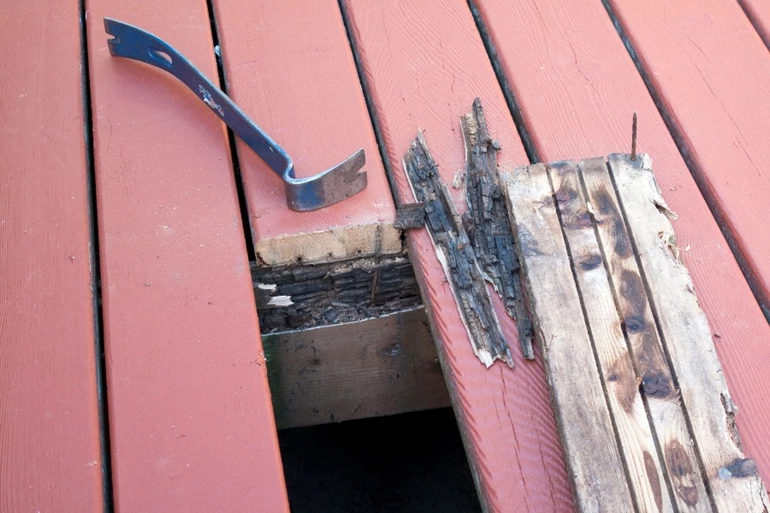
How to Repair Deck Joist Rot
If you’re handy, you can likely repair or replace rotten joists yourself. You also need to liberate the joist from all the decking above, remove any joist hangers or tie-rod connectors, and disconnect it from an end band board. Whether it’s a small or a large repair, you should understand how to inspect a deck joist so you know when to replace deck joists.
Step 1: Inspect the Deck and Determine What Needs to be Repaired
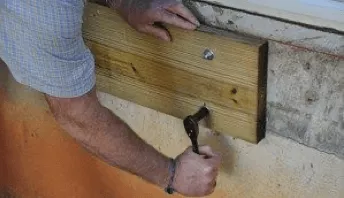
If you feel you need to repair rotting deck joists, do what insect exterminators do. Use an ice pick or long-shaft flat-head screwdriver with a fine point to test for rotted wood. If wood rot is present, slight or moderate pressure will cause an ice pick to travel into the wood with little difficulty. Test your ice pick on wood that has no rot to see how it takes extreme pressure to get it to travel into the wood even 1/4 inch. You’ll then know instantly when you encounter rotted wood.
The first place to check for rotted deck joists is at the top where they are in contact with the decking above. Test the joist on both sides along the entire distance of the joist.
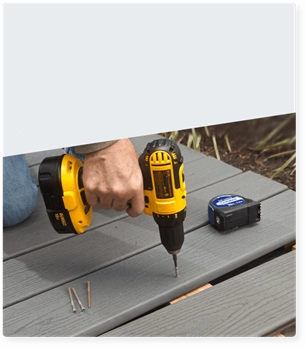
Step 2: Remove Deck Boards to Expose Joists
You may wonder how to replace deck joists. The process begins by removing decking fasteners is not easy if the fasteners are nails and have been countersunk into wood decking. If you use a cat’s paw nail-removal tool, you’ll undoubtedly damage the top surface of the wood.
Your job will be easy if the decking is installed with concealed fasteners and plastic parts that fit in between each piece of decking. Use a drill/driver in reverse to remove all fasteners.
Step 3: Remove Rotted Wood
Use a chisel or a saw to remove the rotted wood. Cut away and remove all rotted wood.
Step 4: Beware Using Wood Filler
Understand that any filler you were thinking of using to replace the rotted wood offers no structural value to the deck joist. What’s more, filler often has a very hard time bonding to the treated lumber.
You’ll then discover it may be difficult to create a neat-looking repair that matches the look of the original floor joist using filler or epoxy. If you insist on using filler, be sure to brush on copper naphthenate to the top of the freshly cut or chiseled wood to help extend the joist’s useful life.
Step 5: Reinforce the Joist with Sistered Material
The best way to repair deck joist rot is to sister new treated lumber onto a deck joist that has minimal wood rot. If just the top 1 inch of the joist is rotted, you can repair the rotted deck joist by screwing on a treated 2x4 to the existing floor joist.
The sistered 2x material must always be at least 3 times higher than the depth of the rot. This means that if just one inch of deck joist is rotted, a 3.5-inch 2x4 will be sufficient.
However, significant rot will require you to replace instead of repair the rotted deck joist.
Step 6: Replace Deck Boards
If a sistered repair was sufficient, it’s time to replace & secure the deck boards to the new 2x sister material. Cut the deck boards to size and secure them by using nails or hidden fasteners, depending on the material used.
Get more detailed instructions on how to replace deck boards here.
When to Replace Rotten Deck Joists
You’ll know when to replace deck joists when at least 20 percent of its width is rotted. At this point, you need to know how to replace deck joists. With this much rot in place, the joist has lost a significant amount of its strength and that joist probably no longer meets the building code for its span.
Get Started with Preventing & Repairing Deck Joist Rot
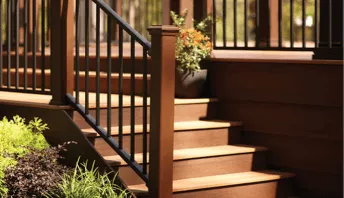
The sooner you start to inspect your deck for deck joist rot, the better. Be sure to inspect all joists, decking, and railing too. You want a safe deck for yourself, your loved ones, and any guests that will spend time on the deck.
If you’re not confident you can assess deck joist rot or feel comfortable hiring a professional, find a contractor near you.

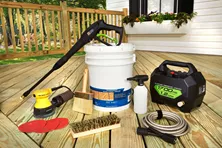
Average Cost to Stain a Deck
Find the national average costs for staining and sealing a deck per square foot, including sanding and power washing prices. Learn more at Decks.com

Deck Inspection: Checklist for Framing, Footings and More
Concerned that your deck no longer meets safety regulations? Want to know how to spot signs of trouble for your deck? Review our checklist for inspecting your deck at Decks.com.
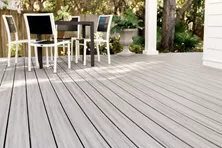
Capped Composite Decking
What is capped composite decking? It's a great option if you like the look of wood but not the maintenance. Learn about capped composite at Decks.com.

Eco Friendly Composite & Wood Decking Options
Looking for the most environmentally friendly way to add a gorgeous deck to your home? Learn how composite decking is made from recycled materials at Decks.com.
Differences Between PVC & Composite Decking
Both PVC and composite materials can be a great alternative to traditional wood decking. Learn the pros and cons of each material with our full comparison.
More Helpful Resources

Explore Articles by Topic
Footings
Information related to installing frost footings for decks
Framing
Learn structural framing methods
Decking
Learn about wood and composite decking materials
Stairs
An in-depth look at the complex issue of how to build stairs
Railings
How to install guardrails and handrails to meet IRC code

Features
An overview on water drainage, benches, planters and lights

Design
The basics of deck design
Planning
Learn about permits and working with contractors

Porches & Patios
Build a covered deck to enjoy all seasons
Ledger
Proper attachment techniques
Care
Maintain your deck to maintain your investment
Materials
An overview on water drainage, benches, planters and lights
How to Remove Scuffs and Scratches from Composite Decking
Removing scuffs and scratches can help make your composite deck look like new. Learn how to fix and prevent your composite deck from future scratches.
Deck Inspection: Checklist for Framing, Footings and More
Concerned that your deck no longer meets safety regulations? Want to know how to spot signs of trouble for your deck? Review our checklist for inspecting your deck at Decks.com.
How to Seal Your Deck & Best Deck Sealers
Once you clean or stain a deck, it is ready to be sealed. Learn how to properly seal your deck in order to protect it from damage caused by harsh climates and weather at Decks.com.

Is Trex Decking Worth the Investment? Expert Insights and Reviews
Discover why Trex decking is worth the investment. Learn about its durability, low maintenance, eco-friendliness, and the long-term value it adds to your home.

Composite Decking Prices
Composite decking ranges in price from $2 to $6 per linear foot. Compare brands and costs with our composite decking pricing chart at Decks.com.
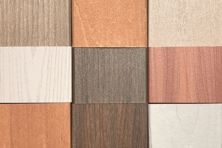
Types of Wood Decking Materials
There are many options for choosing the best wood for your deck, like pressure treated pine, cedar, redwood or mahogany. Compare types of wood at Decks.com.
Explore Articles by Topic
Footings
Information related to installing frost footings for decks
Framing
Learn structural framing methods
Decking
Learn about wood and composite decking materials
Stairs
An in-depth look at the complex issue of how to build stairs
Railings
How to install guardrails and handrails to meet IRC code
Features
An overview on water drainage, benches, planters and lights
Design
The basics of deck design
Planning
Learn about permits and working with contractors
Porches & Patios
Build a covered deck to enjoy all seasons
Ledger
Proper attachment techniques
Care
Maintain your deck to maintain your investment
Materials
An overview on water drainage, benches, planters and lights