Over time, even the most well-maintained wood deck can show signs of wear and tear from weather, foot traffic, pests, or accidental impacts. Fortunately, replacing a single damaged board is a simple and cost-effective DIY project that can revitalize your outdoor space without the expense or hassle of a full rebuild.
In this guide, we’ll take you step-by-step through assessing the damage, removing the affected board, and installing a new one. By the end, your deck will be safe, functional, and looking as good as new.
Assess Your Deck's Condition
Start by giving your deck a thorough inspection. It’s an important step to keep it in great shape. Aim to check it twice a year: once in the spring and again in the fall. Look closely for splits, splinters, warped boards, or signs of rot, especially in areas that stay damp.
Not sure if a spot is rotten? Grab a flat-head screwdriver and gently press it against the wood. If it feels soft or gives way, that’s a sign of rot, and it’s time to replace those boards. Regular checks like these can help you catch issues early and keep your deck safe and sturdy.
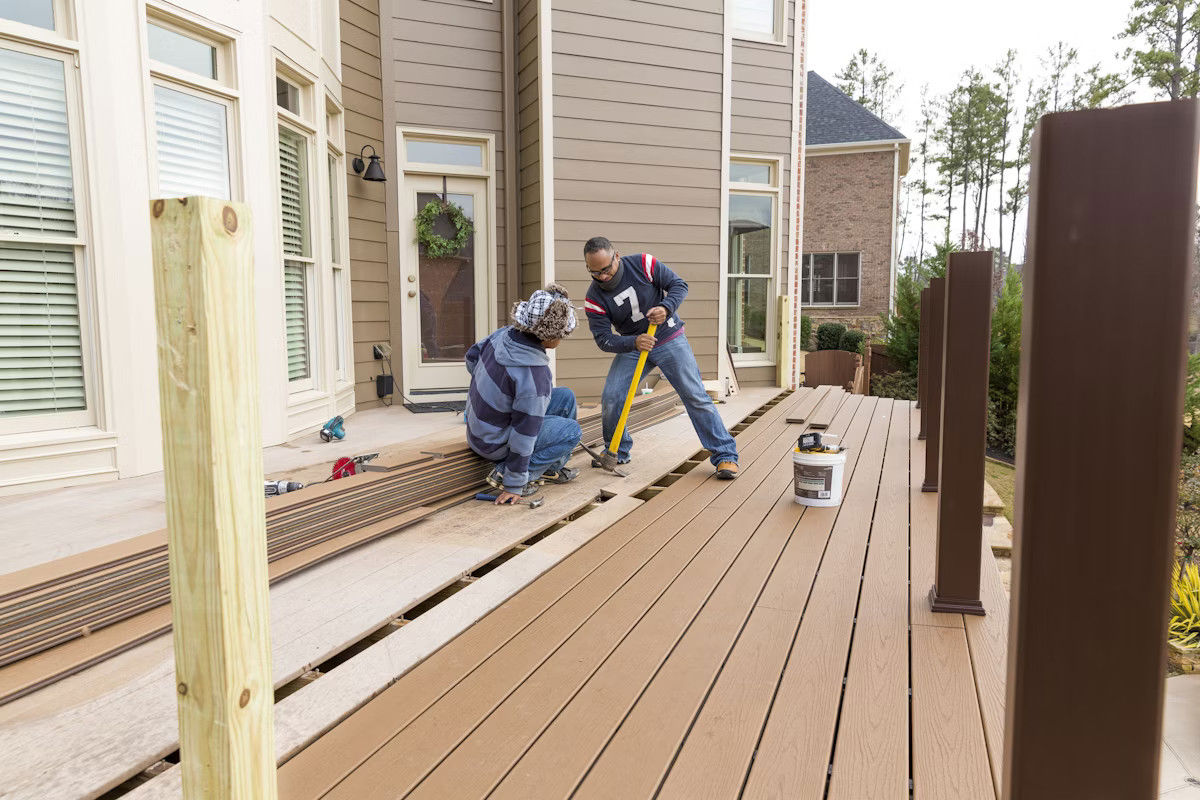
Remove Damaged Wood Deck Boards
Removing a damaged or rotten deck board might seem tricky, but with the right approach, it’s a straightforward process. The method you’ll use depends on a couple of factors, like how the board is fastened and whether you can access the area beneath the deck. The goal is simple: replace the old board quickly and safely, without harming the surrounding boards.
In this guide, we’ll walk you through the process step by step, offering tips to make the job easier along the way. By the end, you’ll be ready to take on this project with confidence and restore your deck in no time.
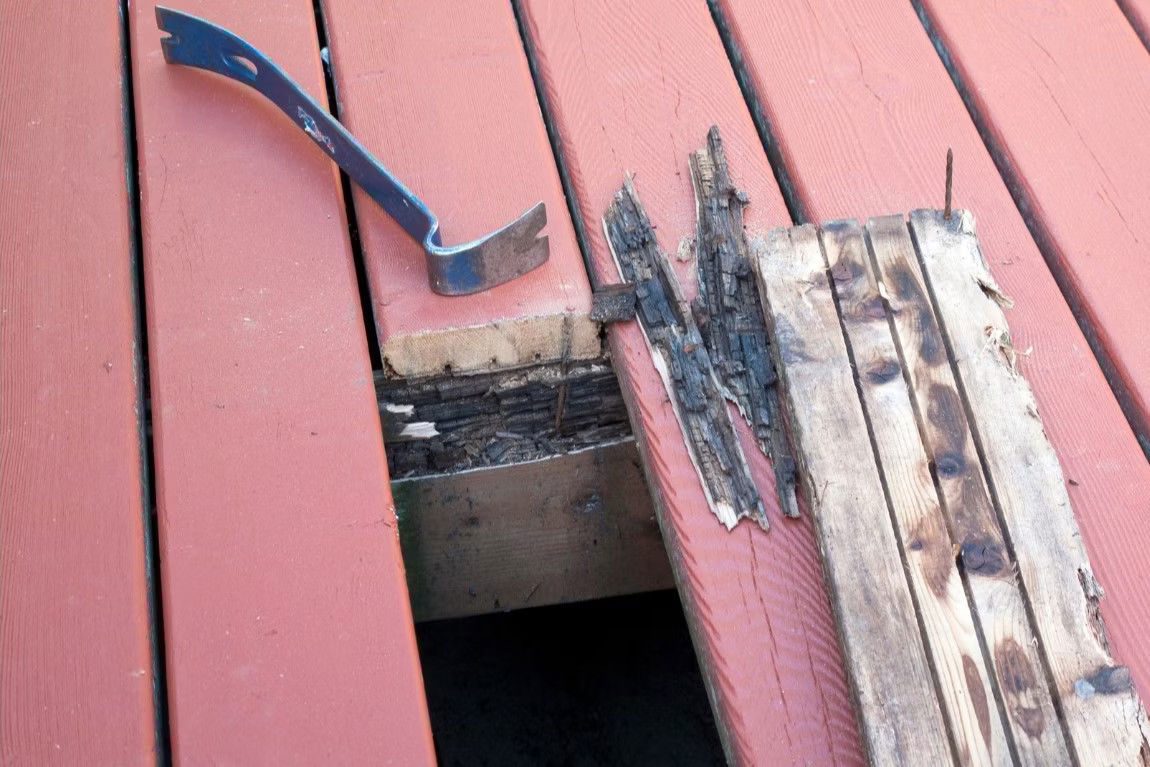
How to Remove a Nailed-Down Deck Board
If you have the room to work under the deck, the fastest way to get the process started is to begin below the deck. Use a heavy hammer or maul to pound one end of the deck board up from the bottom. You could even use a 4-ft.-6-ft. long 2x4 as a battering ram to do the job. Once you get the board separated from the first couple joists, you can move up top, where you’ll get less dirty, and use a pry bar or the claw of a hammer to pry up the rest of the board.
Continue from the end you started on, and work your way down the length of the board. When prying, make sure to use a scrap piece of wood under the claw of the hammer or pry bar to protect the undamaged deck boards alongside the bad one. Some of the nails will likely be pulled out with the board, and others will stay in the joist and can be pulled out or cut off after the board is removed.
Either pull out or bend over the nails in the board right away, so you or someone else doesn’t accidentally step on a nail. If you can’t access the space below the deck, use a cat's paw pry bar or nail puller to dig out the heads of the nails and pull them out. You could remove all the nails this way, or just remove the ones from the first few joists and pry up the rest of the board as described above.
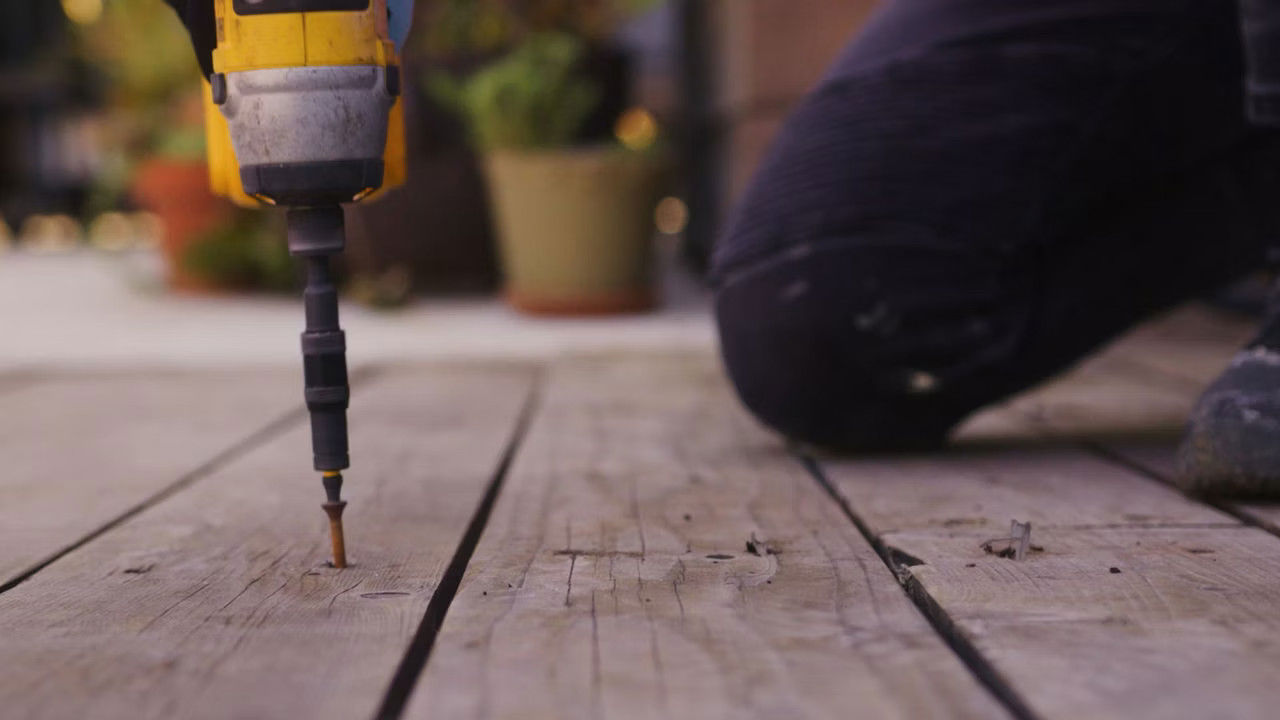
How to Remove a Deck Board That Has Been Screwed Down
For boards that have been screwed down, simply remove the old screws. If there’s a screw you just can’t get out, use a drill bit and drill a couple/few holes alongside of it. This will weaken the area around the fastener, allowing you to pry up the board with very little pressure. You can then come back and remove the stubborn screw by cutting it off, bending it back and forth until it breaks, or by twisting it out using a locking pliers.
Cut the New Wood Deck Board
When installing a newly purchased, pressure treated board, measure the existing boards and cut the new one about 1/8 in. longer. New treated wood is sold wet and will shrink a little bit along its length as it dries. It shrinks a lot more along its width. So, don’t worry if you notice the new board is much wider than the other dry boards next to it. The new board will shrink as it dries, and eventually match the others.
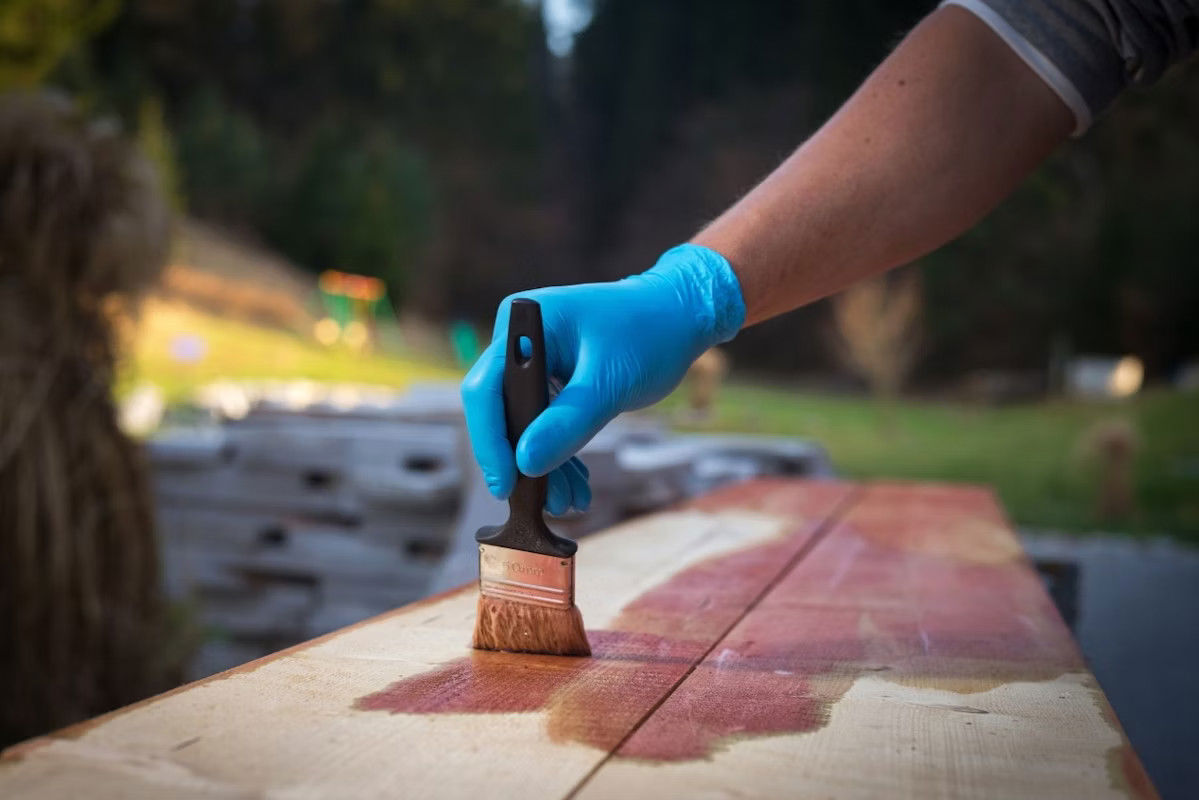
Pre-finish the New Boards
Unless you plan to re-finish the entire deck, pre-finish the replacement board before installing it. After cutting the new board to size, sand it with 80 grit sandpaper, before applying the same stain or sealer that the rest of your deck was finished with.
Sanding the wood will remove the mill glaze, which is a shiny, hard surface that forms on newly sawn lumber, especially pressure treated wood. Mill glaze is caused by the heat and pressure of the planer blades at the sawmill. It can seal the wood grain, making it harder for stain or sealers to penetrate evenly.
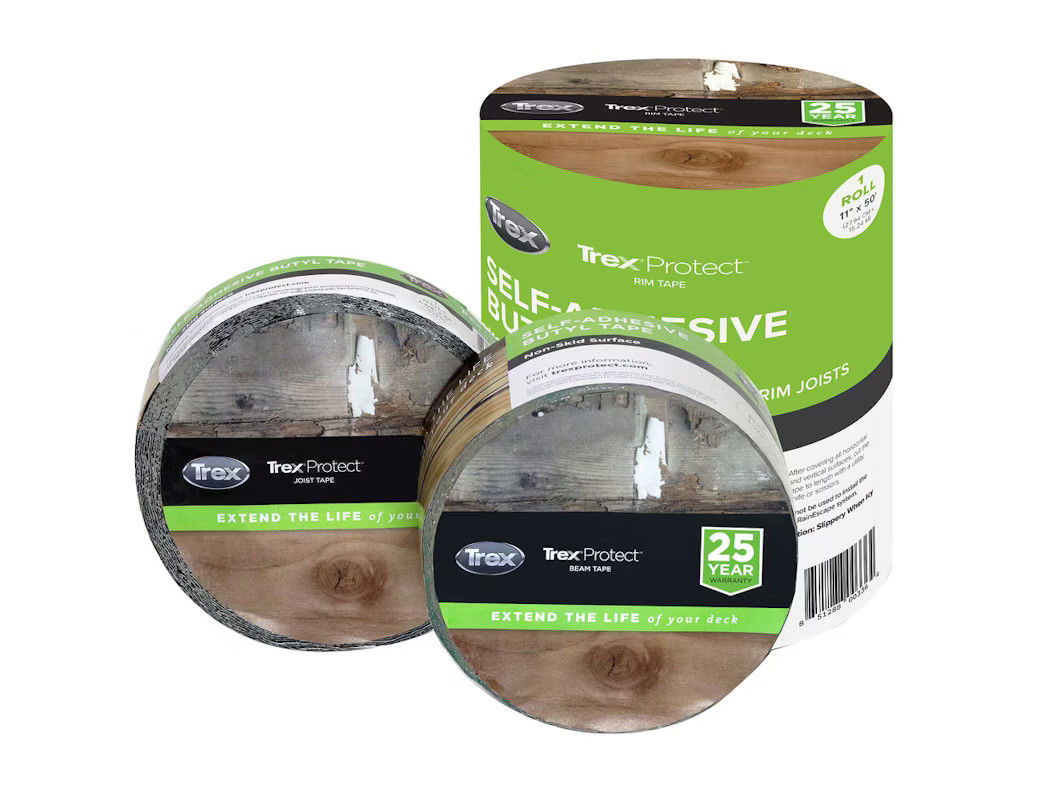
Seal Up the Old Holes
Prior to installing your new decking, inspect the underlying joists for water damage or evidence of mold or insect activity. Address any structural issues before proceeding. To prevent future damage, place a weather-resistant sealant or a piece of Trex®Protect™Joist FlashingTape over any open screw holes. This creates a barrier that stops water from collecting in the old holes. Even if you reinstall the screw in the exact same spot, sealing the area minimizes the risk of water tracking down the screw threads and into the joist, helping extend the life of your deck framing.
Install New Wood Deck Boards
Install the replacement boards using at least 2-1/2-in. deck screws or 3-in. nails. Drive them flush into the surface of the wood. Don’t overdrive them, so they create a hole for water to pool. Drill pilot holes near the ends of the new board to prevent splitting. If the other deck boards were fastened by nails, you may want to use screws instead. Screws have a far superior holding power. To keep a consistent appearance, choose trim-head deck screws designed for wood if the surrounding nail heads are smaller than the heads of standard deck screws.
How Much Does It Cost to Replace a Wood Deck Board
One 5/4 in. x 6 in. x 12 ft. cedar deck board costs about $18. The same size pressure treated board cost about $10. A 1-lb. box of standard 2-1/2-in. deck screw costs about $10. You may also have to buy a quart of deck stain/sealer, which could cost between $20 and $35. You may only find the sealer you need in 1-gal. containers which often cost more than $50.
Prices are approximate and may vary by region, retailer, and product availability.
Tools and Materials Required
- Tape Measure
- Speed Square
- Cat’s Paw or Nail Puller
- Pry Bar
- Pencil or Marker
- Circular Saw or Miter Saw
- Oscillating Tool (optional)
- Drill or Impact Driver
- Drill Bits
- Hammer
- Safety Glasses
- Work Gloves
- Hearing Protection
- Dust Mask
- Knee Pads
- Deck Board
- Deck Screws or Nails
- Wood Stain or Seal
Consider Replacing Your Wood With Composite Decking
If more than just a couple deck boards are showing signs of wear—like cracks, splinters, or rot—it might be time to consider a more permanent solution like Trex® composite decking. Here are some of the top reasons more homeowners are making the switch:
- Minimal Maintenance: Composite boards resist fading, splintering, mold, and rot, so there is sanding, sealing, or staining required, ever!
- Cost-Effective Over Time: Though it costs more initially, composite decking reduces long-term expenses by eliminating the need for frequent repairs and replacements.
- Durable and Long-Lasting: Designed to withstand harsh weather and daily wear far better than wood. And with residential warranties lasting 25 to 50 years, Trex ensures your deck and railings are built—and backed—to last.
- Eco-Friendly: Many products, including Trex, are made from recycled materials, helping reduce environmental impact.
- Boosts Home Value: Composite decks are a major selling point for homebuyers looking for beauty without the hassle of constant upkeep.
May Not Require a Complete Rebuild: You often can save time and money by keeping the existing framing and just replace the decking.
More Information About Deck Maintenance, Repair and Replacement