As your wood deck ages, the deck boards may begin to rot, split, or come loose. This is especially true if the boards haven’t been properly maintained with routine cleaning, staining, and sealing. If that’s the case with your deck and you’d like to switch to a lower maintenance option, replace your old wood deck boards with composite ones. Composite deck boards require no upkeep other than occasional cleaning, and composite can last twice as long as wood.
More good news: You can upgrade your decking without rebuilding your whole deck. But there are things you need to know before you make the swap. This helpful guide provides great tips for removing the old boards and explains how to inspect and prepare your existing framing for the new ones.
Tools Required to Remove Old Deck Boards
You might be able to remove all the boards from a small deck with just a hammer, but here are additional tools that might make the job a bit easier and safer:
- Personal protective equipment
- Large pry bar
- Small pry bar or claw bar
- Drill or impact driver with an assortment of bits
- Screwdriver
- Reciprocating saw or oscillating multitool
- Tarp or powerful magnet for cleanup (optional)
- Circular saw
- Pallet buster–type tool
Remove the Old Deck Boards
First things first: As with all DIY demolition projects, you have to wear the appropriate personal safety equipment. Eye protection, ear protection, gloves, long pants, and reinforced-toe shoes are recommended. And as always, for any home improvement project, follow local code and permitting requirements. Once you get started, here are helpful tips to speed up the process and prevent injuries:
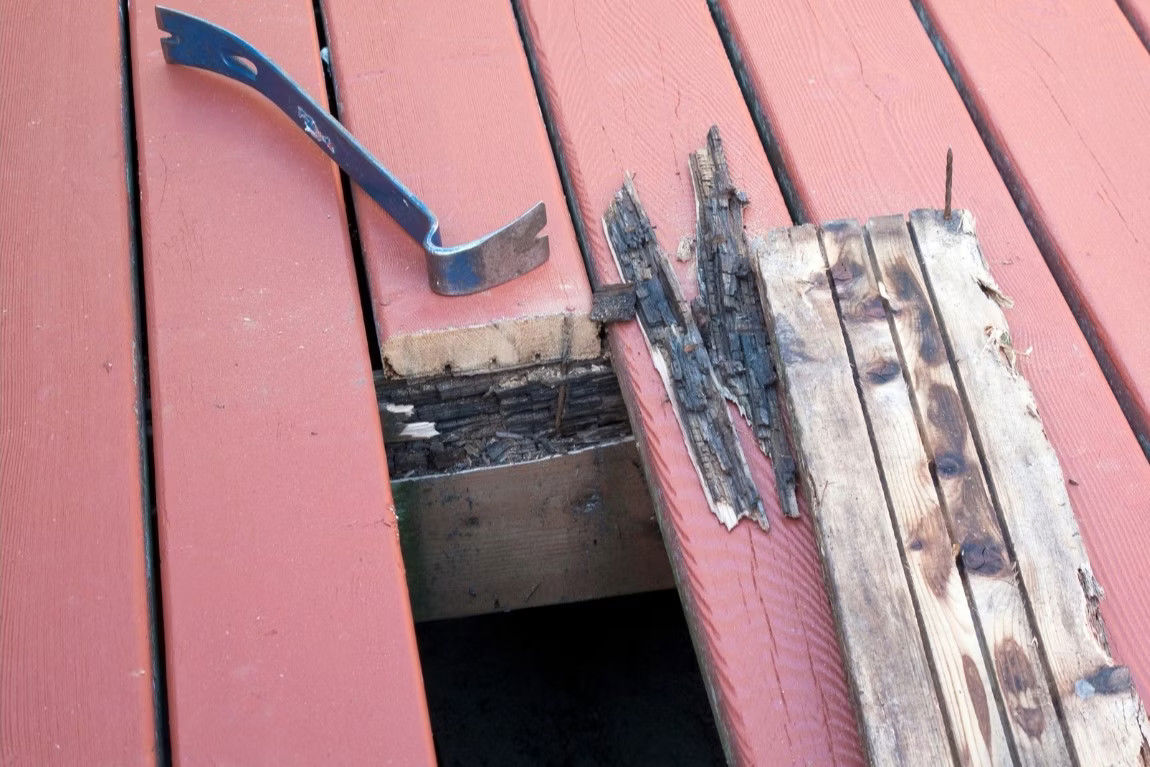
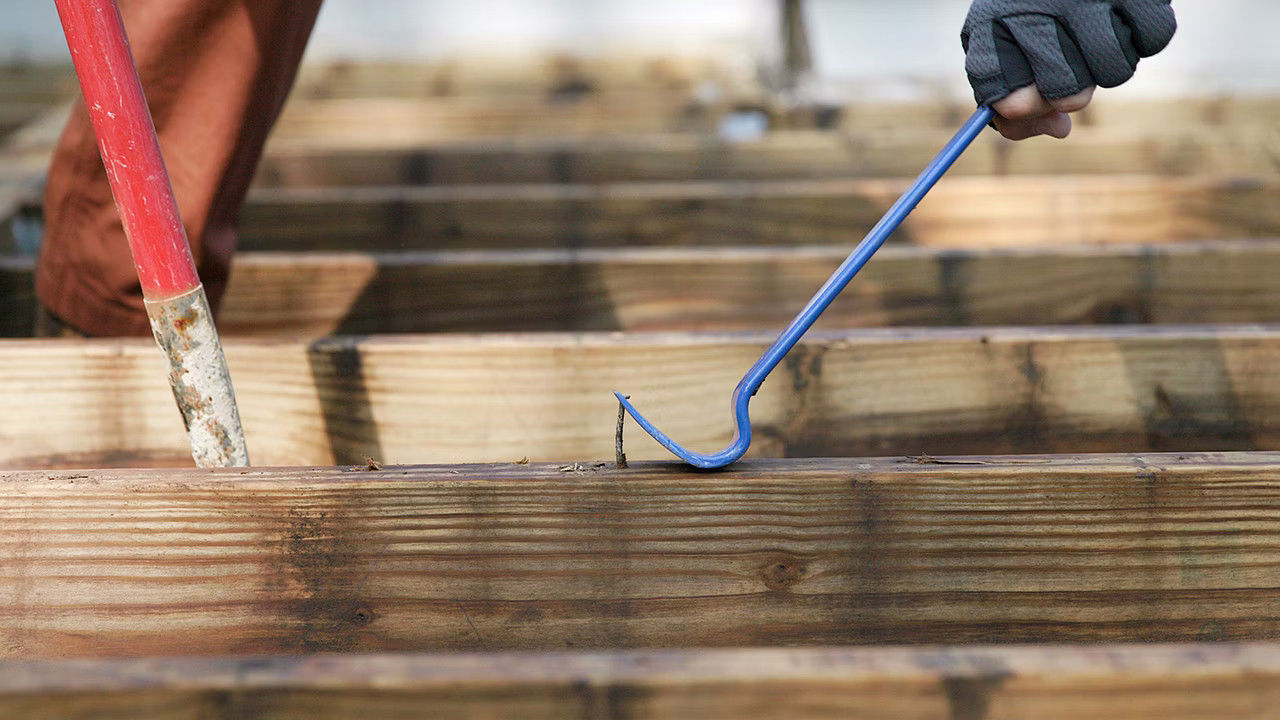
- If the existing deck boards are held down with screws, you can try to remove them with a drill, but this isn’t always possible. If the screws won’t come loose or the boards are held down with nails, pry up the old deck boards instead. Use a 3-ft. pry bar or deck demolition tool such as a pallet buster.
- For deck boards longer than 10 or 12 ft., consider cutting them in half to make them easier to manage. Be sure to set the blade depth on the saw so it cuts just a little deeper than the boards so you don’t damage the joists.
- To prevent stepping on a nail or screw, and to reduce the risk of injury when you handle the boards, you should deal with the protruding screws or nails entirely as soon as the boards are loose.
- If you’re going to repurpose the decking, pull the nails or screws with the claw of a hammer, a smaller pry bar, or a claw bar.
- If the boards are going in the trash, bend the nails over. Screws are typically easy to snap off flush with a hammer.
- For nails or screws that pull through and remain in the joists, you have several options. You can pry them up, snap them off, pound them in, or cut them off flush with an oscillating multitool or reciprocating saw.
- Be careful when you use prying tools, especially when you’re working on an elevated deck. If you put all your weight and force behind a prying tool and the fastener suddenly gives way, you could find yourself taking a quick, unscheduled trip to the ground or worse, the emergency room.
- Set large tarps beneath and around the deck to collect the fasteners. You’ll prevent foot injuries and holes in lawn mower tires down the road. Another option is to drag the area with a powerful magnet after you’re finished removing the deck boards.
Inspecting the Joists, Beams, and Posts
It’s tempting to begin installing your new deck boards as soon as the old ones are off. However, you need to make sure the existing framing can safely support the new boards for the second chapter in the life of your deck:
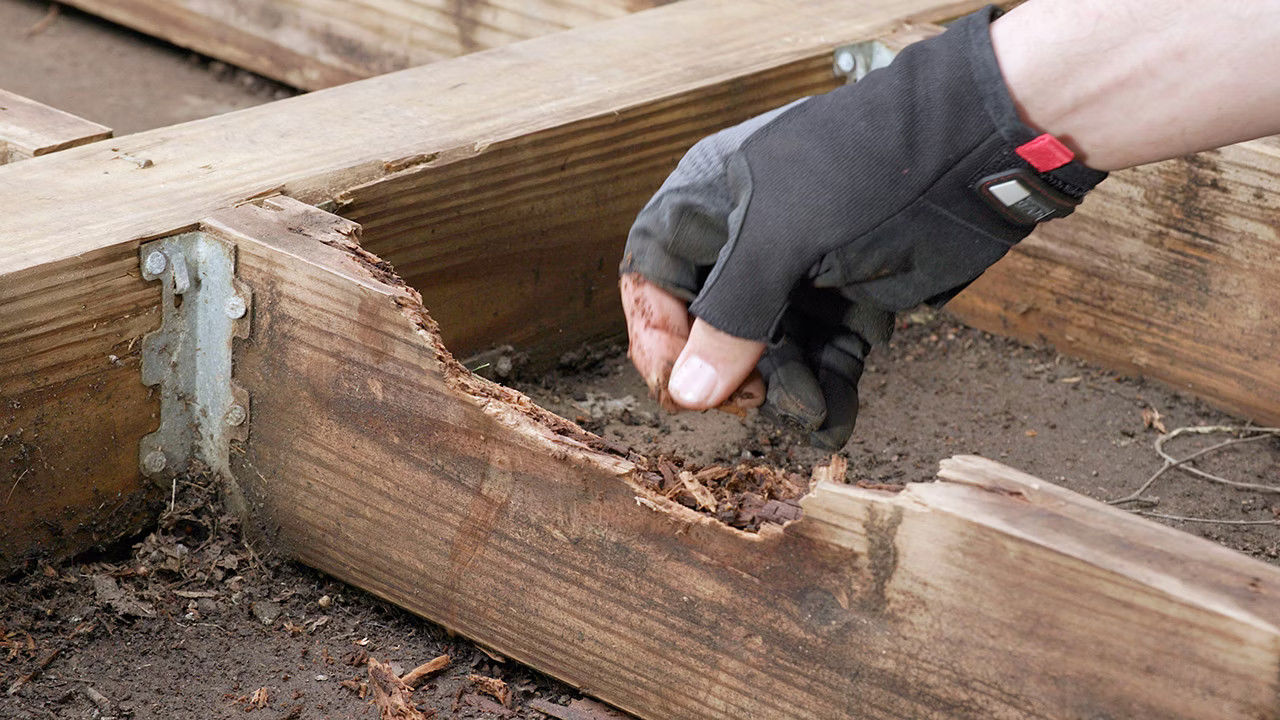
- With the deck boards removed, inspect all the framing lumber for cracks, splits, or other damage.
- Check for soft spots in the wood framing. These can be wet or dry and are a sign of advanced decay. To check for rot, use a screwdriver to probe any wood that looks excessively stained or weathered. If the screwdriver digs into the wood, you’ve found a soft spot, and that board should be replaced. It’s no longer structurally sound and won’t properly hold fasteners.
- Replace all damaged or decayed framing before you install the new deck boards.
- Run a string across the uncovered joists to check the structure for flatness. The removal of wood deck boards can allow joists to spring or warp out of position.
- Use a power planer to knock down any high spots.
- If a joist sinks drastically below neighboring joists, you need to either replace it or sister/attach a new joist alongside it.
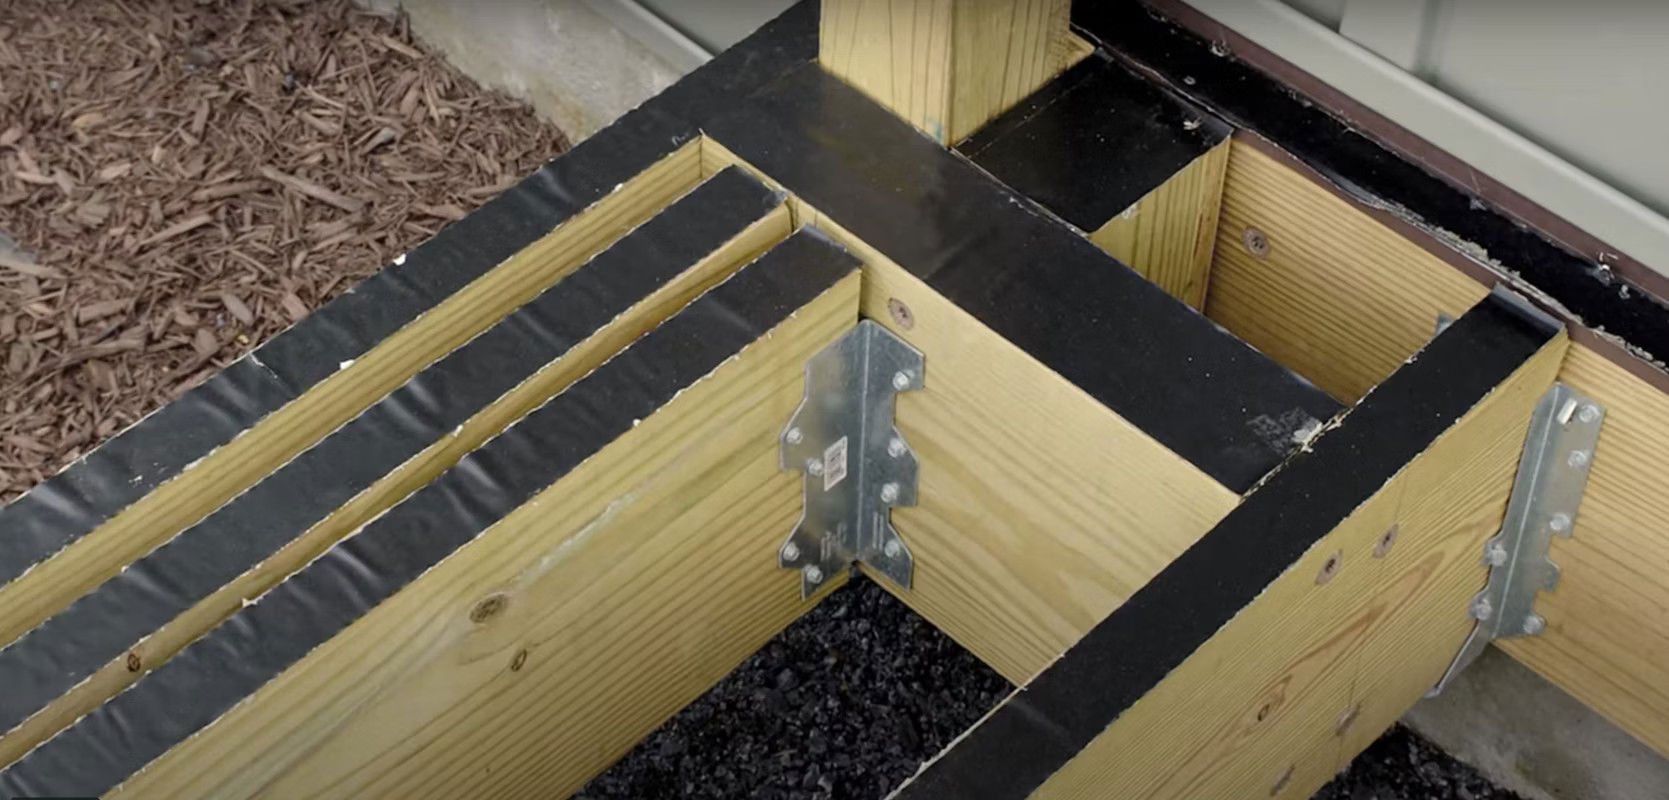
- To extend the life of your deck frame, use a protective membrane to cover the top surface of all the joists, beams, stringers, and ledger boards. A good option is Trex® Protect™ Joist and Beam Tape. It’s designed to not only shed water from the top surface of joists but also to seal around the deck fasteners where they enter wood framing.
Check the Condition of the Framing Hardware
Verify that the joist hangers are plumb, free of rust, and not missing any fasteners. A small amount of white surface oxidation is common. However, orange, brown, or red rust in any amount on the surface of metal framing hardware like joist hangers is a red flag. You need to replace that hardware.
After you identify what needs to be replaced, be sure to choose joist hangers and structural fasteners that are suitable for outdoor use and contact with the corrosive chemicals used in pressure-treated lumber. For more information on joist hangers, check out this article.
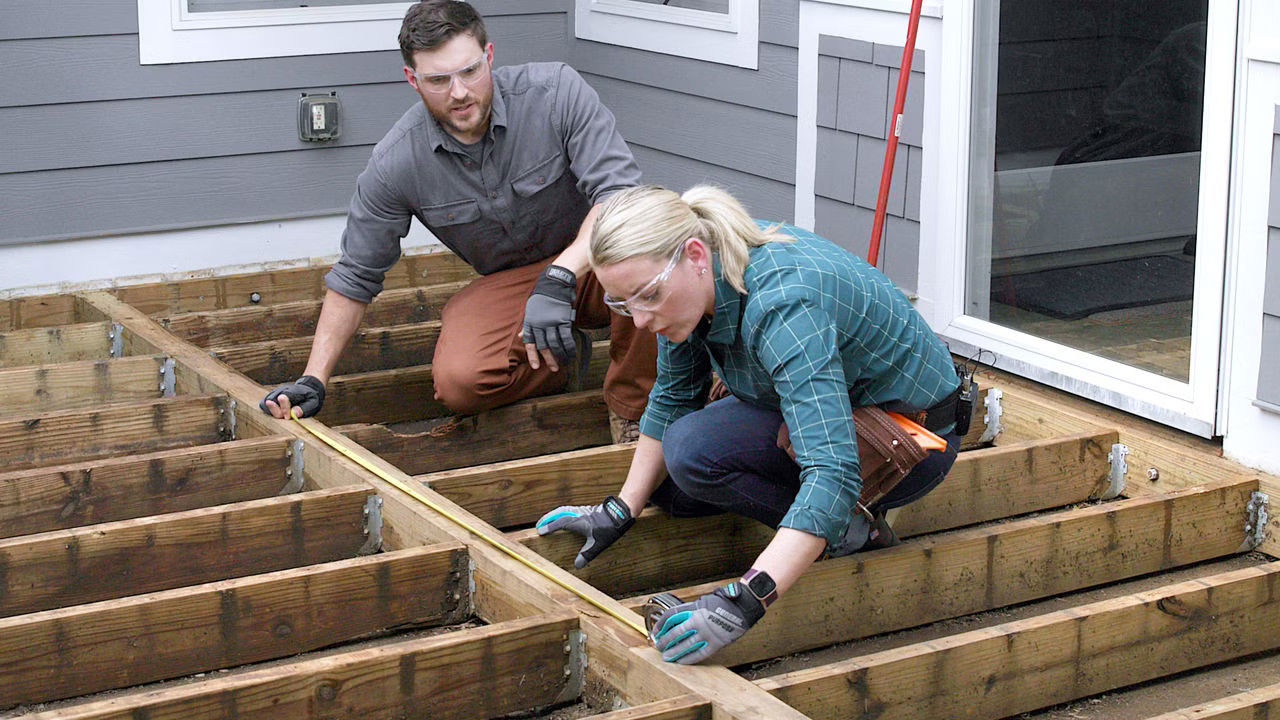
Check the Beam and Joist Spans
The beam span is the distance between support posts. If you plan to add features like hot tubs or stairs, it’s very likely the existing beams will be undersized. It’s also possible that codes have changed since your deck was originally framed, or that the previous builder didn’t follow the building code to begin with. This beam spam calculator can help you determine if your beams are properly sized.
You’ll also need to confirm that the spacing of your joists meets building code requirements. This joist span calculator can help you determine that. If you have even the slightest doubt about the capacity of existing beams or joists, double-check with your local building official.
Check the Joist Spacing
Joist spacing is the distance between two parallel joists. In the past, it wasn’t uncommon for deck builders to use 2x6 deck boards and space the joists 2 ft. apart. Most composite boards require a joist spacing of no more than 16 in. Joists need to be even closer together if you plan to run your deck boards at an angle. If your deck joists are spaced 2 ft. apart, adding new joists between the old ones might be a good solution. You can find the specific joist spacing requirements for Trex composite decking here.
Planning for a “Picture Frame” Border
A picture frame border gives your deck an elegant look and covers the raw cut ends of the deck boards. When you plan a picture frame (or any other nonstandard pattern, such as herringbone, diagonal, or tile pattern), you’ll need to adjust your framing to support that particular pattern. For a picture frame border, you’ll need to add properly spaced blocking between the outer joists where the perimeter picture frame deck boards will run parallel to the joists. You can find more detailed information in this article, How to Prepare Your Deck for a Picture Frame Border.
How Much Does It Cost to Replace Deck Boards?
Installing Your New Decking
For some great information on how to install your new composite decking check out these helpful articles: