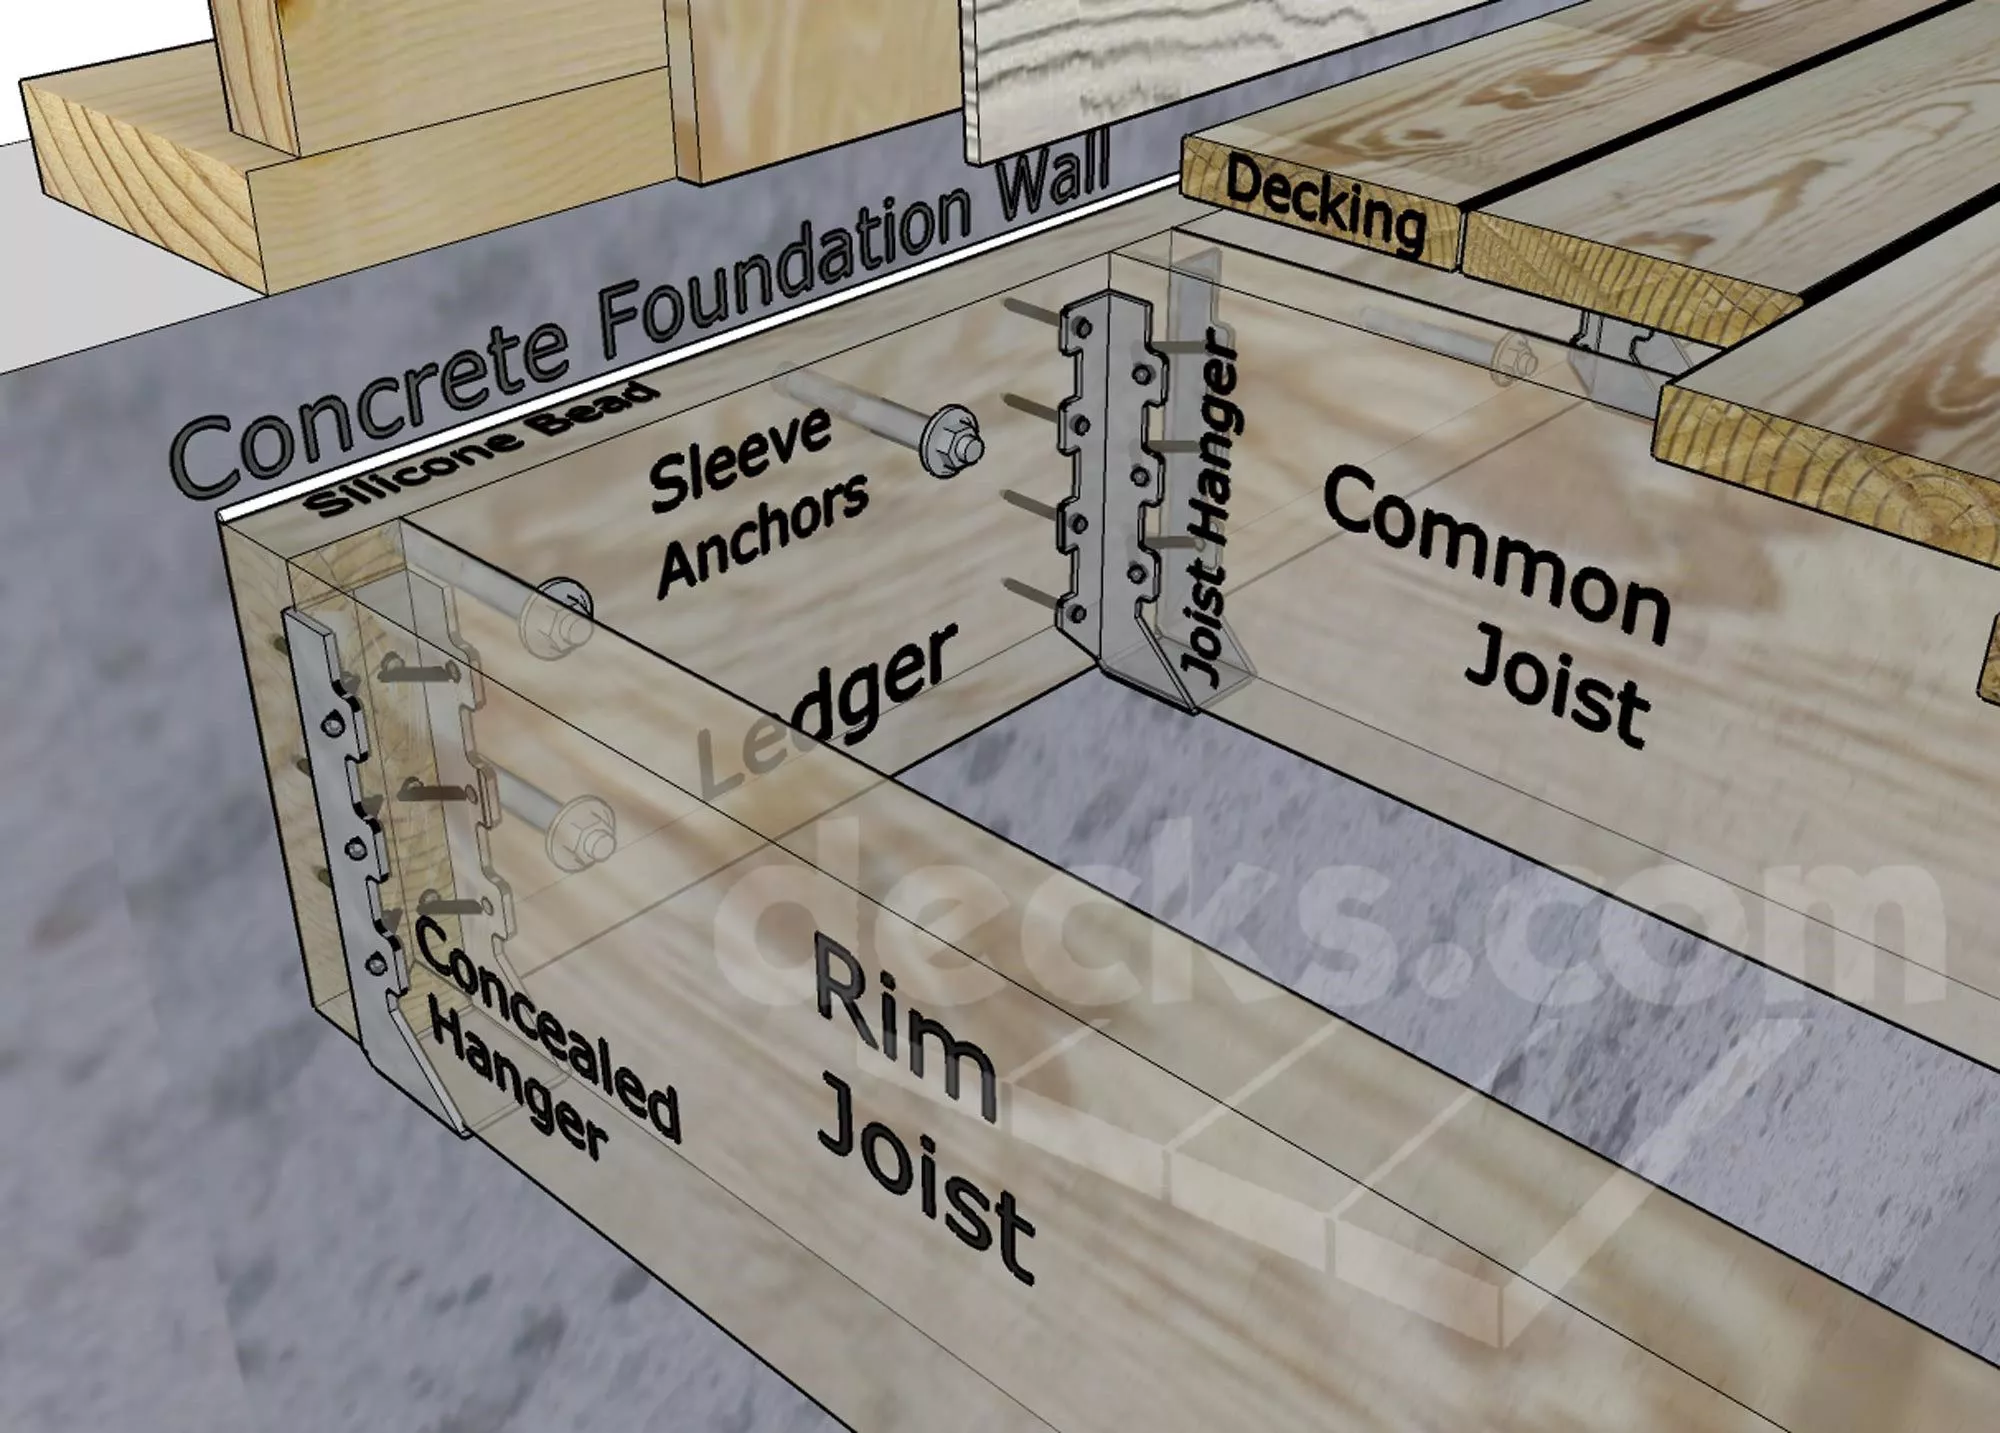
When attaching a ledger board to a masonry wall, you will want to first cut the ledger board to size and have two helpers hold it in place so you can drill two holes every 12” through the wood where your bolts will be installed. Mark these locations on the wall with a pencil. Now, you can drill the holes through the wall into the basement or crawl space using a hammer drill with a masonry bit. Then, just line up the board to the holes in the brick, and screw in the fasteners.
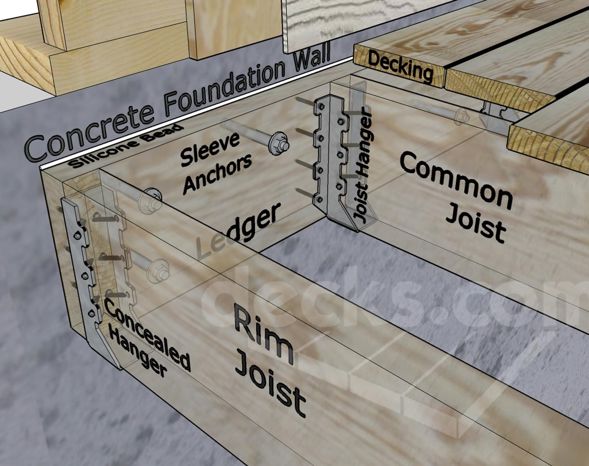
When attaching to solid masonry, you will have to install expansion anchors with a minimum diameter of ½” and set into the wall at least 2 ½”. Hollow concrete block can easily break when drilled and doesn’t leave adequate bearing support for anchors. If you are attaching to a hollow masonry wall, you can fill the cells with grout and use expansion anchors, or you'll need to install epoxy anchors in compliance with the manufacturer’s installation instructions to a minimum depth of 4 ¼”.
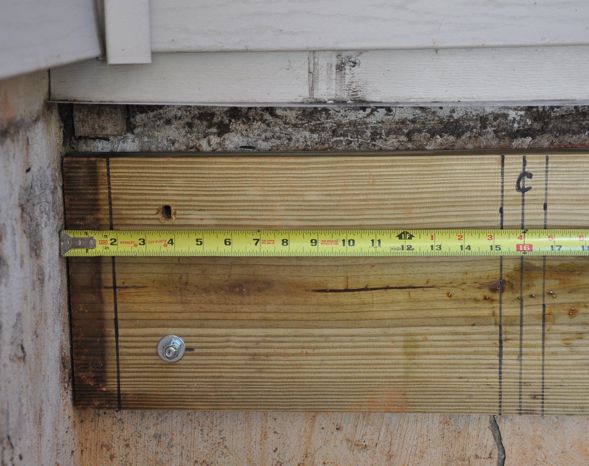
Lay out your bolt locations using a tape measure and construction pencil. Bolt patterns will vary depending on joist length. Bolts should be staggered between joists and located 2" from the top and bottom of the ledger board.
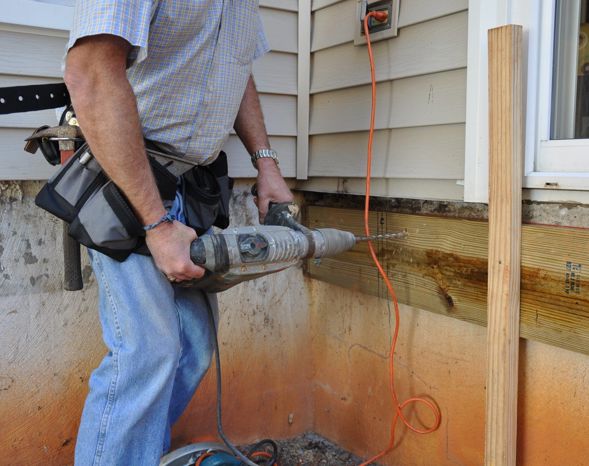
Temporarily secure the ledger board to the correct location against the concrete wall using concrete screws or temporary supports. Use a wood bit to drill ½" pilot holes through the ledger board. Next, use a concrete bit to drill into the concrete wall.
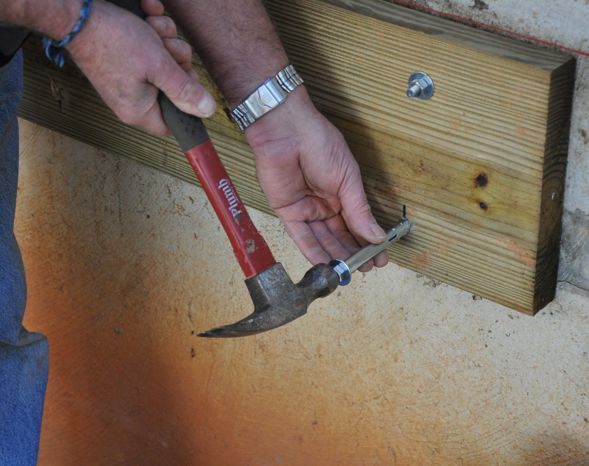
Install two bolts at the end of each ledger board. Hammer the sleeve anchor through the ledger board into the concrete wall.
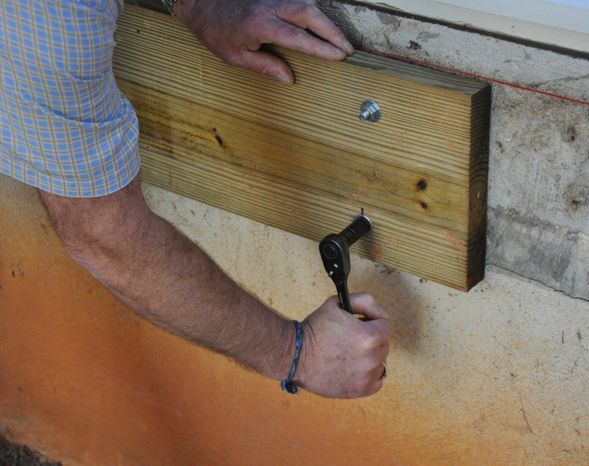
Hand tighten the bolts using a ratchet. Do not over tighten.

Apply a generous bead of silicone along the top the ledger against the house.
Protect the opening by sealing with silicon caulking on both the inside and outside of the wall, or wherever necessary. Always consult your local building inspector before attempting to attach a ledger board to a masonry wall. In some cases, you may want to avoid the hassle and uncertainty of attaching to a masonry wall. Remember, you can always install frost footings and posts beside the house to support the deck without attaching to the house.