Adding decking patterns can bring style to your deck design. Consider different layout options when planning your deck design. This may require some extra material. Decks are artistic spaces that reflect your vision, playing a key role in your property's architecture. They offer cozy seating, dining areas, fire pits, and entertainment spaces, enhancing your home.
When designing a deck, choosing a layout for deck boards is crucial. Various designs cater to your style preferences and enhance your home's appeal. Whether you like a subtle pattern or intricate designs, there's a perfect deck pattern for your project. Expect additional costs for materials and possibly labor when considering your layout deck design. Explore different designs, installation complexity, and visual impact to kickstart your decking design process.
Popular Deck Pattern Layouts & Designs
1. Single-Width Deck Pattern
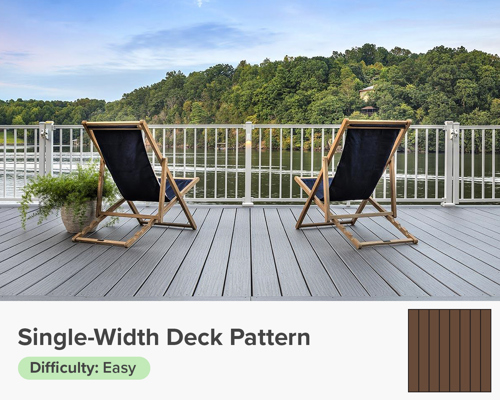
You're probably familiar with the single-width deck pattern, which is not only the easiest to install but also the most cost-effective. Typically, deck boards are spaced 16 inches on center, with a subframe running perpendicular to support them.
This layout, alternatively known as the horizontal deck pattern, optimizes material spacing and quantity and simplifies installation. When these factors are combined, you achieve the best overall cost/ft2, making this a perfect choice for budget-conscious homeowners seeking the benefits of their outdoor deck.
The simplistic single-width deck pattern is an elegant option when you are looking for a subtle deck design. Depending on the orientation of the boards you choose, you can emphasize straight lines to draw attention to or away from specific areas. This makes it an ideal choice for integrating your deck seamlessly into its surroundings, enhancing its visual appeal.
2. Diagonal Decking Pattern
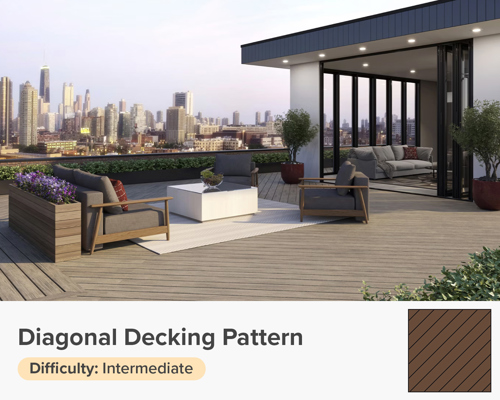
The technique entails installing decking at a 45-degree angle across the joists. Using diagonal decking increases the strength of the deck frame, which prevents racking and makes installing sway bracing unnecessary. Depending on the decking material you are using, you may need to reduce your joist spacing to 12” on center to help support the diagonal span. Some deck builders will tell you that applying decking diagonally will increase your waste factor by 15 percent. We believe you can do much better than that with some planning. However, more labor is involved because this technique requires you to make more cuts.
It is usually best to start with the longest board length from a corner and work off of both sides. It is important to square the decking to maintain a consistent angle across the surface. You can allow the ends of the boards to hang over the frame until the end so you can use a single pass with a circular saw to achieve a consistent edge. Diagonal decking adds a distinct character to your deck and can emphasize a view or affect how people move through the space. For decks that are over 20’ wide, you should consider applying your decking diagonally to minimize butt joints.

A deck with diagonal decking brings a touch of sophistication and style to your outdoor space. The diagonal lines immediately draw the eye and create a striking visual impact. Depending on the complexity of the diagonal decking pattern, whether it covers the entire deck or just a particular section, an additional subframe is required to support the decking material and prevent any bounce or sag in the deck. Typically, this means reducing the spacing of subframe joists from the standard 16 inches on center to 12 inches on center.
The added material and the need for higher installation skills make diagonal decking patterns more labor-intensive and costly. However, if you're aiming to design an interesting and eye-catching outdoor living area, diagonal deck boards are an excellent choice.
3. Picture Frame Deck Pattern
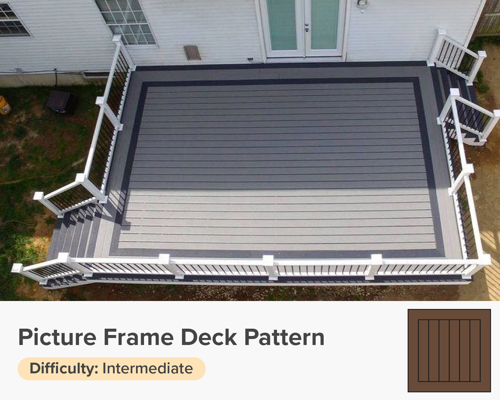
To add an urbane finish to your deck design, consider incorporating a picture frame deck pattern. These decking boards run the perimeter of the deck to create an artistic framing, akin to how a picture frame surrounds a painting. This creative touch adds a subtle yet effective twist, making your deck visually interesting and intentionally complete.
Deck patterns with borders can be added to any design and especially stand out when they’re set in a contrasting color. With slight adjustments to the subframe, the rim joist can be configured to support deck boards running in two directions, creating a fully supported picture frame decking pattern. With careful planning, this design can be executed with minimal impact on cost and material wastage. For a competent DIY enthusiast, installing a picture frame deck edge is fairly straightforward.
4. Transition Board Deck Pattern
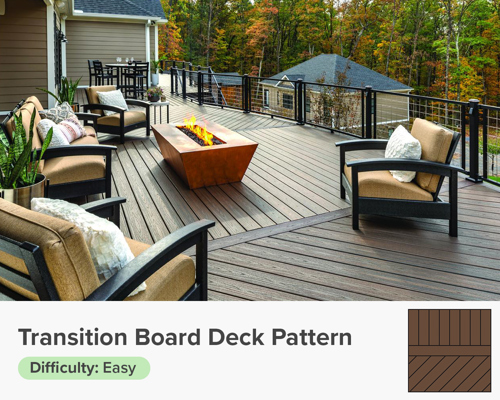
As the name suggests, transition board deck patterns serve to create a bridge between two areas or elements within a deck layout. This transition can signify a physical shift from one space to another or simply introduce a change in deck board orientation or pattern. The flexibility of transition board designs allows you to tailor your deck's appearance and functionality according to your specific needs, such as creating separation between two areas on a deck that serve different purposes or adding visual interest by splitting long runs of deck boards.
One effective use of transition boards is to introduce different colored decking. This two-tone decking design adds a custom look that truly makes your deck a unique and interesting feature to behold. It allows for a broader color palette, enabling you to harmonize your deck with its surroundings or create striking contrasts within its overall finish.
Implementing this design may require additional joists and blocking to adequately support the decking materials, especially where transitions occur. Precision planning and execution ensure that the transition boards not only enhance aesthetics but also maintain structural integrity throughout the deck.
5. Herringbone Deck Pattern
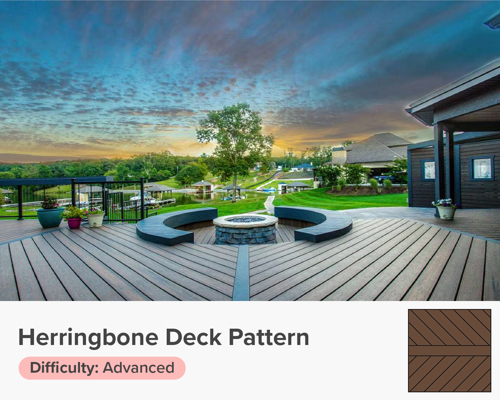
From ancient Roman to Elizabethan Renaissance design, the herringbone pattern has always symbolized luxury and opulence. Today, in the realm of herringbone deck patterns, it maintains a well-deserved reputation for rich visual intrigue and expert craftsmanship. If you’re ready to take your deck to a level that’s heads and shoulders above the rest, then herringbone is certainly the right choice.
This unique deck design requires highly skilled craftspeople and often demands significant upgrades to the subframe. Alongside considerations such as potential waste, implementing a herringbone deck can be both time-consuming and costly. However, with experienced installers and premium-quality materials, the results are truly exceptional.
6. Chevron Deck Pattern
![]()
The chevron deck pattern is often viewed as a simplified version of the herringbone pattern, sharing a similar historical heritage and a highly coveted geometric design. It achieves a distinctive zig-zag effect by alternating the direction of deck boards typically at a 90-degree angle.
Unlike herringbone, chevron utilizes boards that are cut at 45-degree angles and butted together, creating a continuous V-shape along the deck surface. This difference, although subtle, distinguishes the two designs upon closer inspection.
Installing a chevron deck involves the added complexity of making numerous precise 45-degree cuts to ensure a seamless fit. Additionally, it necessitates upgrading the subframe to support the angled boards effectively. Due to these requirements, it's advisable to enlist the expertise of a professional installer experienced in working with this specific pattern. Given its comparative complexity and associated costs, not all installers may have the necessary skill set to achieve a high-quality installation of chevron decking.
7. Staggered Deck Board Pattern
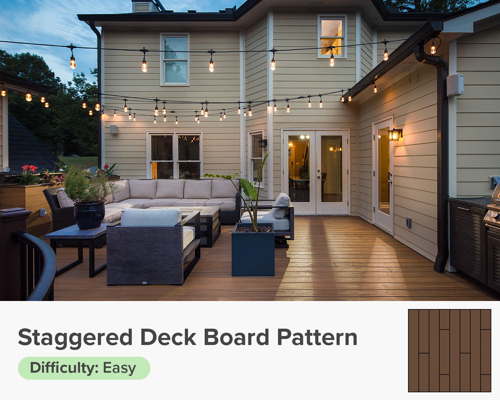
The staggered deck board pattern resembles the typical running board pattern found in brickwork, where deck boards are repetitively and alternately joined across the deck surface. This technique effectively breaks up the appearance of long deck boards and adds an eye-catching motif to the deck.
This style is commonly seen in traditional decks that prioritize material utilization over intricate design, resulting in a handcrafted look. However, maintaining a consistent staggered pattern can achieve a more modern and updated aesthetic that complements a wide range of home styles.
Similar to other straightforward deck patterns, the subframe required is simple and doesn't require any special construction over and above the standard subframe. It's important to ensure that boards are properly spaced when staggering them to allow for adequate air and water flow and to accommodate the expansion and contraction of the wood.
8. Tile or Patchwork Deck Pattern
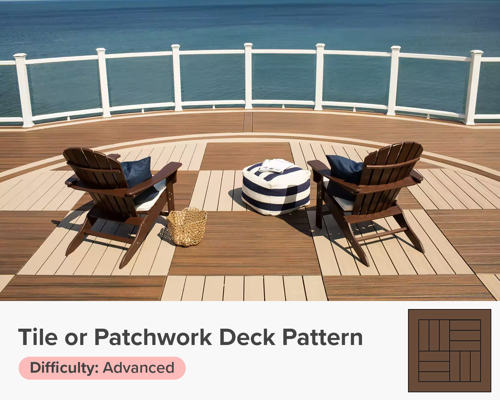
Tile deck patterns offer an avant-garde and innovative approach to creating an elegant outdoor living space that appears larger than it is. By utilizing varying patchwork deck pattern sizes, you can effortlessly introduce diversity into your deck design. Whether you opt for a small checkerboard design or a larger parquet design layout with deck boards arranged in geometric patterns, you can create a very distinct and unique sectioned deck.
However, to achieve this pattern, you will need a complex sub-structure capable of supporting the deck boards running in different directions. This requirement will vary depending on the size of the tile pattern and final design. Plus, the design requires detailed planning and calculations to ensure a high-quality result. Typically, projects of this nature are best executed by experienced contractors who have the expertise to handle the intricacies involved.
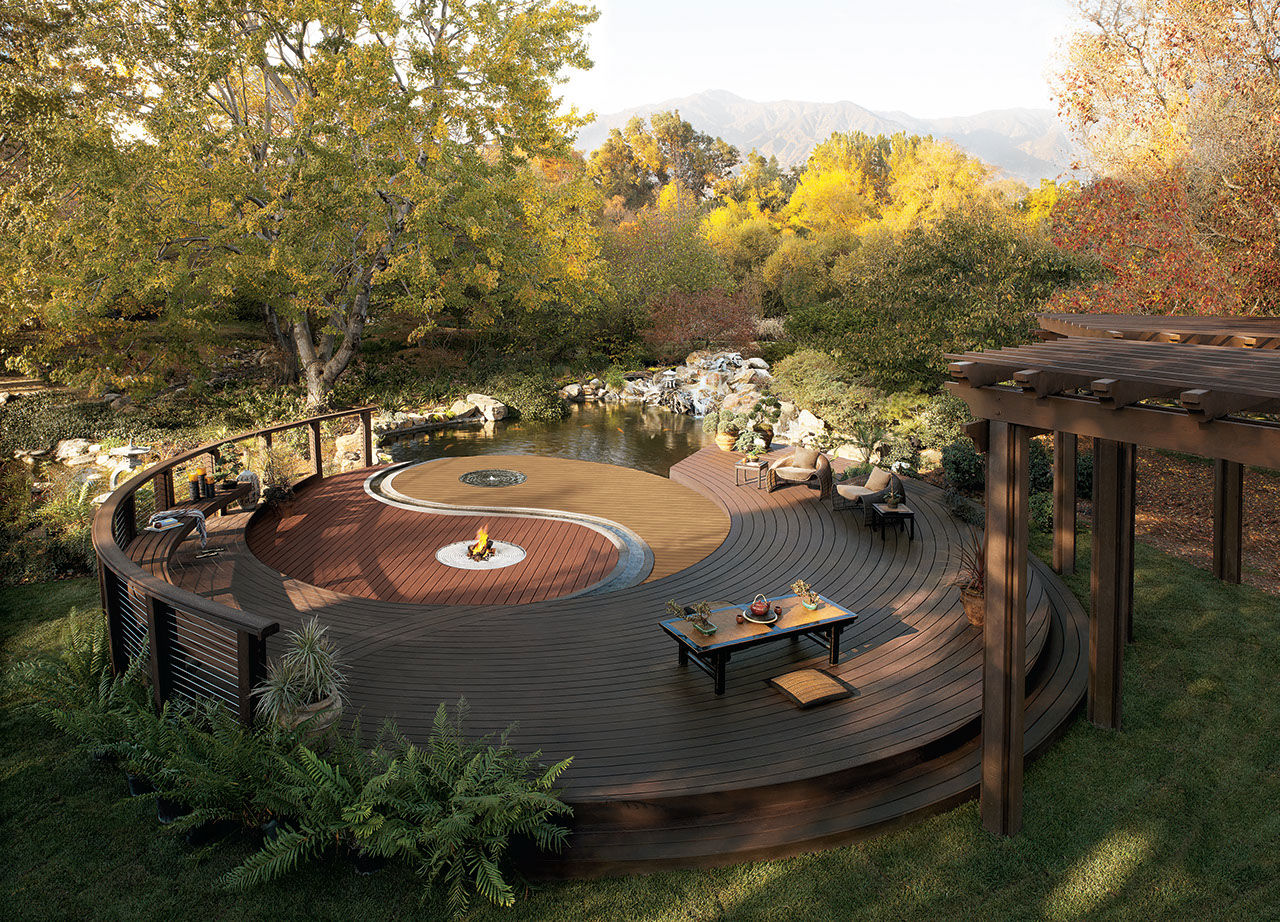
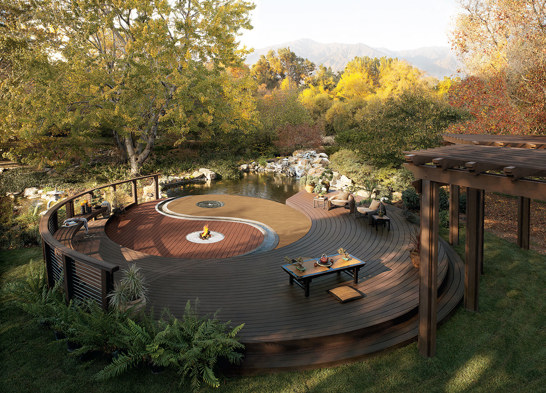
9. Curved Deck Pattern
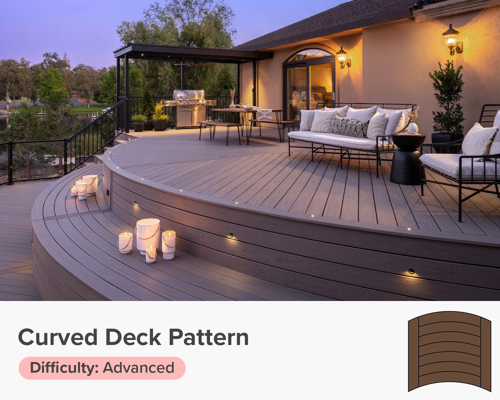
Curved decks are one of the most popular layouts thanks to advancements in decking materials and specialized curving equipment. These innovations have made it easier to achieve curved designs without relying solely on advanced carpentry skills or the limited availability of skilled craftsmen. Curved deck patterns allow for imaginative and truly one-of-a-kind designs that can cater to various styles, whether contemporary, cutting-edge, or minimalist.
It's important to note that building curved decks requires more effort and planning compared to standard rectangular or square decks. This involves using specialized subframes and curving equipment. Not all contractors are familiar with or experienced in constructing this type of deck, so it's essential to work with professionals who have the expertise and knowledge of how to construct a round or curved deck.
10. Deck Inlay Pattern
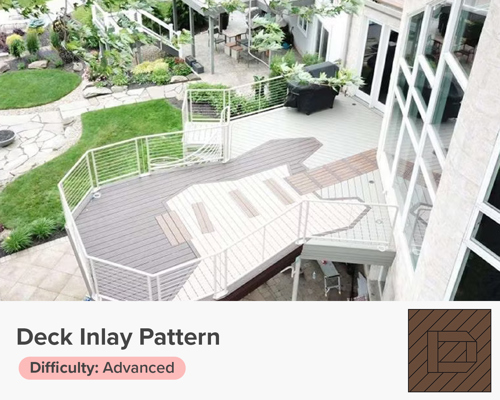
Installing a decking inlay is a creative way to add some flair to any deck project. Use a combination of contrasting colors, angles and shapes to make a statement. We have seen some beautiful examples of octagons, compass roses and even curved designs. However, inlays are challenging, time consuming and require a lot of wasted materials. Plan ahead to save yourself some frustration. Curved inlays are very difficult to build even for professional builders. Find a pattern that is attractive and practical to build.
Decking inlays always require a lot of vertical blocking in between joists because most decking materials can only overhang 3" beyond a joist. Attention to detail is important because every cut will be on display. Also, remember that small pieces are more difficult to install and more likely to loosen, separate and fall out over time.
What is the best pattern to lay decking?
For a perfect compromise between cost and complexity while also offering unique style opportunities, the transition board deck pattern stands out. This pattern allows for creative transitions between different decking areas and the use of multiple colors or orientations, making your deck visually appealing without requiring advanced installation skills or incurring excessive costs. Implementing this design may require additional joists and blocking to adequately support the decking materials, especially where transitions occur, but the overall balance of ease, cost, and aesthetic customization makes it a highly recommended choice.
Get More Inspiration for Your Deck Layout & Design