


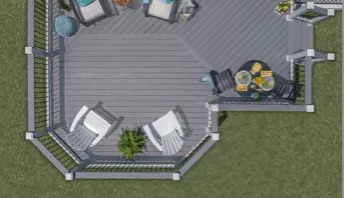
How to Build & Install an Outdoor Deck Gate
Learning how to build and attach a deck gate can be simple and rewarding. Properly gated areas provide a much safer and more secure area for both kids and pets. And as is the case with many home improvement projects, you don’t need to be an expert contractor to do nearly everything yourself. Gaining some experience with smaller projects like this will help you eventually work your way up to bigger projects like learning how to frame a deck.
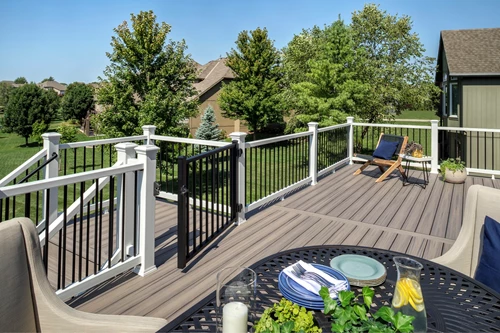
With a little preparation and a step-by-step guide, just about anyone can build their own DIY deck gate. And, in case you don’t want to build it yourself, you can purchase premade gates like the Trex Signature Railing gate.
This self-closing gate can lock to keep unsupervised children from entering the pool area.
Materials Needed for Building a Deck Gate
You’ll need a handful of tools and building materials, but the very first thing you’ll want to grab is a measuring tape. That will allow you to begin measuring the area you want to be gated and to better assess how much lumber you’ll need. Following measurements, the list of things you’ll need includes:
- Measuring tape
- Table saw
- Drill or screwdriver/drill driver with bits
- Framing square
- 2- and 4-foot levels
- Lumber – 2x4s for framing
- 2x2 balusters
- Wood screws
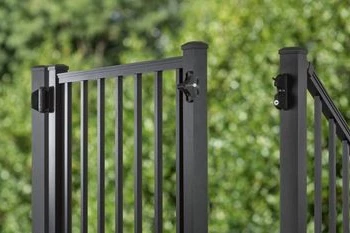
- Two gate hinges
- One gate latch
- Four metal corner braces
And the number of balusters you’ll need for building a deck gate will partially depend on the width of the gate, partially on your style preferences, and partially on the requirements of deck gate code.
Deck Gate Codes & Safety Guides
Making sure your deck gate project is up-to-code can be one of the more intimidating parts of building something. Fortunately, a DIY deck gate only needs to follow a small handful of guidelines in order to be safe and accessible. For residential homes, the International Residential Code (IRC) requires that:
- The gate should open onto the deck - not the stairs or the ground.
- The distance between the bottom of the gate and the deck should be no more than 4 inches.
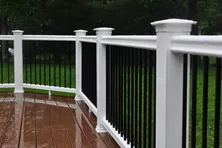
- The space between each baluster must have a maximum distance of 4 inches.
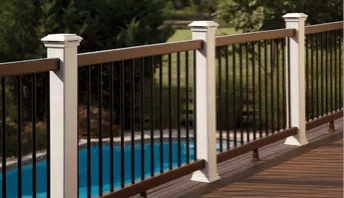
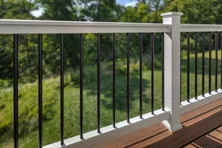
- Handrails and gates must be at least 42" in height, measured from the surface of the deck.
- Self-latching devices can be located no less than 3 inches below the top of the gate.
- Railing is necessary for at least one side of a staircase.
- Handrails and gates should be easy to grip, with a minimum diameter of 1 1/4 inches and a maximum diameter of 2 1/4 inches. Because railing requirements may vary by circumstance, it’s worth learning more about safety codes for deck railing.
- Not all gates require strap hinges but many wood and composite gates often require these straps, which must be strong enough to support its weight.
Additionally, you want to check your local codes as well to ensure you’re compliant.
Building a Deck Gate
Building an outdoor deck gate is a DIY project that can be achieved by even those new to home improvement. The following is an overview of the building process that outlines taking measurements for your gate, choosing and cutting materials, and making sure the frame is properly built.
Measuring the Width of Your Deck Gate
Making the measurements for your deck gate requires you to anticipate a few things. Start at the base of the stairs, and use a tape measure to determine the desired width of your gate. Subtract an inch to allow the gate to swing, as well as making room for the hinges and latch. Then measure how tall you’ll want the gate while keeping in mind that the bottom edge can’t be more than 4” above the floor of your deck.
Measuring the Space
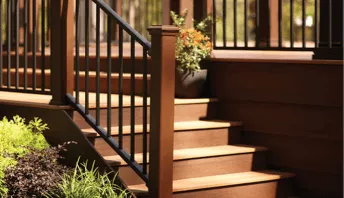
The gate needs to swing back onto the surface of the deck. Typically, the gate is at the top of steps leading off the deck to the ground below. You’ll discover two handrail posts at the top of the staircase up on the deck. Your new gate is going to close off this opening.
Step 1: Use a 2-foot level and check each of the posts for plumb. Make a note if either of the posts are leaning towards one another, away from each other, or are out of plumb the same amount in one direction creating a parallelogram.
Step 2: Use your tape measure to record accurate measurements 4 inches up from the surface of the deck and as the code requires, 42 inches up off the surface of the deck. Draw a rough picture of the opening on a piece of paper or scrap lumber and record these.
Selecting the Wood
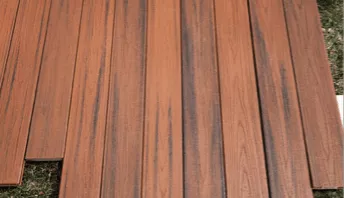
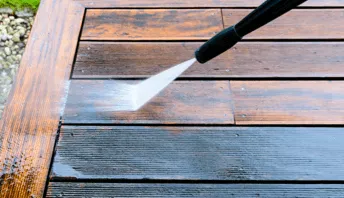
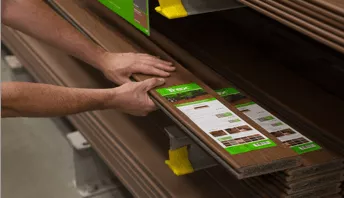
The most appropriate wood for your gate depends on your budget, climate, and color preferences. However, most people often choose pressure treated 2x2 balusters and 2x4’s. Whatever your choice, avoid low-grade lumber for building a deck gate because it’s prone to shrinking or warping, which can impair the functionality of a gate.
Choose lumber that has vertical grain to minimize warping and twisting. When you look at the ends of vertical-grain lumber, you’ll be able to see the center of the tree in the best pieces.
Cutting the Wood
While keeping in mind the gate can’t be more than 4” above the deck, cut the top and bottom gate frame horizontal 2x4s to the length required based on your measurement between the posts making sure to subtract the amount so the gate can open and close without touching the posts.
Cut the two vertical side-frame 2x4’s to the desired length based on your measurements. Temporarily lay the pieces of 2x4 on the deck with the wide face (3.5-inch) facing down and up to the sky. Without screwing it together, assemble the frame to measure its inside dimensions and determine the desired length of your balusters. Then cut your 2x2 balusters to length.
Building The Frame & Adding Balusters
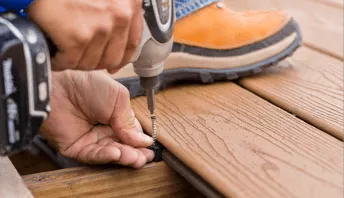
The strongest corners you can create are half-lap joints. You do this by carefully cutting away 13/16ths of an inch of wood a little over 3.5 inches wide from the end of each 2x4. Overlap the pieces of lumber and then use six countersunk 1 and 1/4-inch galvanized screws to lock the corners together. It’s a good idea to also use exterior wood glue on the overlap joints just before installing the screws. As you assemble the outer frame, be sure to check that the shape of the gate matches the actual shape of the opening where it will fit.
The result should look similar to a photo frame. The quantity and precise placement of balusters is up to you, as long as the gaps between them do not exceed 4”. Connect the top and bottom halves of the frame, and then individually add balusters with wood screws.
Painting or Staining the Wood
Staining can be a time-consuming portion of learning how to make a wooden deck gate. With pressure-treated lumber, it is absolutely necessary to stain or paint the wood. Without this protection, Mother Nature will undo all your hard work in a matter of a few years. Allow the assembled gate to air dry in the shade or a garage for a week or two if the treated lumber seems extremely wet. Once it’s painted or stained, allow it to dry before adding hardware or attempting to install the gate.
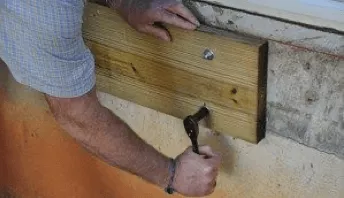
Adding Corner Braces
Corner braces are one of the most commonly overlooked steps in how to make a deck gate. They’re important because they help evenly distribute force across the entire frame. After painting or staining, use a drill to screw metal braces into each corner of the frame to help ensure lasting stability. A brace about 9 inches long on each leg offers great strength.
Your half-lapped corner joints may not require this extra reinforcement. That said, it’s a great idea to add L-shaped galvanized corner braces made by Simpson Strong-Tie. Use their approved outdoor-exposure structural screws to attach the braces to the gate.
How to Install an Outdoor Deck Gate
After you’ve built your outdoor deck gate, it’s time to attach it. Adding a gate to your deck can be a relatively smooth process.
Insert the Gate into the Deck Posts
Lift the gate up and place it between the posts. Be sure to put temporary supports under the gate so it’s up off the deck 4 inches.
Attach the Short Side of the Hinges
If your gate is mounted at the top of the stairs, remember it should swing away from the stairs and not towards them.
Assuming you’re using hinges that attach to the face of the gate and post sides that face the deck, center the hinge-pin part of the hinge over the gap between the gate and the post that will support the gate. Use galvanized structural screws 1.5-inches long to attach the hinges to the gate. Use 2.5-inch timber screws to attach the hinge end onto the post.
Make Sure Posts are Plumb and Gate is Level
Before attempting to attach the hinges, do a final check to ensure the gate is level and oriented correctly.
Wooden gates tend to sag over time, and many builders compensate for that by making the hinge-free side of their gate slightly raised, as opposed to keeping it truly level. But you don’t need to make that compensation with gates made from lighter materials, like aluminum.
Finally, remove the support blocks and ensure the hinges swing freely. If they do, you’re ready to enjoy your new DIY deck gate.
Get Started Installing Your Deck Gate Today
Attaching a deck gate provides privacy and safety. Plus, installation of most premade gates can be a relatively easy process. Check your local home improvement retailer for options and follow the helpful tips above to successfully install your own deck gate.
Glass Deck Railing Ideas and DIY Installation Tips
All glass panels used for deck railings must be safety-tempered and shatter-resistant. Learn how to install glass railing panels and get ideas for your deck.

Reddit Railing Questions Answered
Deck railing is an essential component of any deck, providing both safety and style. However, with so many materials, designs, and installation factors to consider, questions often arise.

Steel vs Aluminum Deck Railings
Discover the key differences between steel and aluminum railings, including maintenance, durability, installation, and cost—perfect for homeowners and pros.

Deck Skirting
Skirting can be an attractive feature that can be added to any low-level deck.
9 Best Deck Furniture Ideas & Designs
Make your deck the place to be this year. Find unique outdoor furniture ideas for decks of all sizes and transform your backyard into an outdoor living room.

Deck Fire Pit Ideas
Fire pits can add ambiance and coziness to your deck year round. Get ideas and inspiration for adding a fire pit to your deck.
More Helpful Resources

Explore Articles by Topic
Footings
Information related to installing frost footings for decks
Framing
Learn structural framing methods
Decking
Learn about wood and composite decking materials
Stairs
An in-depth look at the complex issue of how to build stairs
Railings
How to install guardrails and handrails to meet IRC code
Features
An overview on water drainage, benches, planters and lights
Design
The basics of deck design
Planning
Learn about permits and working with contractors
Porches & Patios
Build a covered deck to enjoy all seasons
Ledger
Proper attachment techniques
Care
Maintain your deck to maintain your investment
Materials
An overview on water drainage, benches, planters and lights
Baluster Basics: Types, Installation Tips, and Deck Design Ideas to Transform Your Space
Discover everything you need to know about deck balusters, from code requirements to material options and installation tips. Explore practical advice and stylish infill alternatives to help bring your project to life with confidence.
Steel vs Aluminum Deck Railings
Discover the key differences between steel and aluminum railings, including maintenance, durability, installation, and cost—perfect for homeowners and pros.
How to Install Composite Deck & Porch Railings
Composite deck and porch railings offer a low-maintenance option for railings. Learn how to install composite railing and get ideas for your deck at Decks.com.

5 Best Ways on How to Hide Trash Cans Outside
Outdoor trash cans can be an unwanted eyesore. Discover how you can easily cover them up and add an extra touch of beauty to your yard.
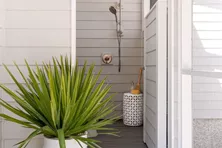
Best DIY Outdoor Shower Ideas & Designs
Outdoor showers are perfect for cleaning off after the beach or pool. Here are some of our favorite DIY outdoor shower ideas. Find inspiration at Decks.com.

What Does it Cost to Enclose a Deck?
Dreaming of a cozy 3-season room? Get the real cost and smart DIY tips inside.
Explore Articles by Topic
Footings
Information related to installing frost footings for decks
Framing
Learn structural framing methods
Decking
Learn about wood and composite decking materials
Stairs
An in-depth look at the complex issue of how to build stairs
Railings
How to install guardrails and handrails to meet IRC code
Features
An overview on water drainage, benches, planters and lights
Design
The basics of deck design
Planning
Learn about permits and working with contractors
Porches & Patios
Build a covered deck to enjoy all seasons
Ledger
Proper attachment techniques
Care
Maintain your deck to maintain your investment
Materials
An overview on water drainage, benches, planters and lights