


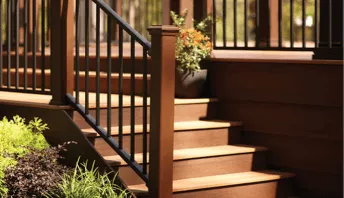
Building a Deck Around a Tree

You may have fond memories of playing and dreaming in a treehouse you clambered up into as a child. Now that you’ve grown up, why not rekindle those fun times by building a deck around a tree in your yard?
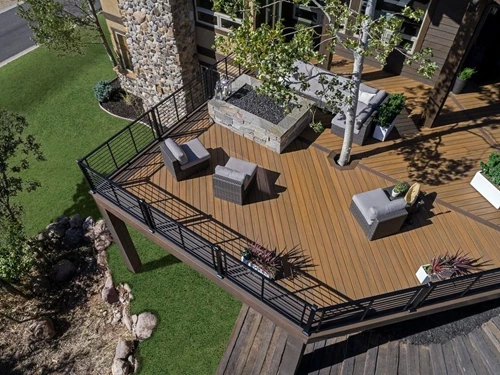
Trees offer delightful shade that will keep you cool on blistering hot days. The wind rustling the leaves above you can help wash away any and all stress. That said, there are a few extra things you need to consider with a deck around a tree. A tree deck is very possible with smart planning.
Why Build a Tree Encompassing Deck?
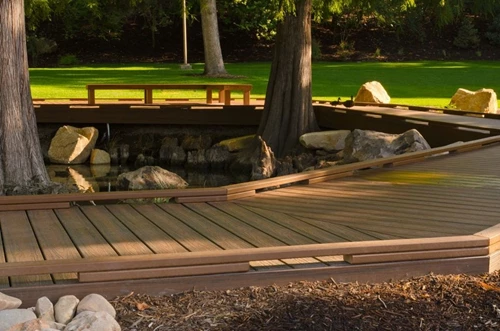
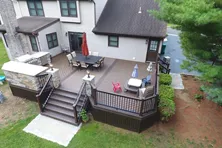
If you’ve ever had the good fortune to sit on a patio surrounded by stately trees, then you know why it makes perfect sense to build a tree deck. Most appraisers will agree that large trees add value to a home. A tree or two reaching for the sky through a new deck will be the envy of all your friends and neighbors who might have to erect a shade sail to keep from melting on a hot summer’s day, while you get your shade for free.
The cost of removing a large tree can also be prohibitive. Why not put that money toward building a deck with extra upgrades that you’ll enjoy for years to come? Your tree-encompassing deck is sure to bring you far more joy than you might ever imagine.
What to Consider Before Building a Deck Around a Tree
A deck built around a tree requires a small amount of pre-planning. The first thing you should do is consult with a local certified arborist who has experience evaluating trees. Here are a few considerations when building a deck around a tree that you should discuss with a professional:
- Is the tree in great health?
- How close can deck support piers be placed to the tree trunk?
- How much does the diameter of the tree increase each year?
- What should be done to keep the tree healthy as time passes?
Type of Tree
You might not think the type of tree extending up through your new deck makes a difference, but not all trees are the same and certain species can be problematic. For example, some evergreen trees broadcast droplets of sap at certain times of the year. You may have never noticed this before as it falls into the grass under the tree. But you’ll notice this sticky sap for sure on your deck furniture, cushions, decking and handrails. This sap can become a nightmare so be sure to ask your arborist which evergreen trees to avoid.
Other tree species have equally offensive qualities. Ginkgo trees, for instance, are known for emitting a foul smell during certain seasons due to natural off-gassing, as are Bradford pears, maidenhair trees, trees of heaven, and the Chinese chestnut.
Some trees are litterbugs. They drop small twigs and other debris in the slightest breeze. Since this happens now on your lawn, it’s not a big deal. But having to sweep or clean your deck multiple times a week can quickly become unpleasant. Once again, ask about this when during your arborist consultation.
Tree Growth Over Time
All trees grow and the diameter of the tree will increase as time passes. You need to be cognizant of the rate of growth only because you need to frame the undercarriage of the deck so that you can easily enlarge the hole, if needed, to accommodate the expanding girth of the trunk over time.
You also need to be aware of sway. Trees can move quite a bit during a windstorm. This usually is not a problem if your deck surrounds the trunk about 2 or 3 feet above the ground. There is very little side-to-side movement in a tree this low to the ground.
However, some trees are more prone to swaying and bending and, in bad weather, may bang or rub against a deck built higher off the ground. Pay attention to tree sway as you are planning your deck or discuss this with the arborist if you don’t know how to measure it.
Tree Roots
Not all tree roots are the same. Your arborist will likely cover this in great detail. For example, giant pin oak trees have small-diameter tree roots for the most part. You can cut large amounts of these roots and the tree can survive and thrive.
Certain beech trees, however, are the exact opposite. They have a network of very sensitive roots and if you disturb too many of them under the drip line of the tree, you risk killing it.
It’s best to have your deck foundation plan drawn up before the arborist comes to visit. Use small wood stakes or flags placed in the soil under the tree to indicate the center of each pier you intend to install to support your deck columns. Use spray paint or chalk to outline the diameter of the pier, usually two feet. Your arborist will quickly be able to determine there are any conflicts.
Long Term Impact on Tree
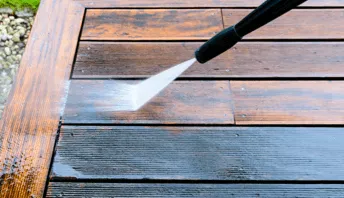
In most cases, a deck built around a tree doesn’t cause any significant long-term impact. Rainwater will still be able to drip through the gaps between the decking falling to the soil below. That said, you should be careful of any cleaning solutions you might use in the future to restore your deck. Never use chlorine bleach to clean a deck built around a tree. Look at the labels of cleaning products. If something contains sodium hypochlorite, the chemical name for chlorine bleach, avoid it. Chlorine bleach will poison a tree over time and slowly kill it.
It’s best to use certified organic oxygen bleach to clean the decking and handrails. Oxygen bleach will not harm the decking, nor will it harm the tree. In fact, it adds beneficial oxygen to the soil surrounding the tree roots.
How to Build a Deck Around a Tree
Your backyard deck around the tree is not much different than a normal deck. The process of building the deck is the same except for the unusual framing you need to do to build a support frame around the tree. Remember, never attach any deck framing to the tree. Your new deck must remain independent of the tree at all times.
Materials and Tools Needed
You’ll need all the ordinary materials for building this deck. The list really is the same for a normal deck:
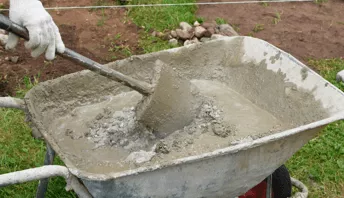
- Concrete
- Anchor bolts
- Post bases
- Through bolts
- Support columns
- Beam material
- Joist hangers
- Structural screws for hangers
- Joist material
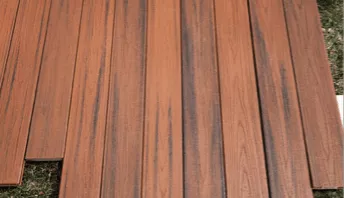
- Decking material
- Stair and Handrail material
- Special Deck Post hardware and through bolts
- Flashing for the ledger board
Here’s a fairly inclusive list of many of the tools you’ll need:
- Shovels, picks, spud bars, and post-hole diggers
- Wheelbarrow
- Garden hose
- Builder’s level, transit, or a laser level
- Ladders and/or pipe scaffolding
- Assorted levels
- Hammers, ratchets, sockets, open-end wrenches
- Gloves and safety glasses
- Knee Pads
- Circular, reciprocating, and miter saws
- Hand saws
- Belt sander
- Cordless drills, drivers, and assorted bits
- String
- Chalk line
- Framing square
- Carpenter pencils
- Sawhorses or portable workbenches
- Job-site table saw
Step 1: Assess your trees
Use the notes from your meeting with the arborist to ensure you will do nothing to harm the tree. Ideally, you used a voice-recording app on your phone that captured all of the detailed advice you paid for during the consult.
Don’t hesitate to mark on the ground any danger zones or places the arborist said not to dig. If the arborist instructed you to trim certain branches, do the ones that can be easily reached from the ground. Once the deck is built, you can almost always set up a step ladder on the deck that may allow you to trim taller branches. Don’t take chances by overreaching for branches that might fall and knock you off a ladder.
Step 2: Plan your deck
Your deck plan should have been created before your meeting with the arborist. It’s possible his advice might have called for a revision or two. The most important aspect of the plan is how you create an easy-to-adjust, ever-expanding box or octagon around the trunk of the tree. Your plan should call out that any and all joist hangers should be attached with structural screws that are easy to remove years from now as the opening around the tree needs to be enlarged.
It’s a good idea to plan 20 years down the road. Long joists 3 or 4 feet away from the tree might be doubled up as these distant joists may start to be the load-carrying beams for the box that surrounds the growing tree. It’s far easier to add these extra joists now than years later.
Step 3: Outline & Prepare Deck Site
Your layout of the deck foundation piers is no different than a normal deck job where no tree is involved. Avoid compacting the soil under the tree. There’s no doubt the arborist mentioned this during his or her visit.
Step 4: Dig Post Holes
Digging the holes for the deck piers may be challenging because of tree roots. You’ll discover a reciprocating saw with a demolition blade is well-suited to cut tree roots. The blade should not be harmed whatsoever contacting the soil around the roots.
Consider using a rotor-hammer drill tool outfitted with a larger flat miniature shovel spade to dig dense clay soil. These tools are like miniature jackhammers and the flat spade bit can bite into the clay removing chunks in no time.
Step 5: Measure, Cut and Place Posts
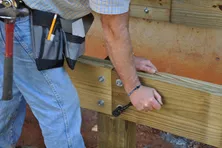
Using a builder’s level, transit, or laser level, you can determine the height of any support posts. It’s best to use 6x6 posts and put an L-notch at the top so the support beam for the deck rests in the notch. Never attach beams to the side of a post where all the weight of the deck above is concentrated on two small semi-circles of the bolt that passes into the support column.
Always use approved metal post bases to attach the support columns to the concrete deck piers. The post bases should be up above the soil line by a minimum of 4 inches. Be sure they’re rated for extreme exposure to the modern treated lumber that has a high copper content.
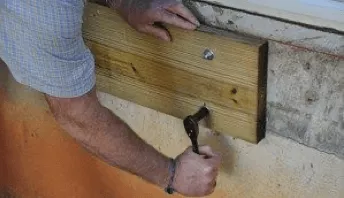
Step 6: Install the Ledger Board
A ledger board is the beam that is attaches to the side of a house and to which the deck joists are attached.
It’s imperative the ledger board be attached to the house using through bolts, not lag bolts. Furthermore, the ledger board should be flashed properly to protect it from moisture penetration that can lead to deterioration. The tops of the deck joists should have small 1.5-inch triangular fire cuts in them so the flashing can lap over and down onto the front face of the ledger board. Be sure the flashing has a kick out so all water drips off the flashing to the ground below.
A secondary flashing must be installed on the house wall before the ledger is attached. This flashing laps over the house siding or brick to prevent any water from getting to the house framing and sheathing.
Special metal connectors should also be installed and connected using through-bolts to tie the deck joists to the house joists so the deck can never pull away from the house.
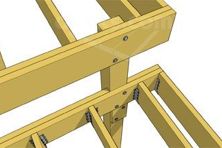
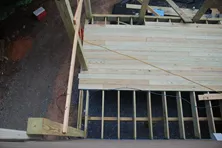
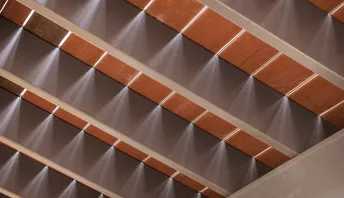
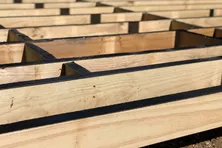
Step 7: Frame the Deck & Install Joists
It’s best to install the outer frame of the deck first, square it up, and install temporary diagonal braces so the frame stays square while the joists are installed. Trying to square up the undercarriage, which can weigh close to 1000 pounds or more, after all the joists are installed can be very problematic.
Step 8: Frame Around the Tree
A box needs to be built around the tree allowing for a minimum of five years of growth. You’ll probably have to add 2x6 diagonal joists to create an octagon out of the square box. The decking material can overhang the framing by an inch or two as most people would never stand right up against the tree. Their feet would be back about 9 or 12 inches from the tree trunk.
This decking can then be trimmed each year as the tree grows. Allow for a minimum of a 1-inch gap between the tree bark and the decking at all times.
The joist hangers for the box should be installed with structural screws that allow for the easy removal and enlargement of the box as the tree grows. As stated earlier, be sure to double up primary floor joists away from the tree that will in the future accept the beams that will form a larger future box.
Plan ahead so that all screws used to build the box can be accessed in the future as the tree grows.
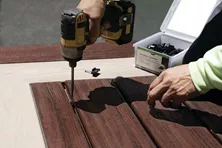
Step 9: Mark for Tree Cuts and Lay Deck Boards
Installing the decking is straightforward. Read the decking material installation instructions. If you know how to scribe an irregular shape onto the decking that matches the outer diameter of the tree trunk at that location, do it for a professional look.
Use a jigsaw to make the cut following the scribed line on the decking. Once again, maintain a minimum of 1 inch of space between the decking and the tree trunk. You may have to have more spacing if you anticipate the tree swaying in violent windstorms.
If you prefer to work with a professional to build your tree-encompassing deck, use the Decks.com “Find a Builder” tool to find a decking contractor in your area.
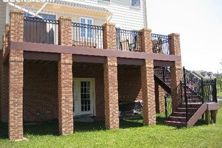
How to Decorate Deck Support Columns
Browse some examples of decorative deck support posts for tall decks.
How to Use Shared Load Deck Support Posts
Learn how to support an upper and lower deck using one support post and a larger footing by bolting the lower deck into the side of the post.
How to Splice a Deck Beam Over a Support Post
Follow our step by step tutorial for splicing a deck beam over a support post. Never split a beam in the center of a span.
Decking Patterns
Installing your decking at a 45-degree angle is a popular style for decks. This can be done to reduce decking seams or just for appearance.
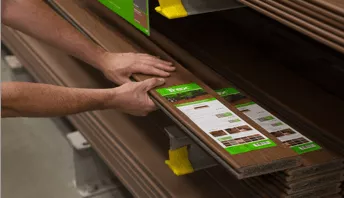
How to Install Composite Decking
Learn about how to install composite decking. Topics include expansion and contraction issues and hidden fastener systems.
More Helpful Resources


Explore Articles by Topic
Footings
Information related to installing frost footings for decks
Framing
Learn structural framing methods
Decking
Learn about wood and composite decking materials
Stairs
An in-depth look at the complex issue of how to build stairs
Railings
How to install guardrails and handrails to meet IRC code
Features
An overview on water drainage, benches, planters and lights
Design
The basics of deck design
Planning
Learn about permits and working with contractors
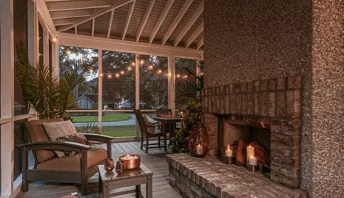
Porches & Patios
Build a covered deck to enjoy all seasons
Ledger
Proper attachment techniques
Care
Maintain your deck to maintain your investment
Materials
An overview on water drainage, benches, planters and lights
Why is Joist Protection so Important for Your Deck?
If you’ve ever seen a piece of wood left out in the weather for any period of time, you know what happens: decay. Whether through wet rot, insect damage, or mildew, the fibers begin to break down.

Roof Top Deck Construction
Rooftop decks transform otherwise wasted space into beautiful planes for entertaining, dining, relaxing and even gardening. The views will make your deck the talk of the neighborhood and draw frequent guests to your home or business.
How to Use a Triple Deck Beam to 6x6 Post Connection
Learn how to use a post beam connector to attach a 3-2x10 beam to a support post for a deck when there isn't enough material on the post to create a notched connection.
How to Demolish & Remove a Deck
At some point, it might become necessary to remove an old deck, due to age or condition. Learn more about what's involved in a deck demolition and removal project.
Decking Patterns
Installing your decking at a 45-degree angle is a popular style for decks. This can be done to reduce decking seams or just for appearance.

Tile decking
Installing tile over a standard deck frame in an exterior environment is a recipe for trouble.
Explore Articles by Topic
Footings
Information related to installing frost footings for decks
Framing
Learn structural framing methods
Decking
Learn about wood and composite decking materials
Stairs
An in-depth look at the complex issue of how to build stairs
Railings
How to install guardrails and handrails to meet IRC code
Features
An overview on water drainage, benches, planters and lights
Design
The basics of deck design
Planning
Learn about permits and working with contractors
Porches & Patios
Build a covered deck to enjoy all seasons
Ledger
Proper attachment techniques
Care
Maintain your deck to maintain your investment
Materials
An overview on water drainage, benches, planters and lights